Index
Home ↵

Welcome to Dr. Neil's Notes
In here you will find notes made by Dr. Neil Roodyn, they include a variety of topics and this index file should help you to navigate the notes.
As you are reading this introductory note, you should realize that these are not private notes, although they are not all fully formed yet. In this collection you will find some more well thought through notes, that are closer to articles or documents, along with some half formed ideas and thoughts.
If you feel you have ideas to contribute, please get in touch with me. I will try to read all incoming thoughts and contributions.
Welcome to my notes.
Index
- General
- Software
- Social Networks
- Seamless Software
- Software Development
- Coding Notes
- .NET development on a Raspberry Pi
- .NET Console Animations
- .NET Console Clock
- .NET Console Weather
- .NET Camera on a Raspberry Pi
- .NET Web Server on Raspberry Pi
- .NET Camera Server on Raspberry Pi
- .NET GUI application on Raspberry Pi with Avalonia
- .NET Picture Frame on Raspberry Pi with Avalonia
- .NET camera feed viewer on Raspberry Pi with Avalonia
- Python Glowbit server
- Azure Key Vault in .NET applications
- Using GitHub Packages with NuGet
Dr. Neil's Notes
General > People
Professionals
Introduction
Being a professional means different things to different people, however I think there are a certain set of behaviours I would expect to see from anyone that considers themselves to be professional. I have made a list below and described how I perceive the actions as professional.
Polite
There is never an excuse for being rude to people, especially when you are carrying out your chosen vocation. To be polite costs nothing, and earns respect from those around you. Customers can often be rude, colleagues at work may be frustrating, managers might infuriate you, keep your cool. A professional will always maintain a sense of composure, and respond to a situation in a polite, and considerate way, even if they are not receiving the same treatment in return. I will admit I am not always great at following this advice, I often get to a point where I push back rather than take it. It is a hard to remember that every action you take in your life can impact on your reputation, and your reputation stays with you for a long time.
Helpful
Another low cost behaviour, and one that can help you build your reputation is to always try and help the people around you. Customers, colleagues, and managers all need help at times. If you are the person they turn to, then your reputation for being helpful is good. You might not be the person to solve the problem presented, however if you can do everything you can to lead the person towards a solution then you are showing a sense of professionalism.
Considerate
Having empathy for those around you at all times shows that you are able to understand the fact that people feel differently about different topics. Something you might consider a funny joke might be offensive to other people, if you are not sure, then do not tell it in that group, and certainly don't send it as a team wide email. Being considerate is about not forcing offense upon people. While you can never prevent people from seeking to be offended by something you have said or done, you can prevent yourself from imposing that statement (or action) on people without their consent. A professional, does not have to be walking on eggshells, however they do need to ensure that their actions are not placing the people around them in unnecessary discomfort.
Record actions
A person who cares about what they do, will almost always record the actions they take to reach end results. If you are in a situation that requires interaction with other people, then recording that interaction, either digitally, or taking notes, and then following up with the people involved with a summary, and the record of the interaction is valuable. This allows people to clarify a point, or change their mind (which is always allowed). When you are working alone, then capturing the steps you take to reach a goal will help you improve, and validate you did not miss anything in the process. Records provide a history that can be returned to, long after the event has been forgotten. This is a good practice to enable processes to be repeated, and prevent mistakes from being repeated.
Communicate clearly
Clear verbal and written communication is critical for teams that are working together to become aligned with goals, and deliverables. Communication is a skill that can be learned and improved. Whatever work you are doing, being able to clearly communicate aspects of that work will help everyone understand the work. When communicating consider the following concepts; i) why are you doing this work? ii) how are you doing this work ? iii) what is the end result ? If the people you are working with (and for) can easily understand these three ideas when you explain them, then you are doing a great job of communicating clearly.
Be Thankful
Be thankful to the people you work with for actions that are taking you towards your shared goal. Explicitly thank people for the time they are committing to activities that help benefit the work you are doing. When you have a meeting (or Teams call) with someone, thank them for the time they have committed to being in that meeting. When someone shares thoughts, ideas, and questions, explicitly thank them for the input. It is not hard to say 'Thank you for that ...' to make it clear that value has been added through the contribution. When the team you work with reaches a milestone, thank each person you work with for their contribution. This ties back into being polite, and also provides positive feedback on the addition each person is making.
Dr. Neil's Notes
General > Projects
Show and Tell and Ask
Introduction
Show and Tell and Ask is the name of a meeting I organise with the project teams I work with. This note will explain why these meetings are worth doing, what happens in the meetings, and how to get the most from Show and Tell and Ask meetings.
Alignment
A project that has well defined goals is more likely to succeed. At the very least you will know you have succeeded once the goal is reached, even in part. A team that is aligned on the goals of a project is more likely to reach those goals, than a team that has many different alignments. In all the projects I have ever been part of I try to get the entire team involved in the design, the testing, and of course the creation of the product. Getting everyone on the same page is often a hard thing to achieve. Everyone has a unique set of skills and experiences they bring to a project, and this will tend to lead to people specializing in aspects of the project. Maybe someone is really passionate about databases, and they are likely to gravitate to spend most of their time working on the database. Another team member might be great at user interface design, and spend most of their time designing beautiful user interfaces. This behaviour is normal and in many ways it is great if the project you are working on allows people to excel in their areas of passion.
However this siloed work tends to leave the rest of the team blind to what is happening in other parts of the project. This leads to a situation where the project is missing out on the opportunity for everyone to contribute their thoughts, ideas, and creativity to the whole project.
The Show and Tell and Ask meetings provide a forum to realign a team on the work being done by other members of the team. These meetings allow each member to contribute their ideas and ask for clarification on areas of the project.
Sharing
During the meeting one member of the team will start by demonstrating, and presenting, the work they have been doing in the last few weeks, or months (depending on the scale of the project). This provides a chance for the other team members to get insight into the work being done by the presenter. This provides a way to understand the contributions being made by the person presenting in this meeting. The presentation should not be a PowerPoint Extravaganza, instead it is preferable to focus on the actual work done, either by demonstrating a functional component, or showing some other output of the work done. This provides a great chance for people to show pride in the work they are delivering. Sometime it is useful to have an image or animation to explain what is being presented, and in those scenarios a tool like PowerPoint makes sense, however often a whiteboard picture does the job, and provides a more interactive tool to tell a story and further explain parts of the work being done.
Something to note here is that not all teams are in a position to hold Show and Tell and Ask meetings throughout the project lifecycle. For example, there is no point in holding these meetings in very early stages of a project, when there is very little to show. Another example, is when a project is to maintain an existing product, the progress to show is usually fairly limited. Projects go through different cycles of productivity, planning, creativity, production (development or engineering), delivery, and support. This sort of meeting is most valuable during the creative and production stages of a project.
The Activity
With intention, the meeting is not recorded. As most meetings are now happening online (eg on Microsoft Teams) it is very tempting to record meetings to review later, and so people can catch up if they missed the meeting. Being purposeful about not recording a meeting provides two positive outcomes; people are less afraid to ask a question they think might sound dumb, and people are more likely to participate if they cannot 'catch-up' later. The people I am talking about that want to 'catch-up' later tend to be the managers rather than the people doing the actual work. During the meeting someone (often I do this) should capture the points being raised and discussed. A free form note taking tool, like OneNote is ideal for this.
When holding a Show and Tell and Ask meeting it is good to keep the meeting focussed to a set time. I have found an hour to be a good length of time to achieve these meetings. The person presenting takes 15 to 20 minutes to Show and Tell the work they have been doing. Then the rest of the hour should be used to Ask questions, and solicit feedback on ideas and issues. This Ask part of the meeting is the most valuable part, make sure you do not fall into the trap of letting the presenter take most of the hour to Show and Tell. The presentation is the trigger to the conversation. The questions asked might start to stray from the topic presented, this is often fine. For example, when a team member sees the details of the work presented it might make them question the work they are doing, and how it fits in to the bigger picture. Perfect. This is exactly the sort of thing I am looking for in these meetings. The cross fertilization of ideas, the spreading of knowledge, and the discussion that flows is where you can start to find the gold in your project.
Most teams I have worked with do these meetings at the end of the week, on Friday afternoon. This provides a nice way to wrap up the week, and gives the person presenting the week to get things ready. However if you find the person presenting is spending a major part of the week getting things ready for the Friday presentation then you have an issue. This meeting is to show the work you are and have been doing, not build specific output for the presentation (see the one caveat to this in the outcomes below).
Once the meeting is over the person who was capturing notes should write up the points made in the meeting, along with any questions that remain unanswered. These meeting notes should be emailed to all the people that were invited to the meeting. While the meeting was not recorded as video and audio, this email acts as an important place to share the conversation and remind everyone of the topics raised. I normally send the email, summarizing the meeting, on the following Monday morning. This allows the team relax over the weekend, and reminds everyone of the meeting on Monday along with any actions or discussions raised.
Outcomes
There are a number of positive outcomes to gain from holding Show and Tell and Ask meetings:
-
Everyone in the team gets an improved understanding of what the other team members are doing, and how other parts of the project are progressing. This leads to greater team alignment.
-
Each team member is given an opportunity to ask questions, and make suggestions about each area of the product presented. This enables the combined skill set of the team contribute to the end result.
-
The product being created by the team gets hardened to demonstrations. It is a well known fact that things are most likely to break when you are demonstrating them, the more you demonstrate parts of the product, the more issues you find in front of (what I hope is) a friendly audience.
-
The team members each get better at presenting the product, and sharing their passions for the work they are delivering. Getting good at presenting is a skill that takes practice, this meeting provides practice. Having everyone in the team able to present various aspects of the project enables the project to be demonstrated more readily, without having to wait for one person to be available.
-
The product being created by the project becomes more presentable and the team gains experience showing aspects of the product to managers before it gets shown to customers.
-
Some team members will use the meeting as a forcing function to spike (prototype) ideas in order to demo some work a bit further along the road map than they currently are with production ready output. This has only positive side effects, as it provides an exploration with the team of an idea of how something might turn out.
Dr. Neil's Notes
Software
The Social Networks
Introduction
In the last couple of years I have pulled away from using social networks. I no longer watch, or contribute to my Facebook account, Twitter has become something I occasionally use in order to contact people who only seem to respond to Twitter messages. Instagram, Snapchat, and many others have never held interest to me. I want to use this article to explain why I have stopped engaging with these platforms.
Media Driver
For me, it was important to consider the motivation behind running a media platform. Journals, newspapers, almanacs, magazines have always existed to create money for the publisher, and provide a platform to present the viewpoint of the author(s). Sometimes the author and publisher is the same person, or entity, however not always. These periodicals would historically edit the content, to match with regulations, and maintain a view point aligned with the publisher. Some publishers would refuse to print certain materials for being too 'racy', or promoting views that they considered dangerous.
People believe what they read. I am sure we have all heard the phrase "it must be true, it was written in ....". A large amount of trust is placed (almost certainly misplaced) in the publisher validating that what they produce is true, or clearly marked as fiction.
The challenge is that the truth is often boring, and boring does not sell well. People want to read something simple and exciting. The more exciting, and less complicated a story is, the more people will read it. The majority (a big generalization here) of people do not want to spend an hour reading an article in order to understand the nuances, and details, of a situation.
There is also an effect I will call the Stern Effect where being outrageous increases the audience size, because not only is it titillating content, it is also often so ludicrous that it is funny. People tuned in to Howard Stern not because he was providing valuable information, it was because he could stir people up into saying and doing dumb things that made a large percentage of the audience wonder what he would do next, and tune in to find out. This is entertainment. This form of entertainment draws in a large audience, and therefore makes a lot of money for the entertainer, and the publishing platform.
Serious objective informational media is in decline. A platform that enables, and encourages, people with different view points to publish in the same issue, is becoming rare. While more interesting, and more thoughtful, it requires listening to both sides, and having a level of empathy for both sides. This requires effort, and most people want to be entertained. Caligula knew that the gladiatorial ring is more exciting than the discussions in the senate. To get the people on his side it is far simpler, and more efficacious, to slaughter some Christians, and pay for some horse races, than have a intellectual debate on the pros and cons of some activity relating to taxes and the cleanliness of part of the city. Some things have not changed much, many countries are being run by clowns, in the truest sense of the word. They are entertainers, providing a change from the boring, stuffy conversations. The clown simplifies the challenge to something that most people can understand, even when untrue. The clown is not there to provide truth, the clown wants to misdirect your attention, and then surprise you with something silly and funny.
Back to the topic of social media platforms. These are owned by stake holders that want to increase revenue, if more people want to see cat videos, then that is what the platform shall promote and provide. If the antics of clowns misdirecting your attention, and making you laugh, helps sell advertising then that is what will get promoted further. These platforms have no vested interest in presenting you with a complete world view, where you have to stop and listen and think about multiple sides to a situation. Facebook, Twitter, and countless other platforms, want you to click, scroll, click, click, scroll, exposing you to more advertising, the only (or major) source of revenue they have.
The customer for an advertising company is the advertiser, the company promoting their product. The size of the audience, along with the ability to target specific type of people within that audience, is the product they are selling, to their customer. If you use FaceBook, Twitter, YouTube, or countless other platforms, then you are part of the product those companies are selling.
While in legal terms, you agreed to this, it is somewhat analogous to agreeing to be on the crew of ship after being press ganged at knife point. The choice was not exactly made clear, and you are not given an option to use the platform under different constraints. If you have the patience, please read the terms and conditions, which you agreed to when you created an account, on any one of these platforms. You will discover that you have agreed to a slew of constraints enabling the platform to determine what is presented to you and when.
The objective of each of these platforms is get as many people spending as long as possible watching their screen, repeating the click, scroll, click, click, scroll, scroll behaviour. All the while consuming the advertising that is being pushed alongside the sweet candy of titillation and clown shows. The addiction of the variable mini-dopamine hits experienced, is by design in each platform. They have hooked, and enslaved millions of people to the countless channels of entertainment, disguised as information. This might sound like a strong statement, however consider how much time you have spent on these platforms in the last week. Did you schedule that time in your calendar to consume advertising ?
This is not new, it is simply scaled up. In the 1990's I made a conscious decision to not own a television, I did not want to be the consumer of advertising and biased view points. I also felt my time watching TV was not well spent. I would go to the cinema to watch movies on a regular basis, often once a week, however TV seemed pointless. I wold prefer to spend the time I had available, reading, writing, cycling, in the gym, or sleeping. Twenty years later and the rise of social networking platforms was an interesting phenomenon, I participated out of curiosity, and it become a good way to keep in touch with friends all over this little planet. Prior to the rise of the social network platforms, I tried sending out group emails, blogging, and podcasting. These are broadcast mechanisms, and the feedback is in a different time frame to the social networks. The rise of notifications in software, that flag when something might be interesting to you, along with a wider reaching internet has taken us to a place where people expect responses in seconds, minutes, or at most hours, not days. Combine this with devices that you keep with you at all times, drives a new set of behaviours. The social networks take advantage of all of these vectors.
Your phone and the social networks
The timing of the smartphone becoming more popular, and the rise of the social networks is not coincidence. They are symbiotic in nature. The internet connected phone enables you to post and consume content from almost anywhere, at anytime. The social networks need more people to engage throughout the day in order to keep driving those dopamine hits. If you could only access Facebook, or Twitter when sitting at a wired-in desktop computer, I am almost certain the platform would have failed to reach the level of success, and value, that exists today. Interestingly the success of the smartphone is also tied to the rise of the social network platforms. If your phone did not have an application that let you share, and consume, on your favourite social platforms, what else would you use it for ? Making phone calls perhaps? Listening to music? The smartphone revolution was, in part, fuelled by the adoption of the applications that enabled you to scroll, click, click, scroll, scroll, all day, from anywhere. Now you are part of the product consuming advertising from the bus, while walking, from the sofa while half-watching TV, anywhere, anytime.
The politics of media
All this adds up to a set of hard to manage distractions, taking your time from the traction you are attempting to achieve in your life goals. The strong willed may laugh and say they can manage this. Some people might even schedule 'social networking' time in their calendars. If all that these platforms did was push cat videos (or the equivalent) into your focus, it would not be that bad, would it?
However there is another (darker?) side to this ability to target an audience with specific messages, the political side. This creates tribes of people, that are willing to believe the same message, and will never (or rarely) hear another message. This provides certain customers of the social network platform to target vulnerable groups with messages that will stick and get reinforced by the platform. The platforms remove the ability to have open, moderated debate. Open and moderated debate is the cornerstone of group decisions and tribal understanding. Some might say it is the cornerstone of democracy, however I am not sure that is true. When the customer of the platform is a political movement, promoting their messages, to the audience they wish to reach, echo-chambers are created, where the message bounces around between people who buy into that point of view. The fact that the most acceptable messages are short, and easy to understand, leads to a simplification of the true matter at hand. It is far easier to blame a group of people for a certain situation, than understand that the whole system in which everyone exists is to blame for the current situation in which we find ourselves. The world is far more interconnected than ever before, in part due to the underlying technologies enabling the platforms being discussed here. We are a global species, everything we do has impact on people all over the world. It is not possible to pull up the drawbridge and operate in the modern world cut off from the rest of the world. Yet the social network platforms enable this isolationist lie to proliferate, Trumpism, and Brexit, only succeed by reducing the whole picture to simplified 200 character messaging and videos that are 5 mins long at most. The whole picture is not provided, the voter is not being given all the information they need to make a complex decision that will change the fortune of their country on the globe.
It is ironic that the goal of many of the social networking platforms is to connect everyone together, has become a tool to drive the division of more people than we have seen since the cold war.
Buying In and Dropping Out
I bought into the Facebook view of the world at the beginning, I remember meeting some of the initial folks at The Facebook as they moved into their first office in downtown Palo Alto. There was a high level of excitement, they were connecting the world together. These seemed like good people, with a positive mission, to make the world a better place. The application of technology, to help people connect, fantastic I thought. I set up my own account as soon as it broke out of the education account only model. I convinced other friends to create accounts, it grew very fast. The obvious term is the network effect, the more people connected, the more valuable it becomes.
Jump forward ten years and the young folks with the vision of connecting everyone together (who are still around) are driven to increase revenue and build a business of value. The stake holders (share holders) demand profits. When the majority of profits are generated from advertising, the pressure to drive the addictive behaviour of the users (yes just like drug users) is increased. The Stern Effect helps provide this, outrage, and divisive messaging grabs the attention of the user to benefit the customer (advertiser).
Once I started to see this platform being used to drive more division, than I felt was acceptable, in a world that needs a global species attitude to survive, I dropped out.
Will I return? At this point I cannot answer that. Technology is fast evolving and new ideas get introduced all the time. I would like to see the platforms adopt a true global species view, and prevent single viewpoint conversations from proliferating without including multiple points of view, and provide a forum for honest fact based debate. Then I might consider returning to the conversation.
Ended: Home
Software ↵
Software Notes
This section of Neil's notes contains notes on the topic of Software.
Notes
- The Social Networks
- Coding Notes
- .NET development on a Raspberry Pi
- .NET Console Animations
- .NET Console Clock
- .NET Console Weather
- .NET Camera on a Raspberry Pi
- .NET Web Server on Raspberry Pi
- .NET Camera Server on Raspberry Pi
- .NET GUI application on Raspberry Pi with Avalonia
- .NET Picture Frame on Raspberry Pi with Avalonia
- .NET camera feed viewer on Raspberry Pi with Avalonia
- Python Glowbit server
- Azure Key Vault in .NET applications
- Using GitHub Packages with NuGet
Development ↵
Development Notes
This section of Neil's notes contains notes on the topic of Software Development.
Notes
Dr. Neil's Notes
Software > Development
Access Granted
Introduction
Imagine living in a world in which you are locked out of accessing information, knowledge and experiences that the majority of people in the world take for granted. You cannot access most of the news, social media feeds, sports games, or computer games. You might think I am asking you to imagine being a prisoner, locked out of the normal world. No. The position in which you find yourself, is one that is shared by many people because products (in this case digital products) are not designed for you. The majority of people are different, maybe they can see better than you, or they can hear notifications that you cannot, or colours that look identical to you, appear to be different to them.
We Are Responsible
This is the place we put many customers because we do not build our software products and experiences to be accessible to anyone other than the 'average' or 'normal' person. Products are excluding people from accessing the riches offered by the digital world because the developers have not put a priority on making sure those experiences are accessible to everyone. Yes, I fully understand this is often considered a business decision. However I would counter with the fact that you could consider quality and security as business decisions. If you are a craftsman, building the best product you can build would you allow the business to dictate that the quality does not matter ? I am sure there businesses operating that consider security a lower priority, until they get hacked and the entire business is held to ransom.
Consideration
Someone involved in the creation of any product should be considering how to make that product the greatest possible version of that product. In the software development world building quality, and security into the product are given, however ensuring the product is accessible to as wide an audience as possible, is often overlooked. You might hear comments such as, well most of our users are normal and we do not get any value out of supporting people who have bad vision, poor motor skills, etc... This is simply lazy. Most modern operating systems and web browsers have features designed to help make sure applications, and web sites, are more accessible. As a software developer the first thing we should be doing is ensuring we do not break any of these accessability features. The guidelines are provided by Apple, Microsoft, Google.
Proposition
In the last couple of decades every developer has been encouraged to think about building high quality products from the start, using techniques such as Test Driven Development. As all systems are now connected (in some way) to all other systems, security and protecting your product from misuse has become something developers have had to learn how to achieve.
I propose that now is the time to put accessibility alongside the quality and security of all products. It should be a given that digital products are as inclusive as possible and do not exclude a large portion of the audience from getting advantage from your creation.
Homework
Have a look at the following websites to understand how the major software companies are supporting accessibility in the environment you are building your product.
Apple: Accessibility for Developers
Google: Accessibility For Developers
Dr. Neil's Notes
Software > Development
Don't Gamify My Craft
Introduction
There is a behaviour happening in the business world, and that includes the software industry, that I am not convinced drives a good outcome for customers.
The software product experience
Software is a product that, when created well, delivers a beautiful experience for the people that work with it. I am sure you can think of a digital experience you have had that felt magical the first time, and still leaves a feeling of satisfaction when you use that product again. At the same time I imagine you have had many more average experiences with products, that leave you wondering what the people who built that software were thinking.
One thing I can say with certainty, great experiences in a software product do not happen by chance. Great software is designed that way. The people building that software have an experience they want to deliver, and they work hard to ensure the customer gets the desired experience. There is a sense of craftsmanship that the developers and designers put into the product with the aim of delivery of a product they can be proud of. Telling people 'I worked on that' when someone enjoys the product is highly satisfying.
I have a theory that I want to share here, the gamification of a craft acts in opposition to pride in the work you do. The type of person that wants their work to be gamified, is the type of person that is less likely to have pride in their work. How can I say that ?
Someone that has pride in the deliverable they are creating, is not doing it for points, they are doing it for their own satisfaction, and the experience of their customers. The output from a person is directly represented by the motivations that drive the deliverable. The output from a team, directly reflects the motivations of the team.
A product delivered by a person, or team, motivated to get points in a game system, will reflect that motivation in the experience delivered.
It is entirely possible for a product to deliver a great experience, while the people building it also can get points in the game they are playing. However, there will always be circumstances where a decision is going to be made to either focus on getting points, or delivery of an experience.
Collecting Treasure or Cleaning the Kitchen
One of the challenges with gamifying a system is that you have to account for all the things people do not want to do. In order to encourage people to do something they might not otherwise do, a points system is created that will reward a person for doing that task. If the system does not cater for a scenario, then in the game world, there is no benefit to performing a task in that scenario. On the other hand, when a person is motivated by doing something that leads to a good outcome for the product they are more likely to tackle the tasks that are uncomfortable, or less desirable. Let's look at a simple example situation. For the sake of this thought experiment consider this approach is taken from the start of a new project, so there is not debt to pay (in the real world there is always outstanding debt in terms of software already delivered needing to be supported).
Each developer gets measured by how many features they complete (+10 points each), and how many defects get attributed to code they create (-1 point for each defect).
There is a strong incentive to finish features, and make sure they have a low number of defects found. This sounds like a great setup initially, and I can imagine managers signing off on this system to measure the developers. Some managers would get excited enough to set up a leader-board and start driving competitive behaviour to be delivering the most features and the least defects. What could go wrong ?
What is the incentive to make the code more maintainable over time ? As a developer you would have no motivation to do a large refactoring of the code in order to reduce the complexity. In fact, as long as you are one of the few developers that understand the complex code, you are going to want to make the code more complicated over time. More complicated code will slow down the other developers from getting feature points, and if you feel confident you can work with it, then you can get more points by delivery of more features and less defects.
What happens all too often is that people who should be on the same team start competing with each other. This is not good, as sabotage is often a great strategy to ensure a competitor fails. If you want to stay near the top of a leader-board then it is smart to make it harder for the people lower on the board to succeed. If you are near the bottom of the board then a great strategy might be to spend time each day looking for defects in the code of those that have the highest scores. Even better would be to build something that causes a defect to start appearing in their code and not yours.
Something to consider at this point is what is the objective of each developer in the team? They have stopped caring about the product and instead now care about the points they are getting. The product produced will reflect this.
Building Great Products is a Team Activity
If your objective is to deliver a great product, then you need a great team. Great teams, deliver great products. Attributes of a great team include an alignment of goals within the team that match the goal of the product. If team members are competing with each other, then they cannot work well with each other to deliver the best product, as a combined force. The output of a group should be greater than the output possible from any single individual, in that group. Solutions generated by a group should bring the combined intelligence of the group to solve problems. A great team consists of individuals that work together to build great products.
Dr. Neil's Notes
Software > Development
Scaling Development Teams
Introduction
Along with underestimating the size of projects (or maybe because of), one challenge I repeatedly see in software development teams, is underestimating the number of people needed to accomplish the desired goals. In this note the goals implicitly include a time frame, not only the deliverable outcomes.
Note: this is discussion on when, and how, to scale a development team, and does not cover the act of recruiting of people into your team.
It takes an army
Have you watched all the credits for a movie and wondered why so many people were involved ? If so, then you are getting a glimpse into the reality of creating a great product. Software (and sometimes hardware) projects can provide the illusion that a handful of smart people can deliver a billion dollar product.
Why then do companies like Microsoft, Google, Meta, and Amazon (all successful billion dollar software companies) employ thousands of developers ? If you are thinking it is because they are not as smart as your team, the chances are high you are wrong.
While it is possible to deliver a great, and successful, product with a tiny (less than 20 people) team, it is the exception, and also very very rare.
Most software projects worth doing (the product makes a noticeable dent) will require growing a larger team. However be cautious about growing too quickly.
Create a Map
Before you recruit an army to help conquer the development mountain, make sure you have a clear map to guide the new recruits in the correct direction, and to the top of, the right, mountain.
Creating a map requires a small, tight knit, team, and often takes many months. The small initial team should be doing the experimental work that validates the route, plotted in the map, can be followed, and the development project completed. This map might change several times in this process, it is highly likely that the direction, and goals, change during this first map making phase.
This, map making, is the foundational work. At some point during the map making it will become clear that the direction is now set. This is the time to scale up the development team.
Measure Output
In order to scale successfully, be careful not to measure the output of individuals, instead measure the output of the entire team. Measure the total team output and velocity.
Measuring the output of individuals will restrict growth of the team. Mentoring people, and supporting new starters, will reduce the output of individuals. The team should be focused on increasing the total output of the team over time. If the team uses Sprints, or some form of short time frame milestones (and you should), then each week, fortnight, or month, track the output from the team in terms of progress along the map, and delivered value.
Once a team is aligned to increasing the overall team output, then the dilemma of supporting new recruits dissolves away.
Capture Knowledge As Content
As new people join a team, they will ask questions, in order to understand what is being created, and how the work is being done. Capture these questions, and the answers, in a document, or wiki, that will help the next new people get going faster. As this content grows, it will become a self-serve new starters guide. This new starters guide will enable faster onboarding of new people.
Identify Mentors
As new people join the team, some of those people will be natural mentors for future new starters.
Imagine you have a small core team of ten people, five of whom are capable of mentoring new recruits. In order for the team to double in size, each of those five mentors will need to support two new starters. This will certainly slow down the output of the five mentors, and initially the entire team output. However after a couple of months the total team output, with twenty people, should be noticeably higher than with ten people.
Out of the ten new starters identify the five people most capable of mentoring the next wave of new starters. Now the team has ten mentors and could potentially recruit twenty new starters. Six months into this scaling process you could have forty people in the team, and be capable of doubling again.
Output does not scale with the team
This probably should not need to be said, however here it is; the output of a growing team will not double when you double the size of the team. An increased team size should be able to achieve more than a smaller team. The output does not scale linearly with the team size. As a team grows there is more overhead, in terms of communication costs, and alignment costs. To keep a large team aligned takes work from everyone.
A note on standards
This relates to the Agility from Diversity topic. At a small scale, ten to fifty people, having well defined standards for both the production and process, will help the team go faster. This is not the time to argue about 'tabs vs. spaces' or 'where curly braces should go', follow the standard to increase collaboration and velocity. However as a team grows, it will split into sub-teams, each sub-team will have different (albeit aligned) goals. Allowing each sub-team freedom to define their own process and standards will enable them to go faster, and be more agile. If you try to apply a single development process for thousands of developers all with different targets, scaling becomes far harder, and potentially impossible. The important point is to ensure the sub-teams are aligned with the bigger goal, and each sub-team output is measured.
Dr. Neil's Notes
Software > Development
Debt Collection
Introduction
Every successful product carries debt. The moment you start shipping a product to customers, you are creating debt. If the product succeeds it will need to be maintained, and supported, for a period of time, even if you release newer versions, the old versions will not vanish. Code I wrote at the end of the 1980's is likely still running somewhere, on some machine, in a system that is being supported by someone. Sorry, not sorry.
Leaving garbage on the floor
When you are at home, or your work place, and you see some garbage on the floor, a discarded wrapper, or an empty drink can, do you leave it there? Do you pick it up and throw it in the recycling? Do you expect someone else to deal with that?
If you are the person that picks it up and deals with it when you see it, then you will have less work (less debt) when you clean the house (or workplace).
If you expect someone else to deal with it, then you are following the SEP principle. SEP stands for Someone Else's Problem, this is common in the work place, hopefully less common at home. Once you have SEP, you have debt mounting up. As with financial debt, the faster the debt is cleared, the less interest you need to pay on it.
Paying Interest
With product (or technical) debt, the interest comes in several forms. Some of the interest payments will make the debt grow faster. For example to add a new feature to an existing product might require considerable rework of the existing product. To avoid that rework a clever hack is found, and still get the desired outcome. These hacks often create more debt as they compound. The product becomes a collection of duct tape and string holding things together to make things work. The cost to remove the hacks, and get the work done properly, is now higher.
Interest will need to be paid for any product that requires security. Most software products require security, as they need to connect to networks to operate, and that connection needs to be secure. Security is an area that needs constant attention, what was secure 2 years ago is less secure today, and likely not secure at all in five years.
As a product ages the tools used to build it will age, if the product is not updated to work with modern tooling, then the interest payments come in the form of slower builds, and slower run-times, than you would get from more modern tooling. The distance of a product from the latest development tools is another form of interest being charged on the debt.
So what?
Many products (especially software) are held together by this continual patching and hacking, to keep things working. It still works, people even pay for it, so what is the big deal? The value of most software products is based on where they can go next. Software that stagnates will fall out of favour, and eventually will be insecure, or fail to even load on modern operating systems.
If you want people to keep using your product you need to keep updating it. To keep updating it gets more and more expensive when you have less robust architecture underpinning the product. Each time you walk past something broken in the code, you are ignoring the increasing debt.
As a product ages, you still need to maintain it, support it, and enhance it. That work requires people to do the maintenance, support, and enhancements. The longer the product is around, the older the core code base, and the tooling used to build it, the harder it will be to hire people that have the skills to work on the product, or want to work on the product. The interest payment now comes in in increased cost of doing the work to move the product forward.
Clean as you go
The solution is to clean as you go, when you see garbage on the floor, pick it up and deal with it, immediately. This will reduce the technical debt, and the interest payments. The longer you leave the debt, the harder the work to remove the debt. Spending the time to do the rework that enables the product to maintain a robust architecture, will make the next enhancement easier, and cheaper. Keeping the product updated to work with the latest technologies and tools, will take less work than attempting to update after skipping several versions. The distance between each language, and tooling update is always smaller, and therefore less work, than when waiting to upgrade the product after skipping multiple versions.
In a large code base, when you find something that can be updated, or fixed, fix it, and also fix all the other things that have the same issue.
For example, you discover a control being used has a new version available. You want to use that new version for a feature you are working on. First update all the uses of that control in the code, not only the one where you want the new features. If you do not do this, the code will end up with several different versions of the same control being used, this is debt with plenty of interest payments. When you update one thing, update all the 'same' things.
Dr. Neil's Notes
Software > Development
Leading Software Development Teams
Introduction
A topic of discussion that keeps repeating is how to lead a software development team. Often the words used are different, and the semantics is important. The discussion often starts focussed on managers who seem to be struggling to manage the software team that reports to them. When I hear this I understand the problem almost immediately. What most companies want, from a software development team, is the outcome of high quality software, that can scale. It is then curious that, to achieve this desired outcome, the focus is placed on the details of management, process, and control, rather than the outcome desired. In this Note I will describe some of my observations working with software teams for over thirty years.
The Management Myth
In the introduction (above) I intentionally italicized the word manage, as I believe this is the first problem with the semantics of how we describe the act of helping a software development team achieve the desired outcomes. How do you manage creativity and innovation? I propose you cannot manage creativity and innovation, however you can lead people to be creative and innovate.
One challenge I have observed, is that people, who do not love the act of creativity in software development, see their career path as moving into management. These people are looking for a j o b where they can pretend they are in the software development business, and yet not be involved in the creation of software. Another challenge that compounds the previous challenge; people who do enjoy software development that are looking to move their career forward, see that the higher salaries go to managers who do not write code. The obvious conclusion is then to become a manager, and stop writing code.
Occasionally I hear managers proudly state 'I have been a manager for 5 years, I do not write code anymore'. What I hear is 'I do not like building software, so I followed the Peter Principle, and got promoted out of something I am never going to be good at'. The trouble is these same people, who are not passionate about the creation of great software, are now supposedly managing people to achieve something the manager does not care deeply about.
A good software development team leader is never too senior to write code. I have observed this repeatedly in the companies I have worked with, from start-ups to large software companies, the best leaders of software teams (and sometimes big tech companies) keep their hand in the development process. They write code, and review code changes.
I have never observed a great manager of a software team that is not hands on. Please do not fall into the trap of believing creativity and innovation can be managed by people not actively involved in the creativity and innovation.
Generals are not Leaders
The generals sit a long distance from the front line, getting reports of wins and losses, and then making decisions as to who will die next. This is a terrible model for motivating and supporting a team of creative, intelligent people to achieve their goals. Many managers seem to have an aim to be generals.
Supporting a software development team requires a leader that is sitting with the developers, in the trenches, dodging the same bullets they are dealing with each day. The developers you are working with should know you have suffered the shared pain of building the product. A good leader feeling the same pain as the developers, each week, will be actively looking for ways to remove the pain for everyone. The bad leader will look for a way to remove the pain for themselves only, often this is achieved by not being actively involved in the software development process. This person is becoming the general that is loosing touch with reality.
To be a good leader in a software development team, be part of the team, not an outsider. Actively be on the same side as the developer to get things done, get hands on with solving the problems. A good leader is building (compiling) the software multiple times a week, doing code reviews, and actively contributing to the code base.
Motivated and Intelligent
The role of a leader in a software development team is to create an environment that attracts intelligent creative people, supports those people to do their best work, and motivates the team to deliver the required outcomes.
Intelligent and creative people like to work with other intelligent and creative people. Software developers want to know the people, they are working with, are helping the team move forward, towards the goal of delivering the next feature in the product. People that are not actively contributing to the success of the team, are never going to get respect from the software developers working to make the product better.
There is always going to be a certain overhead for each software development team in a large organization, reporting upwards on the progress, PowerPoint programming. However this should never become a full time job for someone leading a software team. If you are an intelligent and motivated contributor to the team, you can be a better leader.
Programmers are People
The intelligent, creative, people building great software are human beings. Any manager who talks about people as resources will lose all respect from the people they claim to be motivating. Software development is a team activity. The team is made up of people, each person has their own personal goals and motivations. A good leader allows people to be their best selves, in the team, and align the personal objectives of the team members with those of the team, and the company.
Treating creative people as movable (or replaceable) resources that can be redirected to work on any other part of the software development, at a moments notice, is to deeply misunderstand how great software is created. If you treat software developers the same way a fast food chain treats staff, it will lead to the equivalent to fast food in the software product. It will not be a great product.
Team = Software.
Software = Team.
The software created will always be a direct reflection of the team, and the people, creating that software product. A dysfunctional team will build dysfunctional software. A functioning team, is made up of people that work well together to deliver a shared vision.
Macromanaging not Micromanaging
The shared vision is important to get the best outcomes. Some hands-on managers lean-in to micromanaging, trying to control the process, and mechanics of how every line of code gets written. This micromanaging does not scale well. A great software leader can perhaps micromanage fifty to one hundred developers. Most leaders will not get far past ten people. The reason micromanagement often happens is because the leader does not believe the people in their team understand how to deliver the correct outcomes. This is a trust issue, that will, most likely, be validated, because no one gets everything right all the time.
A better approach is to move towards macromanaging. Start with the big picture and make sure everyone on the team understands why the work is being done, and the goals of the project. Then work with each person to find out how they are adding value to that team goal. Systems like OKRs (Objectives and Key Results) can help here. The team should have a set of well defined objectives and measurable results. Then each person in the team should define their own personal career objectives and the measurable results. The objectives and results of each person should contribute to the team objectives and results. If they do not, then you have a challenge that needs to be solved, maybe by moving people into a team where they can align their objectives to the team objectives.
Once you have set objectives and measurable results for the team, and the people in the team, get out of the way, and get other things out of the way. The role of the leader is to support the individuals to hit their objectives, with the knowledge that doing so helps reach the team objectives. This is not a once-a-year activity. Tracking the progress for each person and the team should be done monthly, or at most quarterly. Working daily directly with the team to support the objectives allows a leader to keep their finger on the pulse of progress without the need to micromanage.
Macromanaging has the desirable effect of giving each person in the team an understanding of the bigger picture of how their work contributes. Micromanaging often leads to developers not understanding how the work they are doing contributes to the team, or company, goals.
Dr. Neil's Notes
Software > Development
Software Bill of Materials
Introduction
No innovation happens in isolation in the software world. Software builds upon what came before. Software also drags along historical artifacts, for example the floppy disk as a save icon. As the complexity of software grows, and the interconnectedness of software increases, so does the reliance on shared technology. Consider the entire world wide web, relies on a set of protocols for data transfer that are shared by every single software application that access the world wide web.
In order to reduce the need for every single software application to rebuild an implementation of the basic building blocks, many code libraries are shared across thousands (or millions) of software applications. Each software application that has any level of complexity relies on code libraries, platforms, and frameworks written by other people. The full list of dependencies for a software product is known as the Software Bill of Materials (SBOM).
Licensing
Some of the libraries being used by software are commercial, and require a payment (monetary or otherwise) to use the library. Other libraries are free, and have no restrictions.
In order for a software product to be legally compliant, it is important to know that all required licenses are paid. Sometimes the cost will be a monetary fee, other times it might be an inclusion, or recognition of the authors of the component being used in the product. Some open source software components require that any software using the component is also open source.
With a full list of all dependencies, it is possible to know if the software is compliant with all the licenses required to ship that software product.
Updates
Most code libraries are being updated on a regular basis. Software is never finished, merely abandoned. Software updates typically improve functionality, performance, fix bugs, and remove security issues.
A software product should aim to keep the components, upon which it depends, updated to reduce the risk of security flaws, and get the benefits of the latest updates.
A full list of components, used to create the software, is critical to understanding what needs updating, and deciding when to update.
The Document
A software bill of materials (SBOM) is a document that describes all the components that are used to create a software product. As the libraries being used by a software product will often also use other libraries, the software bill of materials document describes all the dependencies down the supply chain.
Also included in the SBOM document is the license information, and the version of the component being used. The industry standard for an SBOM document is spdx, more details can be found here https://spdx.dev/
A number of tools now exist to help manage and maintain the SBOM document. Ideally this would be created as part of the build in the Continuous Integration (CI) step of software production.
Microsoft has an open source project here https://github.com/microsoft/sbom-tool
FOSSA has a set of tools that can found on their website https://fossa.com/
Conclusion
Software is eating the world, is a statement made by Marc Andreessen in 2011. In 2023 this can be extended to the world is eating software, that is eating other software, that is eating the world.
The SBOM is your ingredients list. Would you buy, and eat, food that does not have an ingredients list? Why then do you use software that does not have an ingredients list?
Ended: Development
Coding ↵
Coding Notes
This section of Neil's notes contains notes on the topic of Coding.
Notes
- .NET development on a Raspberry Pi
- .NET Console Animations
- .NET Console Clock
- .NET Console Weather
- .NET Camera on a Raspberry Pi
- .NET Web Server on Raspberry Pi
- .NET Camera Server on Raspberry Pi
- .NET GUI application on Raspberry Pi with Avalonia
- .NET Picture Frame on Raspberry Pi with Avalonia
- .NET camera feed viewer on Raspberry Pi with Avalonia
- Python Glowbit server
- Azure Key Vault in .NET applications
- Using GitHub Packages with NuGet
Dr. Neil's Notes
Software > Coding
.NET Development on a Raspberry Pi
Introduction
With the release of .NET 6, I thought it would be fun to try getting a Raspberry Pi working as a development machine. It was pretty straight forward and I will share the steps here to get going. I have decided to use my existing development machine to access the Raspberry Pi, saving the need for another screen, keyboard, or mouse.
A video that accompanies this Note can be found here
Get a new Raspberry Pi image setup
The quickest way to get started with a Raspberry Pi is to download the Raspberry Pi Imager from the Raspberry Pi software page https://www.raspberrypi.com/software/. Follow the instructions to download the app for Windows, Mac or Ubuntu and create an operating system image on an SD card for your Raspberry Pi.
If you are plugging a mouse, keyboard, and monitor into your Raspberry Pi you can skip forward to the section titled Install .NET on Raspberry Pi.
Headless Setup
You can set up your Raspberry Pi to work without a keyboard, mouse or screen attached to the Raspberry Pi. Instead you can use your laptop or desktop computer to access your Raspberry Pi, this is called 'headless'. The latest Raspberry Pi Imager software makes this easier, and more secure with the Advanced options. Before starting to write the boot image to the MicroSD card, select the Advanced options, allow SSH, and set the username and password as shown.
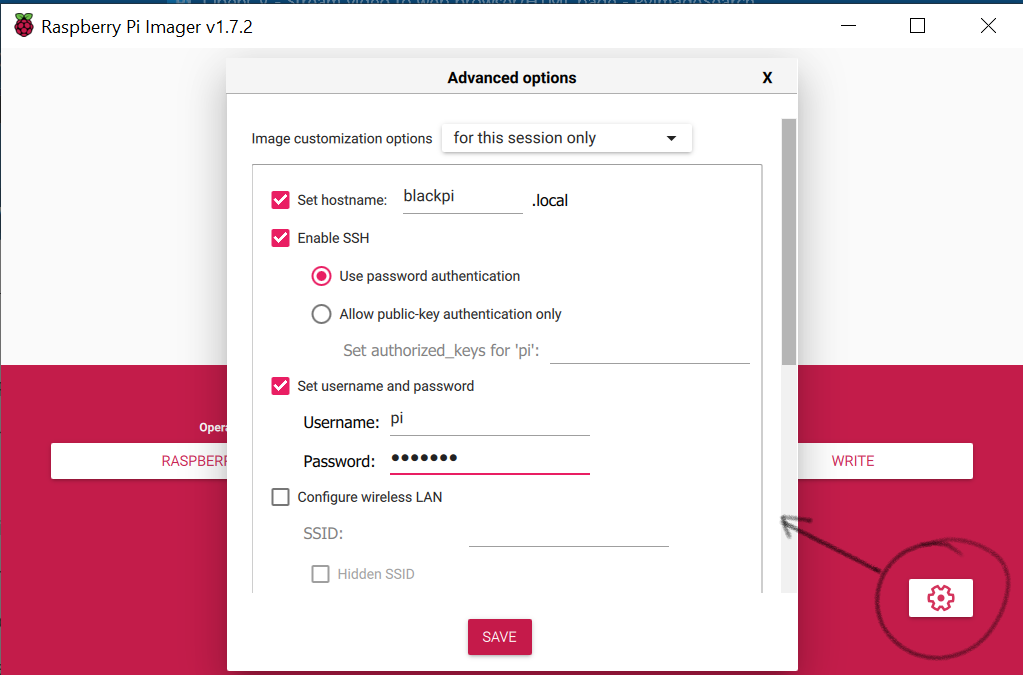
The old way of setting up a headless Raspberry Pi
If you have an older Raspberry Pi image and want to enable headless mode then before you plug your micro SD card (the one you imaged with the Raspberry Pi OS in the previous step) you need to add one file to the root folder of the micro SD card.
Once the Micro SD card is imaged in the above step: 1. open the root folder on the SD card. 2. add a file named ssh to the folder. This file should not have any extension, and it does not need to contain anything.
This lets you access the Raspberry Pi with Secure Shell (SSH).
Plug in the Raspberry Pi
Insert the Micro SD card into the Raspberry Pi, and then plug in an ethernet cable (that is connected to your network) and attach the power cable. The Raspberry Pi should show flashing LEDs.
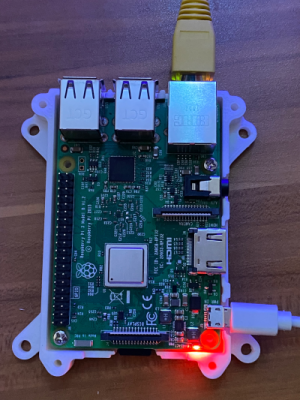
Get the IP address of your Raspberry Pi
In order to use SSH from your computer to access the Raspberry Pi you need the IP address of your Raspberry Pi.
To obtain the IP address: 1. plug in your Raspberry Pi as in the previous step, 2. open a terminal on your computer 3. use ping to find the IP address of your Raspberry Pi.
ping raspberrypi.local
NOTE: if you get a response from ping that the device could not be found, it could be that the Raspberry Pi is still setting things up. The first time you put a newly imaged SD card into the Raspberry Pi it can take a few minutes to complete setup and be ready to work with.
SSH to the Raspberry Pi
Now you can open a Secure Shell connection to the Raspberry Pi from your computer in a terminal.
Replace <ip address of your pi> with the ip address from the step above. You do not want the angle brackets.
ssh pi@<ip address of your pi>
It is also perfectly fine to use the name of the device for ssh.
ssh pi@raspberrypi.local
You will be prompted for the password for the pi user.
NOTE: if you used the Advanced options in the Raspberry Pi Imager, then the username and password will be set to the options specified in that step. You will not need to change the password in the next step.
The default user when you set up the first time is pi and the default password is raspberry
Change your password
If you are not prompted to change the password on first login then follow these steps.
In your terminal when you have connected to SSH, type
sudo raspi-config
This will launch the config app in your terminal. Use the arrow keys to navigate the menu. 1. Navigate to System Options and press Enter 2. Navigate to Password and press Enter
You will be guided through changing your password.
Connecting with VNC
You can do most of your work from the terminal, however it is not as productive as having the full GUI Shell for doing development work. To access the graphical shell you can use VNC. To install VNC on your Raspberry Pi return to the SSH prompt in your terminal as described in the step above.
Return to the Raspberry Pi configuration. From the Terminal enter
sudo raspi-config
The select Interface Options
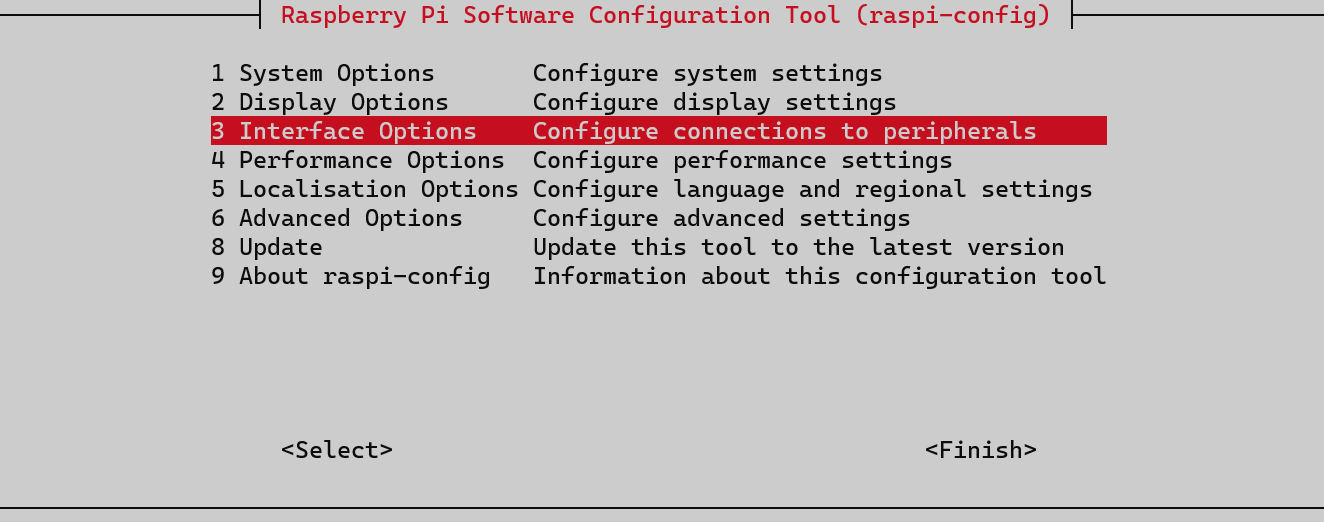
Then select VNC
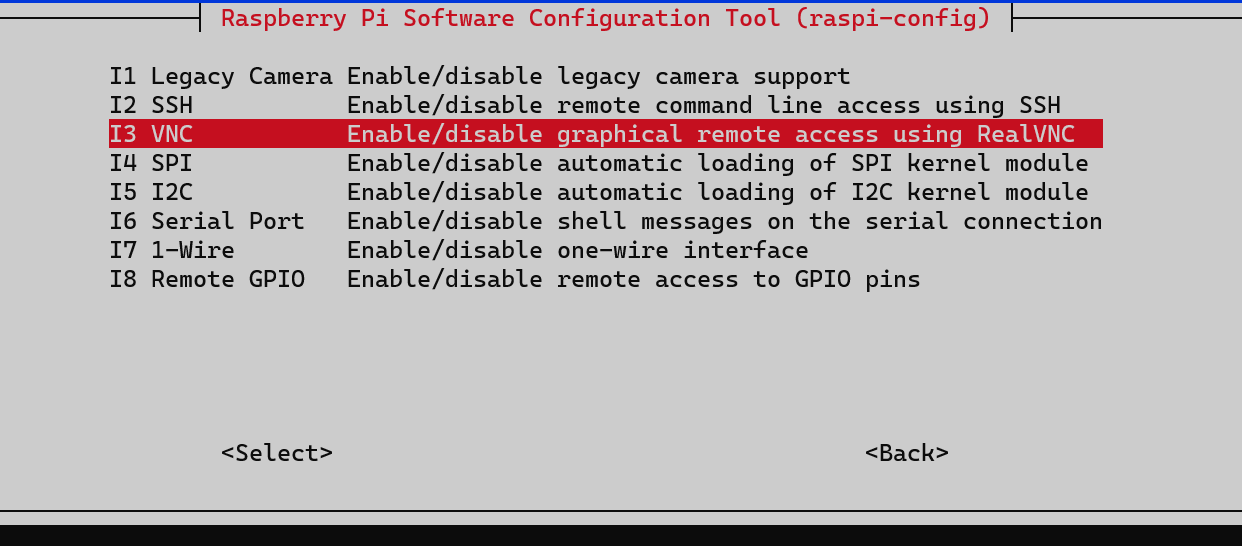
Now enable the VNC server on the Raspberry Pi
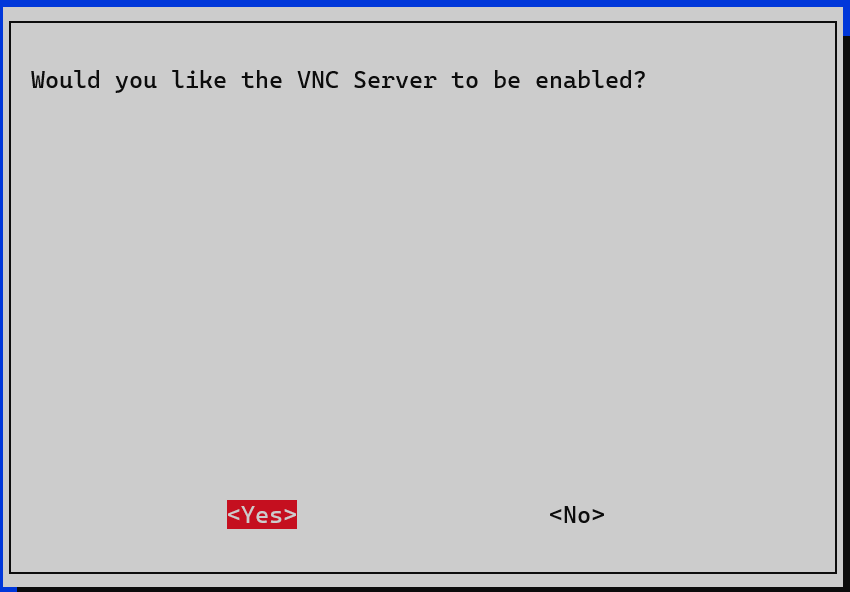
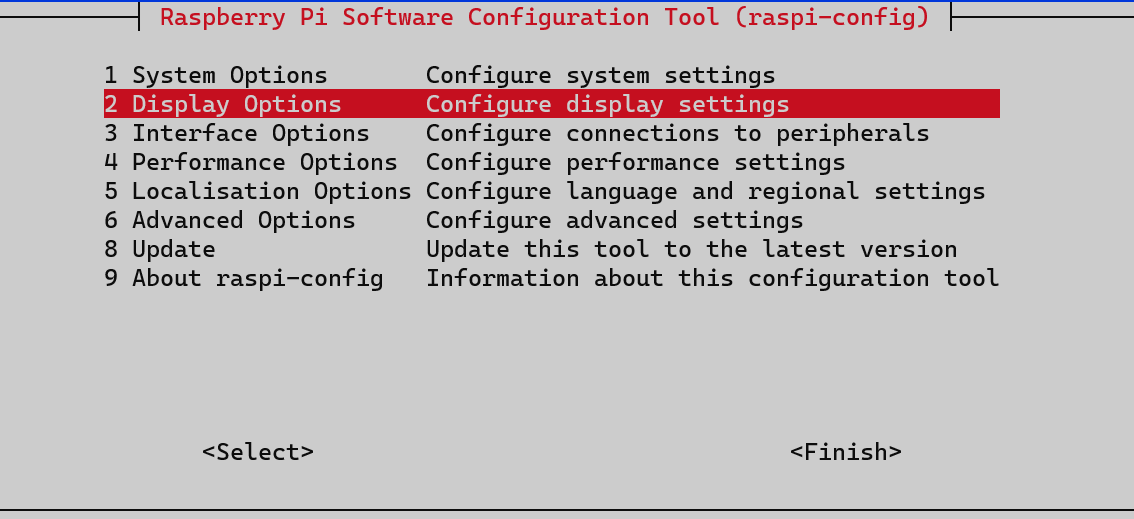
Then select the Display Options
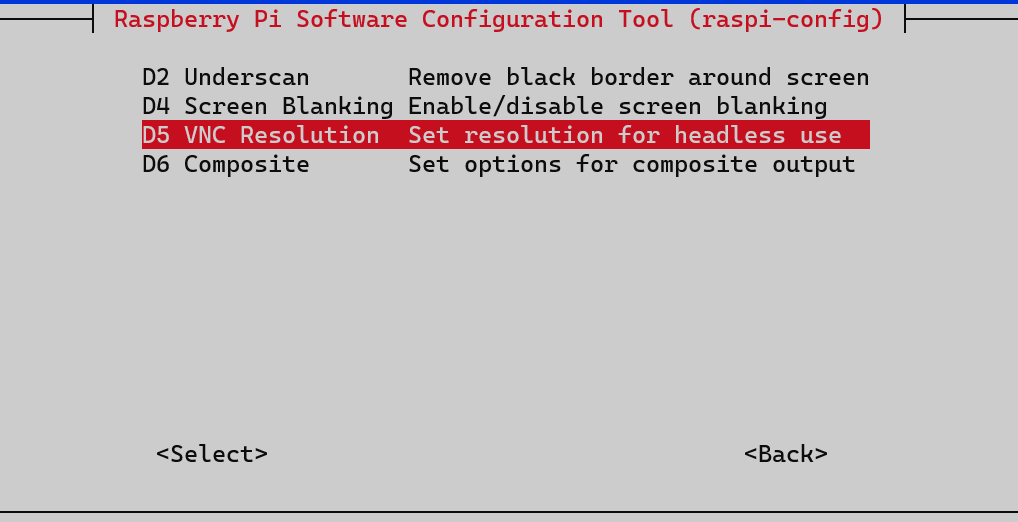
Select VNC Resolution
Then select a resolution that best suits your display
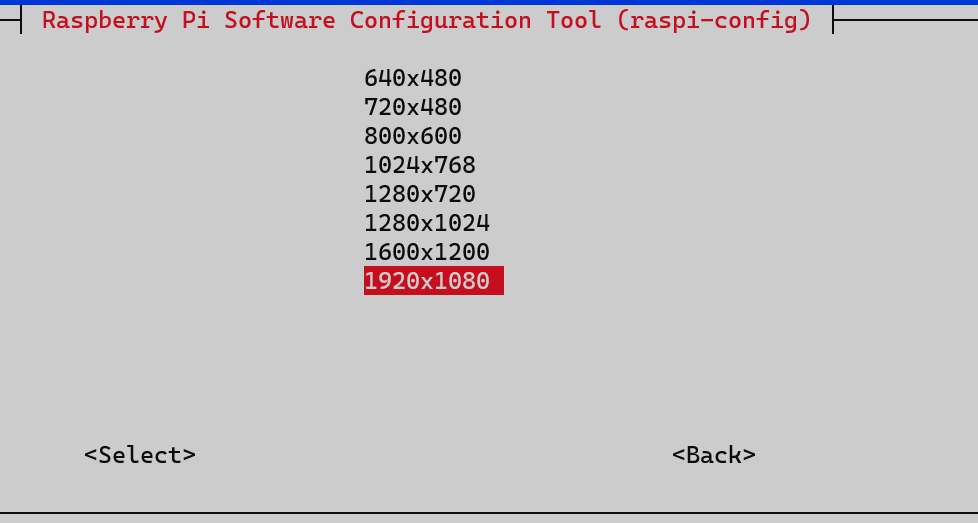
You will be asked to reboot the Raspberry Pi.
Download the VNC Viewer to your computer, there are versions for Windows, Mac, Linux, iOS, Android, and other operating systems including Raspberry Pi.
https://www.realvnc.com/connect/download/viewer/
When you have installed the VNC Viewer you can launch it and connect to your Raspberry Pi using the IP address of the Raspberry Pi
If this is a fresh install of the operating system then the Raspberry Pi desktop will show some notifications to guide you through setting your location, language, time zone, password, Wi-Fi, desktop, and update the software.
Install .NET on Raspberry Pi
Microsoft has some good instructions on deploying .NET to your Raspberry Pi. The following steps are taken from the Microsoft Docs.
In your terminal use curl to install the latest version of .NET (at the time of writing .NET 6).
curl -sSL https://dot.net/v1/dotnet-install.sh | bash /dev/stdin --channel Current
To make it easier for the Raspberry Pi to find the .NET libraries enter the following lines into your SSH terminal
echo 'export DOTNET_ROOT=$HOME/.dotnet' >> ~/.bashrc
echo 'export PATH=$PATH:$HOME/.dotnet' >> ~/.bashrc
source ~/.bashrc
Install Visual Studio Code
Visual Studio Code is my editor of choice for working with code, to install Visual Studio Code on a Raspberry Pi, use the following command in your terminal.
sudo apt install code
Go to your VNC Viewer and you should now have Visual Studio Code in your Programming menu
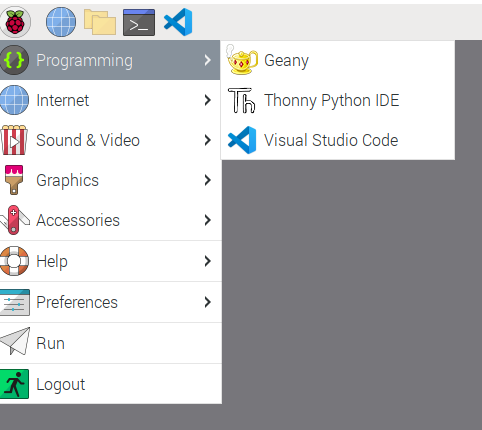
(You can see here I have also added VS Code to the applications in the menu bar)
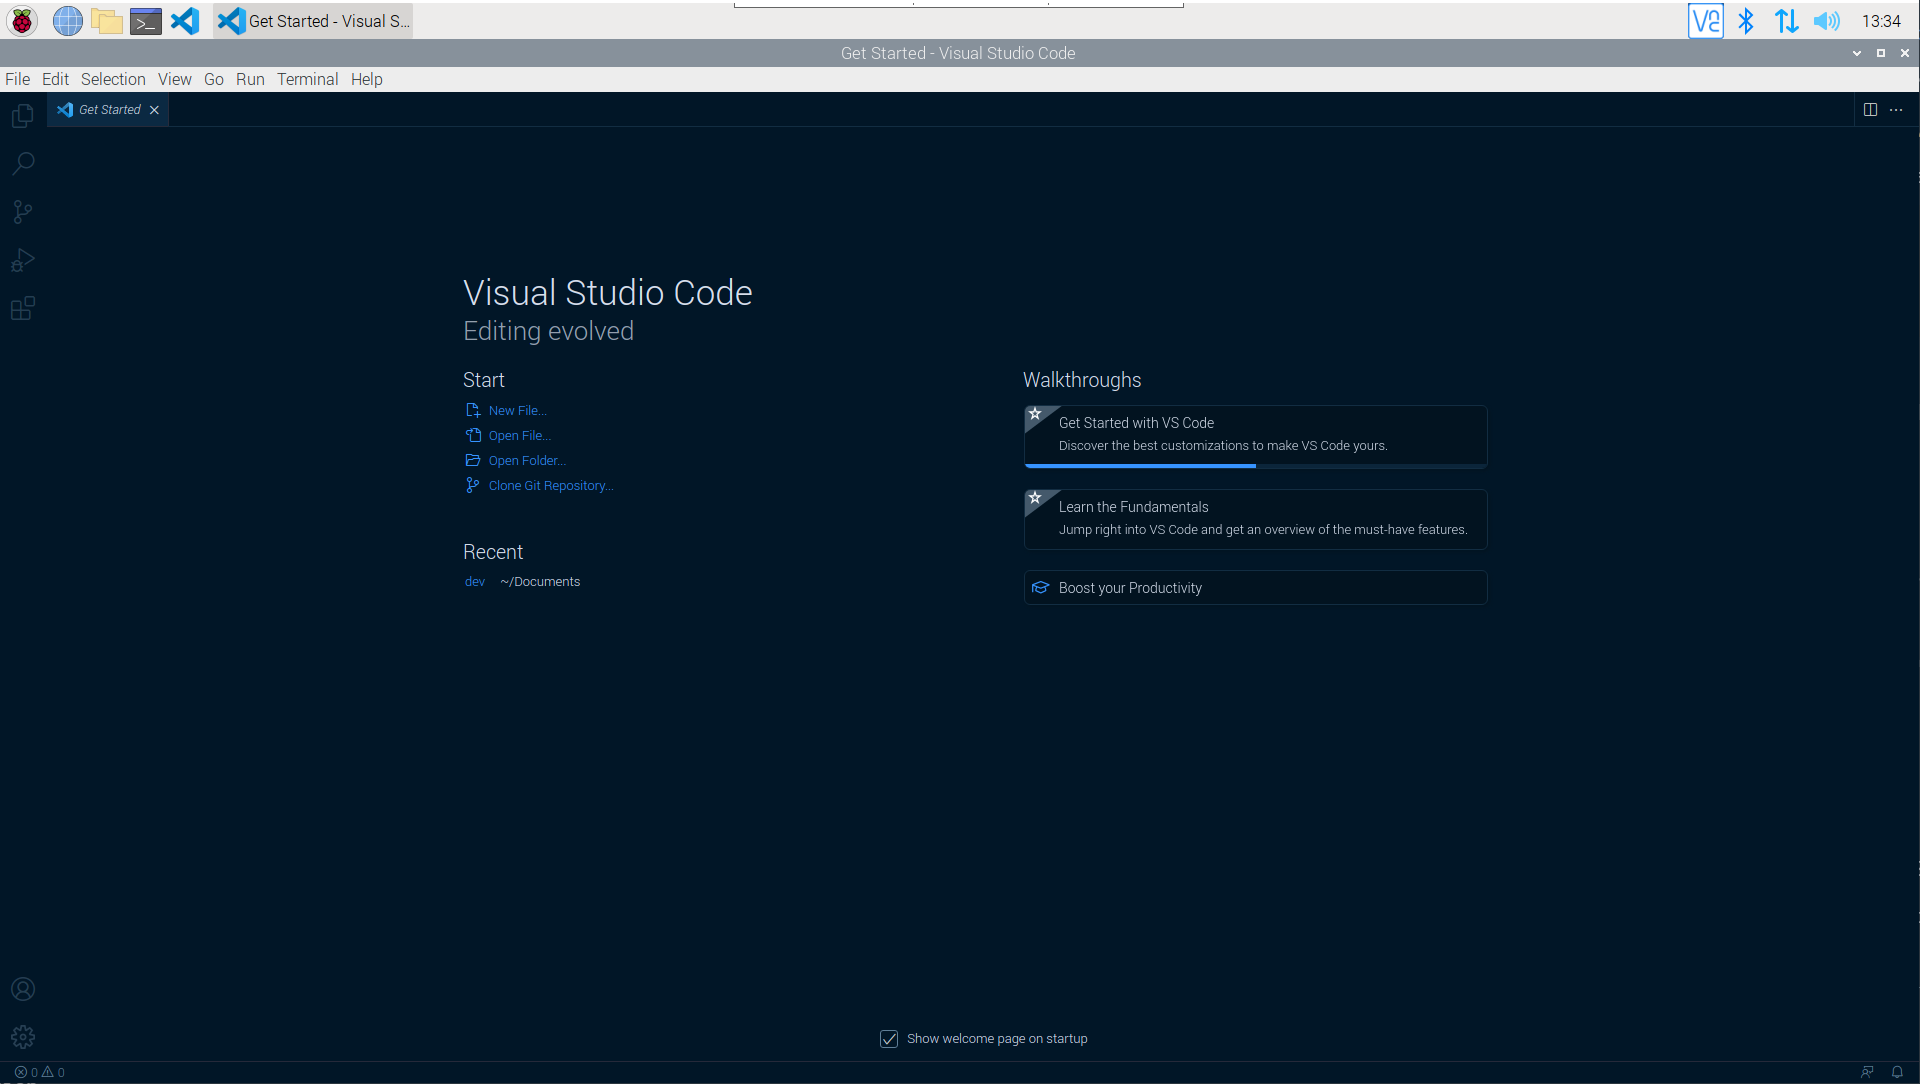
Visual Studio Code can be launched and you are now ready to start developing some great .NET applications on your Raspberry Pi.
(Optional) Rename the Raspberry Pi
If there is more than one Raspberry Pi on the network then this step is important, if you only have one Raspberry Pi on the local network then you can skip this step.
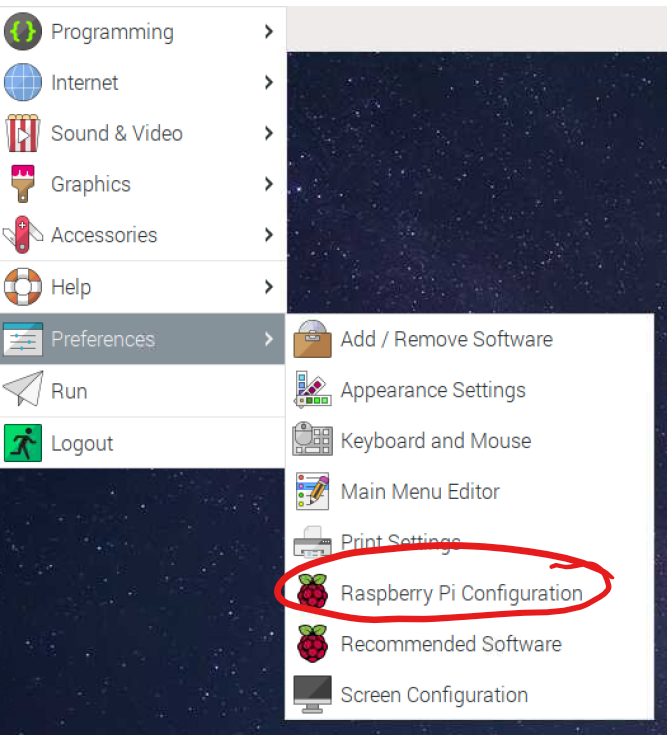
To rename the Raspberry Pi, in the Raspberry Pi desktop select Preferences - Raspberry Pi Configuration
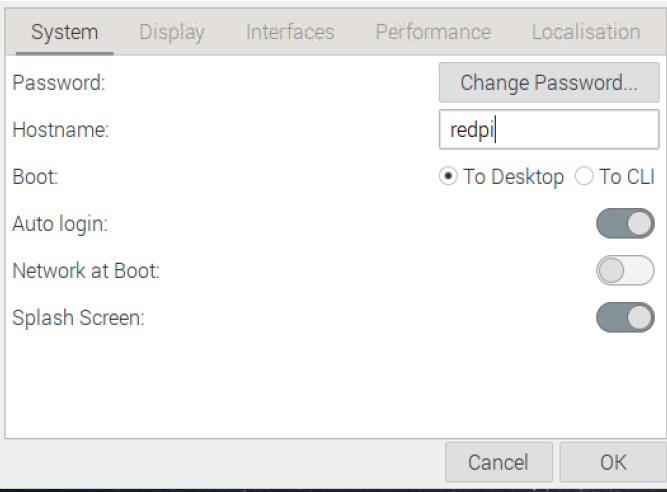
A dialog will appear, and the hostname can be changed from RaspberryPi to anything you like (it is best avoid spaces and non alphanumeric characters). Here I have named my Raspberry Pi redpi
Reboot the Raspberry Pi
At this point after having set up the Raspberry Pi and installed all the tools you need to develop .NET application, it is best to reboot the Raspberry Pi.
From the SSH terminal enter
sudo reboot
IMPORTANT if you renamed the Raspberry Pi in the previous step, then this is the name you should use to ping, and ssh to the device (instead of respberrypi).
Conclusion
This Note has explained how to get a Raspberry Pi ready to do .NET development. Included in this Note are the steps needed to use the Raspberry Pi without having a keyboard, mouse, or screen attached to the Raspberry Pi. If you have a computer already set up, then the work on the Raspberry Pi can all be done remotely from your computer, over the network.
(Optional and not recommended) Create new VNC desktops
Make sure you have the latest VNC software with the following command in your SSH terminal.
sudo apt install realvnc-vnc-server
Once the VNC Server is installed and enabled, you can run the VNCServer from the SSH terminal with this command, this also sets the screen resolution for a new virtual desktop, in this case I selected 1920x1080.
vncserver -geometry 1920x1080
The Terminal should output the address of the new VNC virtual desktop, for example. This address will be needed to connect to the desktop from your computer in the VNC client.
New desktop is raspberrypi:1 (198.161.11.151:1)
Dr. Neil's Notes
Software > Coding
.NET Console Animations
Introduction
After getting .NET 6 and Visual Studio Code running on a Raspberry Pi, I played around with some simple .NET 6 console code. The following are my notes on the console animations I created. These will work on any platform supported by .NET 6 (Windows, Mac, Linux). If you want to get a Raspberry Pi setup to run .NET code, follow the instructions in the .NET Development on a Raspberry Pi document. This document assumes you have installed .NET 6 and Visual Studio Code. This code will run on a Mac, Windows, Linux, and even a Raspberry Pi.
A video that accompanies this Note can be found here
Creating a new .NET project
Start by creating a folder for your code projects. I created a folder called dev. Open a Terminal session and navigate to where you want to create your folder (eg Documents) and enter
mkdir dev
This makes the directory dev
navigate to that directory
cd dev
then open Visual Studio Code. Note the 'dot' after the code, this tells Visual Studio Code to open the current folder.
code .
Your terminal entries should look something like this:
~ $ cd Documents/
~/Documents $ mkdir dev
~/Documents $ cd dev/
~/Documents/dev $ code .
~/Documents/dev $
In Visual Studio Code create a new folder in your dev folder, call it ConsoleAnimations
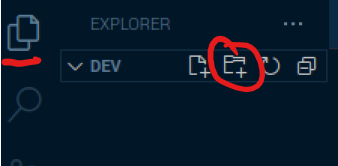
Make sure you have the Explorer open (Ctrl+Shift+E), then click the New Folder icon, and name the new folder ConsoleAnimations
Open the Terminal window in Visual Studio Code, you can use the menu to select Terminal - New Terminal or press Ctrl+Shift+`
The Terminal will open along the bottom of your Visual Studio Code window and it will open in the folder you have opened with Visual Studio Code. In this case it will be your dev folder.
Change the directory to the new folder you just created.
cd ConsoleAnimations/
To create the .NET 6 console application use the command
dotnet new console
The default name of the new project is the name of the folder you are creating the project in. The output should look like this.
~/Documents/dev/ConsoleAnimations $ dotnet new console
The template "Console App" was created successfully.

Processing post-creation actions...
Running 'dotnet restore' on /home/pi/Documents/dev/ConsoleAnimations/ConsoleAnimations.csproj...
  Determining projects to restore...
  Restored /home/pi/Documents/dev/ConsoleAnimations/ConsoleAnimations.csproj (in 1.13 sec).
Restore succeeded.
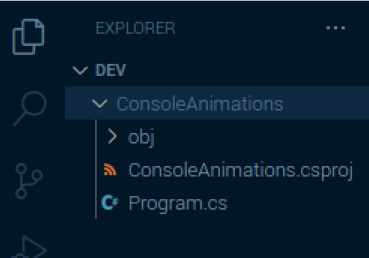
You should also notice that files have been created in the Explorer view of Visual Studio Code
You can run the new application from the Terminal window in Visual Studio Code with
dotnet run
This dotnet run command will compile the project code in the current folder and run it.
~/Documents/dev/ConsoleAnimations $ dotnet run
Hello, World!
As you can see it does not do much yet, other than output Hello, World!
Creating a first animation
The first animation is a super simple spinning line, like you sometimes see when a console application is waiting for something to finish.
In Visual Studio Code, open the Program.cs file that was created with the project previously. You should see the file in the explorer (as seen in the image above). Click on the file to open it.
It has one line of code above which is a comment.
Console.WriteLine("Hello, World!");
Delete both lines, to leave you with an empty file.
Enter the following code into the file
string frames = @"/-\|";

Console.CursorVisible = false;

while (Console.KeyAvailable is false)
{
    foreach(var c in frames)
    {
        Console.Write($"\b{c}");
        await Task.Delay(300);
    }
}

Console.WriteLine("Finished");
Console.CursorVisible = true;
In the Terminal window enter the dotnet run command again to compile and run the application.
When the program runs, it will display a spinning line until you enter a key. You can press any key in the terminal to end the program.
Let's break down what this code is doing. The first line is defining a string, a collection of characters, named frames, as it represents the frames of the animation. The code will enumerate through each character, and display it over the previous character to create the animation.
Then the cursor for the console is hidden using Console.CursorVisible = false;. At the end of the program the cursor is made visible again.
The next line creates a loop that will run until a key is pressed in the console. Console.KeyAvailable will return true when a key has been pressed, and so it is checked that Console.KeyAvailable is false. While a key is not available, do everything in the brackets, again and again.
The foreach loop takes each character c in the string frames, and writes it out, proceeded by a backspace, the \b character is a backspace. After the output of each character the program waits for 300 milliseconds before continuing. The await Task.Delay method tells the program to sleep (or delay) before taking the next step.
When a key press is available, the while loop will finish and the program outputs that it has finished.
Creating an Animate method
To make code easier to manage it is broken down into components of functionality. In this step a method will be created to encapsulate the animation code. As this program grows you will see why this is useful.
Edit your program.cs file to create an Animate method as shown.
string frames = @"/-\|";

Console.CursorVisible = false;

await Animate(frames);

Console.WriteLine("Finished");

Console.CursorVisible = true;

async Task Animate(string frames)
{
    while (Console.KeyAvailable is false)
    {
        foreach(var c in frames)
        {
            Console.Write($"\b{c}");
            await Task.Delay(300);
        }
    }
}
In the Terminal window enter the dotnet run command again to compile and run the application.
When the program runs, it will display the same spinning line until you enter a key.
In the code changes the while loop has been moved into a method called Animate. This Animate method takes a parameter of type string. The string is used to define the frames to animate.
The async Task at the start of the method tells the compiler and runtime that this method can run on a different thread. This means the Animate method could be called and then code could continue running afterwards. The await is used when calling the Animate method to tell the runtime to wait until the method has completed before continuing to run the code.
This process of taking some existing code and restructuring the code without changing the behaviour is called refactoring.
Animating multiple lines
In this step the animation will go beyond a single character to multiple lines. Each line will still only have a single character at this point. This will be extended further in following steps.
Edit the program.cs file to support two lines for animations, as follows:
string[] frames = new string[]{@"/-\|", @"._._"};

Console.CursorVisible = false;

await Animate(frames);

Console.WriteLine("Finished");
Console.CursorVisible = true;

async Task Animate(string[] frames)
{
    Console.Clear();
    int length = frames[0].Length;

    while (Console.KeyAvailable is false)
    {
        for(int i = 0; i < length; i++)
        {
            foreach(var f in frames)
            {
                Console.WriteLine(f[i]);
            }
            await Task.Delay(300);

            Console.CursorTop = 0;
        }
    }
}
In the Terminal window, enter the dotnet run command again to compile and run the application.
When the program runs, it will clear the terminal window, then display two lines, the top line has the same spinning line as before, the line below will show a dot/line transition, you might see it as a shrinking line, or a growing dot.
There are quite a few code changes in this step.
The frames string is now an array of strings, the [] notation after the variable type tells the compiler this is not a single string, it is a collection of strings. In maths you might call this a single dimensional array. In programming it is also called an array.
The Array is initialized with two strings, the first is the string used so far in this code, the second is a string of the same length that will define the frames to animate on the second line.
The Animate method has also changed the parameters to now take an array of string rather than a single string.
The first line of the method now clears the console (or terminal) window, of all contents. This provides the canvas for the animation to be displayed in the console.
A new integer (number) variable is set to the length of the first string in the collection of strings passed into the method with int length = frames[0].Length;
This code assumes all the strings in the collection are the same length, which is true. If we extended this further we might like to change this to use a parameter to set the length of the string, as making assumptions in code is never a good idea.
Inside the while loop we now have a new for loop, for(int i = 0; i < length; i++) This will count the variable i from 0 to 3, The length of the string is 4 characters, however the escape clause in the for loop is to stop when i is no longer less than the length i < length;, and 3 is the last number that is less than 4.
The foreach loop inside the for loop enumerates through each of the strings in the frames array and writes out the character at position i in a new line.
In this code there are only two animating lines, however you could add more lines and this would still work.
Once the lines are all written to the console window, the delay of 300 milliseconds is awaited.
Finally the cursor position is set to the top of the terminal to start again in the next character (i) of the string.
Animating multiple characters on multiple lines
To extend the previous step, the animation will now support multiple characters on multiple lines. To achieve this the animation frames will be longer than a single character in the strings in the array of frames. The length of each frame will need to be defined. The following changes to the code will achieve this.
string[] frames = new string[]{@"/  -- \  |  ", @"   .  .. ..."};

Console.CursorVisible = false;

await Animate(3, frames);

Console.WriteLine("Finished");

Console.CursorVisible = true;

async Task Animate(int width, string[] frames)
{
    Console.Clear();
    int length = frames[0].Length;

    while (Console.KeyAvailable is false)
    {
        for(int i = 0; i < length; i+=width)
        {
            foreach(var f in frames)
            {
                Console.WriteLine(f.Substring(i, width));
            }
            await Task.Delay(300);
            Console.CursorTop = 0;
        }
    }
}
In the Terminal window, enter the dotnet run command again to compile and run the application.
When the program runs, it will clear the terminal window, then display two lines, the top line has the same spinning line as before, the line below will show a series of dots appear. It is that exciting yet, however the code is now animating multiple characters on multiple lines.
The following code changes enable this new behaviour.
The frames string array now is initialized with two longer strings. Each string consists of four blocks of three characters. It is important both strings are the same length, otherwise this code will not work. Each three character block in the string represents a frame on a line.
The Animate method has been changed to take an initial parameter that specifies the width of each frame. In this code the width is 3.
In the for loop the variable i is incremented by the width of the frame on each loop. This points i to the offset of the next frame, using the code i+=width;, until all frames have been output.
The Console.WriteLine method has been changed to output the Substring of characters from the offset i, and for 3 (the width) characters. A Substring is useful method of the string class, it lets the code retrieve a section of the string.
Animating a face winking
Let's extend the animation to something a bit more fun, lets use the same code shown in the previous step to create a face that winks. Only the frames string and the width of the frames needs to be changed to achieve this.
string[] frames = new string[]
{
    @"                                                ",
    @"   O    O      O    o      O    -      O    o   ",
    @"     /\          /\          /\          /\     ",
    @"    ----        ----         --         ----    ",
};

Console.CursorVisible = false;

await Animate(12, frames);

Console.WriteLine("Finished");

Console.CursorVisible = true;

async Task Animate(int width, string[] frames)
{
    Console.Clear();
    int length = frames[0].Length;

    while (Console.KeyAvailable is false)
    {
        for(int i = 0; i < length; i+=width)
        {
            foreach(var f in frames)
            {
                Console.WriteLine(f.Substring(i, width));
            }
            await Task.Delay(300);
            Console.CursorTop = 0;
        }
    }
}
In the Terminal window, enter the dotnet run command again to compile and run the application.
When the program runs, it will clear the terminal window, then display four lines lines. These should resemble a face that winks.
To make it easier to see the frames in the code, the strings are set out in the file above each other. You can see the animation emerging by looking at the code.
The only other change made was to set the width parameter in the Animate method to 12, like this await Animate(12, frames);.
Adding an extra dimension to the animation
Each string in the frames collection in the previous step represents all the different frames for the animation on a single line. In this step you will change this so that a collection (Array) of strings represents a single frame. Then the collection of frames will be a collection of string collections, an array of arrays, known as a two dimensional array.
 string[] frame1 = new string[]  {@"            ",
                                  @"   O    O   ",
                                  @"     /\     ",
                                  @"    ----    ",
                                };

 string[] frame2 = new string[] { @"            ",
                                  @"   O    o   ",
                                  @"     /\     ",
                                  @"    ----    ",
                                };

 string[] frame3 = new string[] { @"            ",
                                  @"   O    -   ",
                                  @"     /\     ",
                                  @"     --     ",
                                };

 string[] frame4 = new string[] { @"            ",
                                  @"   O    o   ",
                                  @"     /\     ",
                                  @"    ----    ",
                                };

string[][] frames = new string[][] {frame1, frame2, frame3, frame4};

Console.CursorVisible = false;

await Animate(frames);

Console.WriteLine("Finished");

Console.CursorVisible = true;

async Task Animate(string[][] frames)
{
    Console.Clear();

    while (Console.KeyAvailable is false)
    {
        foreach(var frame in frames)
        {
            foreach(var line in frame)
            {
                Console.WriteLine(line);
            }
            await Task.Delay(300);
            Console.CursorTop = 0;
        }
    }
}
In the Terminal window, enter the dotnet run command again to compile and run the application.
In the terminal window the same animation of the winking face will appear as you observed in the previous step. However you should notice the code is now simpler, and the frames are easier to define as a block. This will have other advantages as you see in the following steps.
In this iteration of the code each frame has been defined as an array of strings, one string per line of the frame. The collection of frames is now defined as string[][], which is the notation to define an array of arrays.
The length of each line of each frame is no longer calculated, as the updated code outputs the whole of each line for each frame. This has the advantage that not all lines of the frame need to be the same length. However be aware that the same line on each frame should be the same length, for example if you extend the fourth line in frame3, then you should extend he fourth line in the other frames the same amount.
The for loops are now simpler too, it is no longer necessary to increment a counter (i in previous steps) by the length of the line in a frame. The code can take each line of each frame.
With each line, the whole line can be output, using a substring to represent a line is no longer required; Console.WriteLine(line);.
The behaviour of the code has not changed from the previous step, yet the code has been restructured, this is called refactoring.
Frame reuse
In the previous step frame2 and frame4 are identical. This means you could delete frame4 and reuse frame2 in the animation as follows.
string[] frame1 = new string[]  {@"            ",
                                  @"   O    O   ",
                                  @"     /\     ",
                                  @"    ----    ",
                                };

 string[] frame2 = new string[] { @"            ",
                                  @"   O    o   ",
                                  @"     /\     ",
                                  @"    ----    ",
                                };

 string[] frame3 = new string[] { @"            ",
                                  @"   O    -   ",
                                  @"     /\     ",
                                  @"     --     ",
                                };

string[][] frames = new string[][] {frame1, frame2, frame3, frame2};

Console.CursorVisible = false;

await Animate(frames);

Console.WriteLine("Finished");

Console.CursorVisible = true;

async Task Animate(string[][] frames)
{
    Console.Clear();

    while (Console.KeyAvailable is false)
    {
        foreach(var frame in frames)
        {
            foreach(var line in frame)
            {
                Console.WriteLine(line);
            }
            await Task.Delay(300);
            Console.CursorTop = 0;
        }
    }
}
In the Terminal window, enter the dotnet run command again to compile and run the application.
In the terminal window the same animation of the winking face will appear as you observed in the previous step. The frame2 is reused in the collection of frames:
string[][] frames = new string[][] {frame1, frame2, frame3, frame2};
This step is another refactoring.
Get Creative with the animations
With the code you can now focus on editing the frames to make new animations without changing any of the code. Here are some ideas for animations.
Star jumping
string[] frame1 = new string[]  {@"       ",
                                  @"   O   ",
                                  @" /(_)\ ",
                                  @"  | |  ",
                                };

 string[] frame2 = new string[] { @" \ O / ",
                                  @"  (_)  ",
                                  @"  / \  ",
                                  @"       ",
                                };

string[][] frames = new string[][] {frame1, frame2};
Running
var frame1 = new string[] {
                            @"      O     ",
                            @"     /_\_   ",
                            @"     /_\    ",
                            @"    /       ",
                            };
var frame2 = new string[] {
                            @"     O      ",
                            @"    /_\_    ",
                            @"    _\\     ",
                            @"       \    ",
                            };

var frame3 = new string[] {
                            @"     O      ",
                            @"    /_\_    ",
                            @"    _\\     ",
                            @"      \     ",
                            };

string[][] frames = new string[][] {frame1, frame2, frame3};
You can try changing the delay between frames with this for a faster run. Reduce the number for a smaller time between frames, creating the illusion of a faster run.
await Task.Delay(200);
Rocket Launch
This is a bigger animation, the frames are bigger, so you might need to run this in a full screen terminal to get the full animation.
var frame1 = new string[] {
@" ",
@" ",
@" ",
@" ",
@" ",
@" ",
@" | ",
@" | ",
@" ^ ",
@" /_\ ",
@" /___\ ",
@" | | ",
@" |= = =| ",
@" | | ",
@" | | ",
@" | | ",
@" | | ",
@" | | ",
@" | | ",
@" | | ",
@" | | | | ",
@" /|=|=|=|\ ",
@" / | | \ ",
@" / |#####| \ ",
@"| / \ | ",
@"| / \ | ",
@"|/ \| ",
};
var frame2 = new string[] {
@" ",
@" ",
@" ",
@" ",
@" ",
@" ",
@" | ",
@" | ",
@" ^ ",
@" /_\ ",
@" /___\ ",
@" | | ",
@" |= = =| ",
@" | | ",
@" | | ",
@" | | ",
@" | | ",
@" | | ",
@" | | ",
@" | | ",
@" | | | | ",
@" /|=|=|=|\ ",
@" / | | \ ",
@" / |#####| \ ",
@"| / ^|^ \ | ",
@"| / ( ) \ | ",
@"|/ (|) \| ",
};
var frame3 = new string[] {
@" ",
@" ",
@" ",
@" ",
@" ",
@" ",
@" | ",
@" | ",
@" ^ ",
@" /_\ ",
@" /___\ ",
@" | | ",
@" |= = =| ",
@" | | ",
@" | | ",
@" | | ",
@" | | ",
@" | | ",
@" | | ",
@" | | ",
@" | | | | ",
@" /|=|=|=|\ ",
@" / | | \ ",
@" / |#####| \ ",
@"| / (^|^) \ | ",
@"| / ((|)) \ | ",
@"|/ ((;|;)) \| ",
};
var frame4 = new string[] {
@" ",
@" ",
@" ",
@" ",
@" ",
@" | ",
@" | ",
@" ^ ",
@" /_\ ",
@" /___\ ",
@" | | ",
@" |= = =| ",
@" | | ",
@" | | ",
@" | | ",
@" | | ",
@" | | ",
@" | | ",
@" | | ",
@" | | | | ",
@" /|=|=|=|\ ",
@" / | | \ ",
@" / |#####| \ ",
@"| / (^|^) \ | ",
@"| / ((|)) \ | ",
@"|/ ((;|;)) \| ",
@" ((((:|:)))) ",
};
var frame5 = new string[] {
@" ",
@" ",
@" ",
@" | ",
@" | ",
@" ^ ",
@" /_\ ",
@" /___\ ",
@" | | ",
@" |= = =| ",
@" | | ",
@" | | ",
@" | | ",
@" | | ",
@" | | ",
@" | | ",
@" | | ",
@" | | | | ",
@" /|=|=|=|\ ",
@" / | | \ ",
@" / |#####| \ ",
@"| / (^|^) \ | ",
@"| / ( | ) \ | ",
@"|/ (( : )) \| ",
@" (( : : )) ",
@" (( : | : )) ",
@" (( :|: )) ",
};
var frame6 = new string[] {
@" ",
@" | ",
@" | ",
@" ^ ",
@" /_\ ",
@" /___\ ",
@" | | ",
@" |= = =| ",
@" | | ",
@" | | ",
@" | | ",
@" | | ",
@" | | ",
@" | | ",
@" | | ",
@" | | | | ",
@" /|=|=|=|\ ",
@" / | | \ ",
@" / |#####| \ ",
@"| / (^|^) \ | ",
@"| / ( | ) \ | ",
@"|/ (( : )) \| ",
@" (( : : )) ",
@" (( : | : )) ",
@" (( : : )) ",
@" (( : )) ",
@" ( ) ",
};
var frame7 = new string[] {
@" /_\ ",
@" /___\ ",
@" | | ",
@" |= = =| ",
@" | | ",
@" | | ",
@" | | ",
@" | | ",
@" | | ",
@" | | ",
@" | | ",
@" | | | | ",
@" /|=|=|=|\ ",
@" / | | \ ",
@" / |#####| \ ",
@"| / (^|^) \ | ",
@"| / ( | ) \ | ",
@"|/ (( : )) \| ",
@" (( : : )) ",
@" (( : | : )) ",
@" (( : : )) ",
@" (( : )) ",
@" ( ) ",
@" | ",
@" | ",
@" ",
@" ",
};
var frame8 = new string[] {
@" | | ",
@" | | ",
@" | | ",
@" | | | | ",
@" /|=|=|=|\ ",
@" / | | \ ",
@" / |#####| \ ",
@"| / (^|^) \ | ",
@"| / ( | ) \ | ",
@"|/ (( : )) \| ",
@" (( : : )) ",
@" (( : | : )) ",
@" (( : : )) ",
@" (( : )) ",
@" ( ) ",
@" | ",
@" | ",
@" ",
@" ",
@" ",
@" ",
@" ",
@" ",
@" ",
@" ",
@" ",
@" ",
};
var frame9 = new string[] {
@" ( ) ",
@" | ",
@" | ",
@" ",
@" ",
@" ",
@" ",
@" ",
@" ",
@" ",
@" ",
@" ",
@" ",
@" ",
@" ",
@" ",
@" ",
@" ",
@" ",
@" ",
@" ",
@" ",
@" ",
@" ",
@" ",
@" ",
@" ",
};
string[][] frames = new string[][] {frame1, frame2, frame3, frame4, frame5, frame6, frame7, frame8, frame9};
Conclusions
The steps presented in this note represent the process I went through to get a little fun console app working in .NET 6 on a Raspberry Pi. However they will work on any platform supported by .NET 6 (Mac, Windows, Linux).
I hope this has helped you understand a few aspects of building a .NET 6 console application.
Dr. Neil's Notes
Software > Coding
.NET Console Clock
Introduction
Following on from the .NET Console Animations exercise, I thought it would be fun to create a clock using .NET in the console. This exercise uses some of the ideas from the Console Animation. If you are new to C# or .NET, step back through the .NET Console Animations notes.
This exercise has been done on a Raspberry Pi, if you want to learn how to set up your Raspberry Pi for .NET development read my notes on .NET Development on a Raspberry Pi. Any operating system that supports .NET 6 can be used to do create the console clock, including Microsoft Windows, Apple OSX, and Linux.
A video that accompanies this Note can be found here
Creating a new .NET project
If you do not already have a folder to keep your code, start by creating a folder for your code projects. I created a folder called dev. Open a Terminal session and navigate to where you want to create your folder (eg Documents) and enter
mkdir dev
This makes the directory dev
navigate to that directory
cd dev
then open Visual Studio Code. Note the 'dot' after the code, this tells Visual Studio Code to open the current folder.
code .
Your terminal entries should look something like this:
~ $ cd Documents/
~/Documents $ mkdir dev
~/Documents $ cd dev/
~/Documents/dev $ code .
~/Documents/dev $
In Visual Studio Code create a new folder in your dev folder, call it ConsoleClock
Make sure you have the Explorer open (Ctrl+Shift+E), then click the New Folder icon, and name the new folder ConsoleClock

Open the Terminal window in Visual Studio Code, you can use the menu to select Terminal - New Terminal or press Ctrl+Shift+`
The Terminal will open along the bottom of your Visual Studio Code window and it will open in the folder you have opened with Visual Studio Code. In this case it will be your dev folder.
Change the directory to the new folder you just created.
cd ConsoleClock/
To create the .NET 6 console application use the command
dotnet new console
The default name of the new project is the name of the folder you are creating the project in. The output should look like this.
The template "Console App" was created successfully.

Processing post-creation actions...
Running 'dotnet restore' on /home/pi/Documents/dev/ConsoleClock/ConsoleClock.csproj...
  Determining projects to restore...
  Restored /home/pi/Documents/dev/ConsoleClock/ConsoleClock.csproj (in 340 ms).
Restore succeeded.
You should also notice that files have been created in the Explorer view of Visual Studio Code.
You can run the new application from the Terminal window in Visual Studio Code with
dotnet run
This dotnet run command will compile the project code in the current folder and run it.
~/Documents/dev/ConsoleClock $ dotnet run
Hello, World!
As you can see it does not do much yet, other than output Hello, World!
Drawing Digits
At the end of the .NET Console Animations exercise each frame of the animation was defined by an array of strings, one string for each row of the ASCII art frame. The digits of the clock will need to be drawn on the console, however for the clock it would be good to use solid digits, rather than ASCII art. Each digit will be represented by an array of bytes, each byte will represent a row in the digit. In a byte are eight bits, with each bit being either 0 or 1. In C# a byte with no bits set to 1 can be represented as 0b00000000, a byte with all the bits set to 1 is represented as 0b11111111. To draw a digit on the clock using an array of bytes, each of the bits will indicate if a block of the digit should be drawn on the screen.
In Visual Studio Code, open the Program.cs file that was created with the ConsoleClock project. You should see the file in the Visual Studio Code explorer. Click on the file to open it.
It has one line of code above which is a comment.
Console.WriteLine("Hello, World!");
Delete both lines, to leave you with an empty file.
Enter the following code into the file
    byte[] One = new byte[]{
        0b00011000,
        0b00011000,
        0b00011000,
        0b00011000,
        0b00011000,
        0b00011000,
        0b00011000,
    };

    byte[] Two = new byte[]{
        0b11111111,
        0b00000011,
        0b00000011,
        0b11111111,
        0b11000000,
        0b11000000,
        0b11111111,
    };

    byte[] Three = new byte[]{
        0b11111111,
        0b00000011,
        0b00000011,
        0b01111111,
        0b00000011,
        0b00000011,
        0b11111111,
    };

    int clockTop = 5;
    int clockLeft = 5;
    int digitWidth = 10;
    ConsoleColor clockcolor = ConsoleColor.Green;
    int position = clockLeft;

    Console.Clear();

    DrawDigit(One, position, clockTop, clockcolor);
    position += digitWidth;
    DrawDigit(Two, position, clockTop, clockcolor);
    position += digitWidth;
    DrawDigit(Three, position, clockTop, clockcolor);

    Console.ResetColor();
    Console.WriteLine();
    Console.WriteLine("Finished drawing");

    void DrawDigit(byte[] digit, int X, int Y, ConsoleColor color)
    {
        foreach(byte row in digit)
        {
            for(int bitPosition = 0; bitPosition < 8; bitPosition++)
            {
                var mark = (row & (1<<bitPosition)) != 0;
                if (mark)
                {
                    Draw(X+8-bitPosition, Y, color);
                }
            }
            Y++;
        }
    }

    static void Draw(int X, int Y, ConsoleColor Color)
    {
        Console.SetCursorPosition(X, Y);
        Console.BackgroundColor = Color;
        Console.Write(" ");
    }
In the Terminal window enter the dotnet run command to compile and run the application.
When the program runs, it will display the three digits 1, 2, and 3.
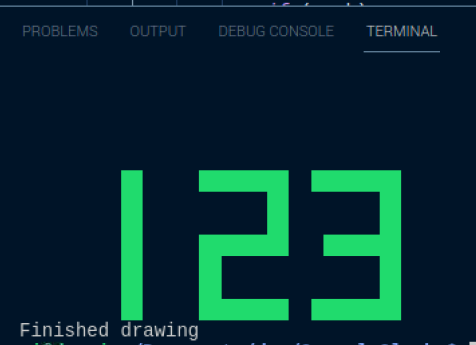
Let's break down what this code is doing.
At the top of the code three sets of byte arrays are defined to represent the numbers 1, 2, and 3. The 1's represent the blocks to be be displayed, the 0's represent the blank spaces.
The code then sets up some variables to define the position of the clock, the width of each digit, and the color of the clock digits.
The poaition variable is used to track the position to draw the next digit. Then the console is cleared, to provide the space to draw the digits.
int clockTop = 5;
int clockLeft = 5;
int digitWidth = 10;
ConsoleColor clockcolor = ConsoleColor.Green;

int position = clockLeft;
Console.Clear();
Each of the three digits is then drawn at a position, with a color. Note that the position is incremented by the width of the digit after each digit is drawn.
DrawDigit(One, position, clockTop, clockcolor);
position += digitWidth;
DrawDigit(Two, position, clockTop, clockcolor);
position += digitWidth;
DrawDigit(Three, position, clockTop, clockcolor);
After the digits are drawn, the console colors are reset, and text is output to indicate the program has finished.
Console.ResetColor();
Console.WriteLine();
Console.WriteLine("Finished drawing");
There are two methods defined in this code DrawDigit and Draw.
The Draw method takes three parameters, the X and Y coordinates to draw at, and the color to draw. The code in the method sets the cursor position in the console (or terminal), then changes the background color in the terminal to the drawing color and draws a space character, forcing the background at that point to paint the selected color.
static void Draw(int X, int Y, ConsoleColor color)
{
    Console.SetCursorPosition(X, Y);
    Console.BackgroundColor = color;
    Console.Write(" ");
}
The DrawDigit method calls the Draw method to draw each part of the digit. A digit is represented by a collection (array) of bytes, each byte represents a row of the digit. The bits in each byte indicate if the position of that bit should be drawn.
The method takes four parameters
- digit ; the byte array representing the digit
- X ; the horizontal (x) coordinate to draw the digit
- Y ; the vertical (y) coordinate to draw the digit
- color ; the color to draw the digit.
The code in the method iterates through each of the bytes in the digit array, each byte represents a row.
For each of the rows, each bit on that row is isolated to determine if it is 'set', or equal to '1'.
If the bit is 1 then the block is drawn at the specified point.
The vertical offset of the next row is then incremented with Y++.
void DrawDigit(byte[] digit, int X, int Y, ConsoleColor color)
{
    foreach(byte row in digit)
    {
        for(int bitPosition = 0; bitPosition < 8; bitPosition++)
        {
            var mark = (row & (1<<bitPosition)) != 0;
            if (mark)
            {
                Draw(X+8-bitPosition, Y, color);
            }
        }
        Y++;
    }
}
This line of code might be the hardest to understand
var mark = (row & (1<<bitPosition)) != 0;
The row is the byte, the & operator performs a bitwise AND operation on the row and 1, left bit shifted by the position of the bit. If the result of the AND is not 0 then that bit needs to be drawn.
The << operator is a left shift operator, this performs a bitwise shift by the bitPosition of the number 1.
Consider the number one represented in binary as 00000001. Left shifting this bit by 1 position would return the binary pattern 00000010. The 1 has been shifted to the left. Performing this 8 times allows every bit in a byte to be tested.
The Draw method is called to draw the block at the X+8-bitPosition because the byte array is being checked from right to left, meaning the character for hte digit is drawn from the right to left.
This could be modified to draw from left to right by shifting right from 128 as shown in the code below. The number 128 is represented in binary as 10000000, so shifting the 1 bit right 8 times, would test the bits from left to right, allowing the Draw method to be called with the X position of the digit plus the bitPosition.
for(int bitPosition = 0; bitPosition < 8; bitPosition++)
{
    var mark = (row & (128>>bitPosition)) != 0;
    if (mark)
    {
        Draw(X+bitPosition, Y, color);
    }
}
Using 128 and right shifting is perhaps less intuitive than using 1 and left shifting.
Drawing a Clock
With numbers being drawn on the screen it should be a simple step to draw the digits of a clock. A digital clock is a series of four digits, and to be extra cool, display a couple of flashing dots between the hour and minute digits. Define the other digits and the dots character as follows.
byte[] Zero = new byte[]{
    0b11111111,
    0b11000011,
    0b11000011,
    0b11000011,
    0b11000011,
    0b11000011,
    0b11111111,
};

byte[] One = new byte[]{
    0b00011000,
    0b00011000,
    0b00011000,
    0b00011000,
    0b00011000,
    0b00011000,
    0b00011000,
};

byte[] Two = new byte[]{
    0b11111111,
    0b00000011,
    0b00000011,
    0b11111111,
    0b11000000,
    0b11000000,
    0b11111111,
};

byte[] Three = new byte[]{
    0b11111111,
    0b00000011,
    0b00000011,
    0b01111111,
    0b00000011,
    0b00000011,
    0b11111111,
};

byte[] Four = new byte[]{
    0b11000011,
    0b11000011,
    0b11000011,
    0b11111111,
    0b00000011,
    0b00000011,
    0b00000011,
};

byte[] Five = new byte[]{
    0b11111111,
    0b11000000,
    0b11000000,
    0b11111111,
    0b00000011,
    0b00000011,
    0b11111111,
};

byte[] Six = new byte[]{
    0b11111110,
    0b11000000,
    0b11000000,
    0b11111111,
    0b11000011,
    0b11000011,
    0b11111111,
};

byte[] Seven = new byte[]{
    0b11111111,
    0b00000011,
    0b00000011,
    0b00000011,
    0b00000011,
    0b00000011,
    0b00000011,
};

byte[] Eight = new byte[]{
    0b11111111,
    0b11000011,
    0b11000011,
    0b11111111,
    0b11000011,
    0b11000011,
    0b11111111,
};

byte[] Nine = new byte[]{
    0b11111111,
    0b11000011,
    0b11000011,
    0b11111111,
    0b00000011,
    0b00000011,
    0b01111111,
};

byte[] Dots = new byte[]{
    0b00000000,
    0b00000000,
    0b00011000,
    0b00000000,
    0b00011000,
    0b00000000,
    0b00000000,
};

byte[][] digitArray = new byte[][]{Zero, One, Two, Three, Four, Five, Six, Seven, Eight, Nine};

int clockTop = 5;
int clockLeft = 5;
int digitWidth = 10;
ConsoleColor clockcolor = ConsoleColor.Green;
int position = clockLeft;

Console.Clear();

DisplayDigits("12");
DrawDigit(Dots, position, clockTop, clockcolor);
position += digitWidth;
DisplayDigits("34");

Console.ResetColor();
Console.WriteLine();
Console.WriteLine("Finished drawing");

void DisplayDigits(string digits)
{
    foreach (var c in digits)
    {
        int n = int.Parse($"{c}");
        DrawDigit(digitArray[n], position, clockTop, clockcolor);
        position += digitWidth;
    }
}

void DrawDigit(byte[] digit, int X, int Y, ConsoleColor color)
{
    foreach (byte row in digit)
    {
        for (int bitPosition = 0; bitPosition < 8; bitPosition++)
        {
            var mark = (row & (128 >> bitPosition)) != 0;
            if (mark)
            {
                Draw(X + bitPosition, Y, color);
            }
        }
        Y++;
    }
}

static void Draw(int X, int Y, ConsoleColor Color)
{
    Console.SetCursorPosition(X, Y);
    Console.BackgroundColor = Color;
    Console.Write(" ");
}
Each of the digits are defined as a collection of bytes, then placed into an array named digitArray. The digitArray contains each digit at the offset of the number it represents. For example digitArray[0] contains the 0 digit byte array, and digitArray[9] contains the 9 digit byte array.
The DisplayDigits method takes a string and iterates through each character, converting it into an int named n. This is then used as the offset to the digitArray. This method does assume that the characters in the string are numbers that can be parsed as an int.
void DisplayDigits(string digits)
{
    foreach (var c in digits)
    {
        int n = int.Parse($"{c}");
        DrawDigit(digitArray[n], position, clockTop, clockcolor);
        position += digitWidth;
    }
}
Then the code that displays the digits can call the DisplayDigits method with a string of numbers. Notice that the Dots are not a number so need to be output using the array directly with DrawDigit(Dots, position, clockTop, clockcolor);.
DisplayDigits("12");
DrawDigit(Dots, position, clockTop, clockcolor);
position += digitWidth;
DisplayDigits("34");
In the Terminal window enter the dotnet run command again, to compile and run the application.
When the program runs, it will display the out 12:34
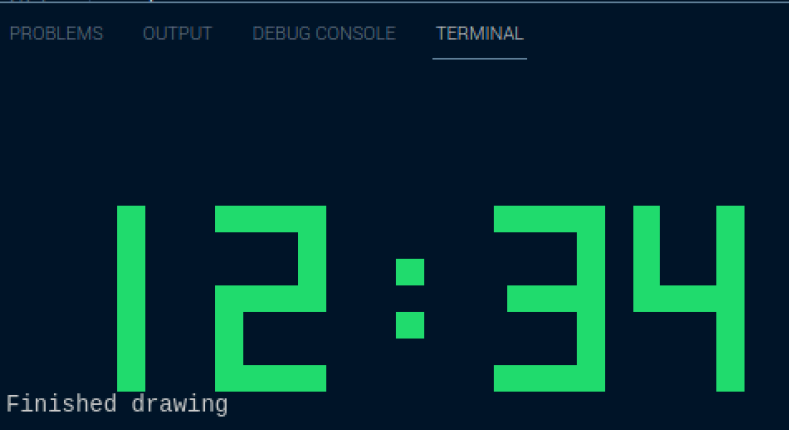
Getting the Time
All the code is now in place to get the time and display it. In the Console Animation a while loop was used to run the animation until, a key was pressed. The same code will be used here to update the clock every second, until a key is pressed. The code to display the digits is replaced with the while loop shown below.
The time is retrieved with DateTime time = DateTime.Now;. The hour can be retrieved from the time as a string, with leading zeros; string hour = time.Hour.ToString().PadLeft(2, '0');. The minute is retrieved in a similar way string minute = time.Minute.ToString().PadLeft(2, '0');.
With a string of digits, the DisplayDigits method, from the previous step, is used to display the time.
bool displayDots = false;
Console.CursorVisible = false;

while (Console.KeyAvailable is false)
{
    Console.Clear();
    position = clockLeft;
    DateTime time = DateTime.Now;

    string hour = time.Hour.ToString().PadLeft(2, '0');
    DisplayDigits(hour);

    if (displayDots)
    {
        DrawDigit(Dots, position, clockTop, clockcolor);
    }
    displayDots = !displayDots;
    position += digitWidth;

    string minute = time.Minute.ToString().PadLeft(2, '0');
    DisplayDigits(minute);

    Console.ResetColor();
    await Task.Delay(1000);
}
Console.CursorVisible = true;
The displayDots flag is used to determine if the the dots in the centre of the digits should be shown. This is alternated, between true and false, each time the code runs through the loop. This flashes the dots on and off.
At the end of each loop the task is delayed for 1000 milliseconds (or 1 second), before running the loop again.
if (displayDots)
{
    DrawDigit(Dots, position, clockTop, clockcolor);
}
displayDots = !displayDots;
Conclusions
The steps presented in this note extend from the Console Animations to display and update a clock in the console. This code can be used on any platform that supports .NET 6. While I did most of the development on a Raspberry Pi, you can do this on Windows OSX, or Linux.
The complete code listing for the console clock is below.
byte[] Zero = new byte[]
{
    0b11111111,
    0b11000011,
    0b11000011,
    0b11000011,
    0b11000011,
    0b11000011,
    0b11111111,
};

byte[] One = new byte[]
{
    0b00011000,
    0b00011000,
    0b00011000,
    0b00011000,
    0b00011000,
    0b00011000,
    0b00011000,
};

byte[] Two = new byte[]
{
    0b11111111,
    0b00000011,
    0b00000011,
    0b11111111,
    0b11000000,
    0b11000000,
    0b11111111,
};

byte[] Three = new byte[]
{
    0b11111111,
    0b00000011,
    0b00000011,
    0b01111111,
    0b00000011,
    0b00000011,
    0b11111111,
};

byte[] Four = new byte[]
{
    0b11000011,
    0b11000011,
    0b11000011,
    0b11111111,
    0b00000011,
    0b00000011,
    0b00000011,
};

byte[] Five = new byte[]
{
    0b11111111,
    0b11000000,
    0b11000000,
    0b11111111,
    0b00000011,
    0b00000011,
    0b11111111,
};

byte[] Six = new byte[]
{
    0b11111110,
    0b11000000,
    0b11000000,
    0b11111111,
    0b11000011,
    0b11000011,
    0b11111111,
};

byte[] Seven = new byte[]
{
    0b11111111,
    0b00000011,
    0b00000011,
    0b00000011,
    0b00000011,
    0b00000011,
    0b00000011,
};

byte[] Eight = new byte[]
{
    0b11111111,
    0b11000011,
    0b11000011,
    0b11111111,
    0b11000011,
    0b11000011,
    0b11111111,
};

byte[] Nine = new byte[]
{
    0b11111111,
    0b11000011,
    0b11000011,
    0b11111111,
    0b00000011,
    0b00000011,
    0b01111111,
};

byte[] Dots = new byte[]
{
    0b00000000,
    0b00000000,
    0b00011000,
    0b00000000,
    0b00011000,
    0b00000000,
    0b00000000,
};

byte[][] digitArray = new byte[][]{ Zero,One,Two,Three,Four,Five,Six,Seven,Eight,Nine };

int clockTop = 5;
int clockLeft = 5;
int digitWidth = 10;
ConsoleColor clockcolor = ConsoleColor.Green;
int position;

bool displayDots = false;
Console.CursorVisible = false;

while (Console.KeyAvailable is false)
{
    Console.Clear();
    position = clockLeft;
    DateTime time = DateTime.Now;

    string hour = time.Hour.ToString().PadLeft(2, '0');
    DisplayDigits(hour);

    if (displayDots)
    {
        DrawDigit(Dots, position, clockTop, clockcolor);
    }
    displayDots = !displayDots;
    position += digitWidth;

    string minute = time.Minute.ToString().PadLeft(2, '0');
    DisplayDigits(minute);

    Console.ResetColor();
    await Task.Delay(1000);
}
Console.CursorVisible = true;

Console.WriteLine();
Console.WriteLine("Finished drawing");

void DisplayDigits(string digits)
{
    foreach (var c in digits)
    {
        int n = int.Parse($"{c}");
        DrawDigit(digitArray[n], position, clockTop, clockcolor);
        position += digitWidth;
    }
}

void DrawDigit(byte[] digit, int X, int Y, ConsoleColor color)
{
    foreach (byte row in digit)
    {
        for (int bitPosition = 0; bitPosition < 8; bitPosition++)
        {
            var mark = (row & (128 >> bitPosition)) != 0;
            if (mark)
            {
                Draw(X + bitPosition, Y, color);
            }
        }
        Y++;
    }
}

static void Draw(int X, int Y, ConsoleColor Color)
{
    Console.SetCursorPosition(X, Y);
    Console.BackgroundColor = Color;
    Console.Write(" ");
}
Dr. Neil's Notes
Software > Coding
.NET Console Weather
Introduction
This exercise extends the .NET Console Clock to add the weather to the output. All the code in this note can run on any environment that supports .NET 6, that includes Microsoft Windows, Apple OSX, and Linux.
All the steps in this note assume the .NET Console Clock code exists, and adds to that code.
A video that accompanies this Note can be found here
Connect to OpenWeather
To obtain the weather for a location the OpenWeather service is used. To call the OpenWeather service a key is required. To obtain a key create an account on the OpenWeather site. On the site is a section API Keys, where you can manage and create keys. Keep the key handy, it is needed to complete this exercise.
Open the .csproj file in the project, this defines how the code is built. Add an ItemGroup element with the PackageReference to Weather.NET. The Weather.NET package contains code to make it simpler to get weather information from the OpenWeather service.
The project (.csproj) file should look like this:
<Project Sdk="Microsoft.NET.Sdk">

  <PropertyGroup>
    <OutputType>Exe</OutputType>
    <TargetFramework>net6.0</TargetFramework>
    <ImplicitUsings>enable</ImplicitUsings>
    <Nullable>enable</Nullable>
  </PropertyGroup>

   <ItemGroup>
    <PackageReference Include="Weather.NET" Version="1.1.0" />
  </ItemGroup>
</Project>
Add OpenWeather API key
It is good practice to keep API keys separated from the code, often this is done in a configuration file that can be updated independently from the code. For this exercise, to keep it simple, the key will be stored in a different file.
In the folder containing the project add a new code file named Keys.cs. In this file create a class to store Keys, as follows:
internal static class Keys
{
    internal const string OpenWeather = "your key goes here";
}
Create a Celsius (or Fahrenheit) symbol
To display the temperature it is good to display the unit of measurement, helping to know if this is a temperature and which units are being used. In this exercise the temperature is being retrieved in Celsius.
After the other symbols, in the Program.cs code file, add a byte array for a Celsius symbol, like this:
byte[] Celsius = new byte[]{
        0b01000000,
        0b10100000,
        0b01000000,
        0b00001111,
        0b00011000,
        0b00011000,
        0b00001111,
    };
Display the weather
At the top of the Program.cs code file add the following using statements. These make it simpler to call the code in the Weather.NET package previously included.
using Weather.NET;
using Weather.NET.Enums;
using Weather.NET.Models.WeatherModel;
A using statement provides the compiler with information about the namespaces in which to find the code classes used in the file.
To retrieve the weather a WeatherClient object is created with the key that was defined earlier in the exercise. Then the current weather is retrieved for a city, in a measurement unit.
If you would prefer to use Fahrenheit, then set that as the metric unit. Replace city ("Sydney, NSW" in this example) with the city for which you want to display the weather.
This code should go above the while loop that renders the clock.
WeatherClient client = new WeatherClient(Keys.OpenWeather);
WeatherModel currentWeather = client.GetCurrentWeather(cityName: "Sydney, NSW", measurement: Measurement.Metric);
To display the weather next to the clock add the following code inside the loop, after displaying the minutes for the clock.
The code moves the cursor position to the right of the last minute digit and uses Console.Write to display the city and the title of the weather.
Then the position is incremented and the temperature converted to an integer, as string, and displayed using the same DisplayDigits method as the hours and minutes in the clock.
After the temperature digits the Celsius symbol is drawn.
Console.ResetColor();
Console.ForegroundColor = clockcolor;
position += digitWidth;
Console.SetCursorPosition(position, clockTop);
Console.Write($"{currentWeather.CityName}");
Console.SetCursorPosition(position, clockTop+6);
Console.Write($"{currentWeather.Weather[0].Title}");
position += digitWidth;
DisplayDigits(((int)currentWeather.Main.Temperature).ToString());
// draw the celsius symbol
DrawDigit(Celsius, position, clockTop, clockcolor);
To run the code type dotnet run in the terminal and the following is an example of the output.

Update the weather
The code in the previous steps gets the weather once and displays that weather while the program is running. It would be better if the weather was updated every few minutes. The code below updates the weather once a minute, however that is probably more than is needed, once every five minutes would be fine.
    const string weatherCity = "Sydney, NSW";
    const int checkWeatherPeriod = 60;
    int currentPeriodSeconds = 0;
    WeatherClient client = new WeatherClient(Keys.OpenWeather);
    WeatherModel currentWeather = client.GetCurrentWeather(cityName: weatherCity, measurement: Measurement.Metric);

    while(Console.KeyAvailable is false)
    {
        Console.Clear();
        position = clockLeft;
        DateTime time = DateTime.Now;
        string hour = time.Hour.ToString().PadLeft(2, '0');
        DisplayDigits(hour);

        if (displayDots)
        {
            DrawDigit(Dots, position, clockTop, clockcolor);
        }

        displayDots = !displayDots;
        position += digitWidth;

        string minute = time.Minute.ToString().PadLeft(2, '0');
        DisplayDigits(minute);

        if (currentPeriodSeconds > checkWeatherPeriod)
        {
            currentWeather = client.GetCurrentWeather(cityName: weatherCity, measurement: Measurement.Metric);
            currentPeriodSeconds = 0;
        }
        currentPeriodSeconds++;

        Console.ResetColor();
        Console.ForegroundColor = clockcolor;
        position += digitWidth;
        Console.SetCursorPosition(position, clockTop);
        Console.Write($"{currentWeather.CityName}");
        Console.SetCursorPosition(position, clockTop+6);
        Console.Write($"{currentWeather.Weather[0].Title}");
        position += digitWidth;
        DisplayDigits(((int)currentWeather.Main.Temperature).ToString());
        // draw te celsius symbol
        DrawDigit(Celsius, position, clockTop, clockcolor);

        Console.ResetColor();
        await Task.Delay(1000);
    }
Before the while loop is started some variables are declared to support the weather being updated.
    const string weatherCity = "Sydney, NSW";
    const int checkWeatherPeriod = 60;
    int currentPeriodSeconds = 0;
The city is defined as a constant string (const means it will not be changed while the program is running).
The checkWeatherPeriod is set to 60, meaning the code should check the weather every 60 seconds. To change the code to check every five minutes, edit the line to const int checkWeatherPeriod = 5 * 60;
The currentPeriodSeconds is used to count up to the checkWeatherPeriod.
Inside the while loop the weather is retrieved every checkWeatherPeriod by the following code
    if (currentPeriodSeconds > checkWeatherPeriod)
    {
        currentWeather = client.GetCurrentWeather(cityName: weatherCity, measurement: Measurement.Metric);
        currentPeriodSeconds = 0;
    }
    currentPeriodSeconds++;
When the currentPeriodSeconds is greater than the checkWeatherPeriod, the latest weather is retrieved, and the currentPeriodSeconds is reset to 0.
The code currentPeriodSeconds++; increments the currentPeriodSeconds by 1.
The timing is not going to be exact using this technique, using the time it takes to run the while loop (including the Task.Delay), is not going to be exactly 1 second, so the weather will update approximately every checkWeatherPeriod seconds.
Splitting up the code
The code in the Program.cs file is getting longer as it is being added to. When building software it is a good practice to keep looking for ways to simplify the code, and break out code that has a specific purpose into a separate code file. This was done with the Keys.cs to manage the API key for the weather service. IT could also be done for the bytes representing all the characters being displayed. In the same folder as the Program.cs file, create a new file called Chars.cs, in this file we will create a static class that holds all the character byte arrays representing the digits and symbols being displayed.
internal static class Chars
{
    internal static byte[] Zero = new byte[]{
        0b11111111,
        0b11000011,
        0b11000011,
        0b11000011,
        0b11000011,
        0b11000011,
        0b11111111,
    };

    internal static byte[] One = new byte[]{
        0b00011000,
        0b00011000,
        0b00011000,
        0b00011000,
        0b00011000,
        0b00011000,
        0b00011000,
    };

    internal static byte[] Two = new byte[]{
        0b11111111,
        0b00000011,
        0b00000011,
        0b11111111,
        0b11000000,
        0b11000000,
        0b11111111,
    };

    internal static byte[] Three = new byte[]{
        0b11111111,
        0b00000011,
        0b00000011,
        0b01111111,
        0b00000011,
        0b00000011,
        0b11111111,
    };

    internal static byte[] Four = new byte[]{
        0b11000011,
        0b11000011,
        0b11000011,
        0b11111111,
        0b00000011,
        0b00000011,
        0b00000011,
    };

    internal static byte[] Five = new byte[]{
        0b11111111,
        0b11000000,
        0b11000000,
        0b11111111,
        0b00000011,
        0b00000011,
        0b11111111,
    };

    internal static byte[] Six = new byte[]{
        0b11111110,
        0b11000000,
        0b11000000,
        0b11111111,
        0b11000011,
        0b11000011,
        0b11111111,
    };

    internal static byte[] Seven = new byte[]{
        0b11111111,
        0b00000011,
        0b00000011,
        0b00000011,
        0b00000011,
        0b00000011,
        0b00000011,
    };

    internal static byte[] Eight = new byte[]{
        0b11111111,
        0b11000011,
        0b11000011,
        0b11111111,
        0b11000011,
        0b11000011,
        0b11111111,
    };

    internal static byte[] Nine = new byte[]{
        0b11111111,
        0b11000011,
        0b11000011,
        0b11111111,
        0b00000011,
        0b00000011,
        0b01111111,
    };

    internal static byte[] Dots = new byte[]{
        0b00000000,
        0b00000000,
        0b00011000,
        0b00000000,
        0b00011000,
        0b00000000,
        0b00000000,
    };

    internal static byte[] Celsius = new byte[]{
        0b01000000,
        0b10100000,
        0b01000000,
        0b00001111,
        0b00011000,
        0b00011000,
        0b00001111,
    };

    internal static byte[][] DigitArray = new byte[][]{Zero, One, Two, Three, Four, Five, Six, Seven, Eight, Nine};
}
Creating the class and variables as internal tells the compiler that this code will only be used inside this program, and not used by other programs.
The static keyword is used to indicate that this program should only ever create one instance of the class, and variables. That one instance will be shared by all the code in this program.
All the references to the chars in the Program.cs file will need to be updated to use the Chars class.
For example:
 DrawDigit(Chars.Dots, position, clockTop, clockcolor);
````
and in the `DisplayDigit` method

```cs
DrawDigit(Chars.DigitArray[n], position, clockTop, clockcolor);
Conclusions
In this note the code to add the weather to the .NET Console Clock has been developed and explained. This code has been tested on a Windows PC, Apple Mac, and Raspberry Pi. It should run anywhere that .NET 6.0 can run.
Complete Code Listing
The project file
<Project Sdk="Microsoft.NET.Sdk">

  <PropertyGroup>
    <OutputType>Exe</OutputType>
    <TargetFramework>net6.0</TargetFramework>
    <ImplicitUsings>enable</ImplicitUsings>
    <Nullable>enable</Nullable>
  </PropertyGroup>

   <ItemGroup>
    <PackageReference Include="Weather.NET" Version="1.1.0" />
  </ItemGroup>
</Project>
The Program.cs file
using Weather.NET;
using Weather.NET.Enums;
using Weather.NET.Models.WeatherModel;

Console.CursorVisible = false;
Console.Title = "Console Clock";
int clockTop = 5;
int clockLeft = 5;
int digitWidth = 10;

ConsoleColor clockcolor = ConsoleColor.Green;
bool displayDots = false;
int position = clockLeft;
const int checkWeatherPeriod = 60;
int currentPeriodSeconds = 0;
const string weatherCity = "Sydney, NSW";
WeatherClient client = new WeatherClient(Keys.OpenWeather);
WeatherModel currentWeather = client.GetCurrentWeather(cityName: weatherCity, measurement: Measurement.Metric);

while (Console.KeyAvailable is false)
{
    Console.Clear();
    position = clockLeft;
    DateTime time = DateTime.Now;
    string hour = time.Hour.ToString().PadLeft(2, '0');
    DisplayDigits(hour);

    if (displayDots)
    {
        DrawDigit(Chars.Dots, position, clockTop, clockcolor);
    }

    displayDots = !displayDots;
    position += digitWidth;

    string minute = time.Minute.ToString().PadLeft(2, '0');
    DisplayDigits(minute);

    if (currentPeriodSeconds > checkWeatherPeriod)
    {
        currentWeather = client.GetCurrentWeather(cityName: weatherCity, measurement: Measurement.Metric);
        currentPeriodSeconds = 0;
    }
    currentPeriodSeconds++;

    Console.ResetColor();
    Console.ForegroundColor = clockcolor;
    position += digitWidth;
    Console.SetCursorPosition(position, clockTop);
    Console.Write($"{currentWeather.CityName}");
    Console.SetCursorPosition(position, clockTop + 6);
    Console.Write($"{currentWeather.Weather[0].Title}");
    position += digitWidth;
    DisplayDigits(((int)currentWeather.Main.Temperature).ToString());
    DrawDigit(Chars.Celsius, position, clockTop, clockcolor);

    Console.ResetColor();
    await Task.Delay(1000);
}

Console.CursorVisible = true;

Console.WriteLine();
Console.WriteLine("Thank you for using the console clock");

void DisplayDigits(string digits)
{
    foreach (var c in digits)
    {
        int n = int.Parse($"{c}");
        DrawDigit(Chars.DigitArray[n], position, clockTop, clockcolor);
        position += digitWidth;
    }
}

void DrawDigit(byte[] digit, int X, int Y, ConsoleColor color)
{
    foreach (byte row in digit)
    {
        for (int bitPosition = 0; bitPosition < 8; bitPosition++)
        {
            var mark = (row & (1 << bitPosition)) != 0;
            if (mark)
            {
                Draw(X + 8 - bitPosition, Y, color);
            }
        }
        Y++;
    }
}

static void Draw(int X, int Y, ConsoleColor Color)
{
    Console.SetCursorPosition(X, Y);
    Console.BackgroundColor = Color;
    Console.Write(" ");
}
The Keys.cs file, remember to put your API key in the string.
internal static class Keys
{
    internal const string OpenWeather = "Your key goes here ";
}
Note: The complete Chars.cs file is shown in the step earlier.
Dr. Neil's Notes
Software > Coding
.NET Camera on a Raspberry Pi
Introduction
After getting .NET 6 and Visual Studio Code running on a Raspberry Pi, I wrote some simple .NET 6 console code. The .NET Console Animations, .NET Console Clock, and .NET Console Weather projects are all able to run on a Raspberry Pi, and will work on any other platform that can run .NET 6.
In this Note, .NET 6 is used to control a camera attached to the Raspberry Pi. This uses an older Raspberry Pi 3 Model B Plus, along with the Raspberry Pi camera kit.
If you want to get a Raspberry Pi setup to run .NET code, follow the instructions in the .NET Development on a Raspberry Pi Note.
This Note assumes you have installed .NET 6 and Visual Studio Code on a Raspberry Pi. This code will run on a Raspberry Pi, and possibly some of the other IoT devices supported by .NET 6. It has only been tested on a Raspberry Pi.
A video that accompanies this Note can be found here
Setting Up the Camera
In order to use the camera on a Raspberry Pi, the camera interface needs to be enabled.
In a terminal (SSH or the Terminal on the Raspberry Pi) run the sudo raspi-config command to configure the camera.
Select the Interface Options and click the enter key
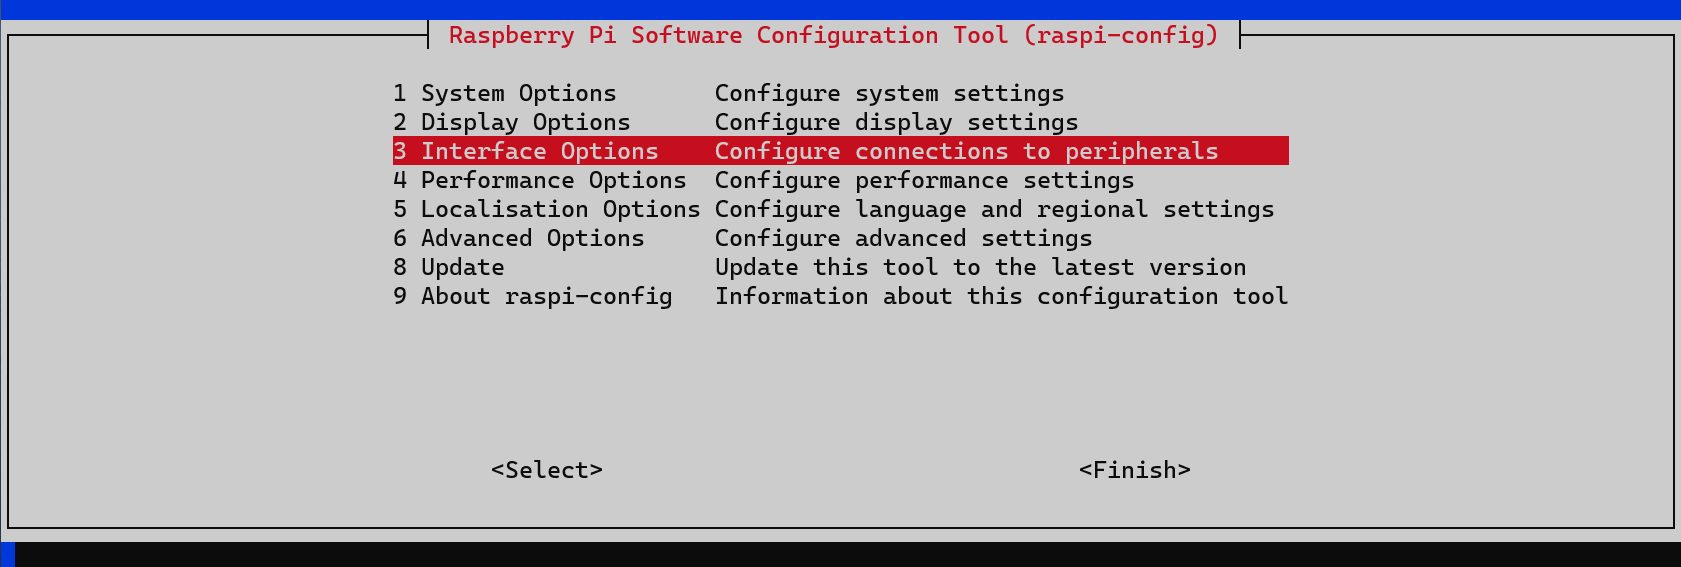
Select the Legacy Camera option, and press enter.

Select Yes (using the arrow keys), and press enter
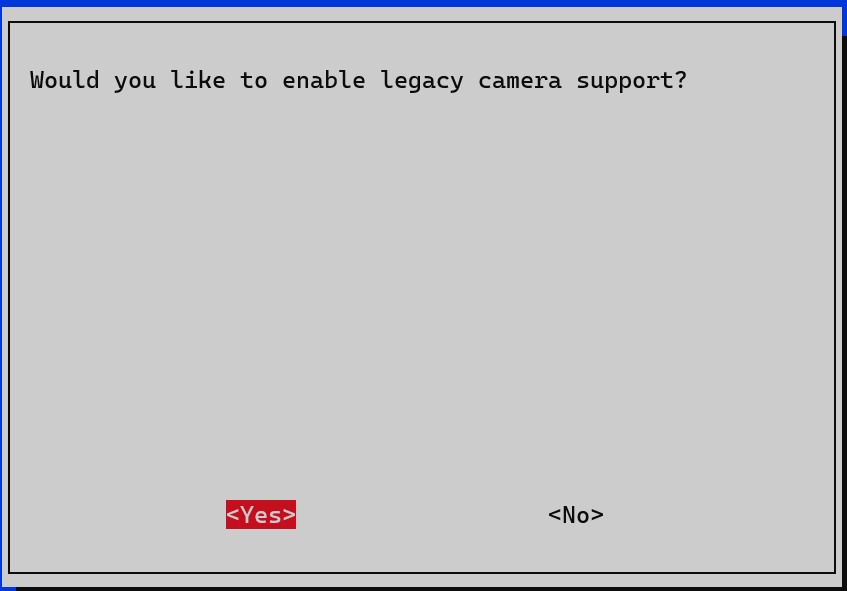
Allow this feature, even if it is reported as deprecated. Then exit and, if required, reboot the Raspberry Pi.
Return to the Raspberry Pi Terminal (either SSH or the Terminal on the Raspberry Pi), and enter the following two commands to install the libraries required to communicate with the camera.
sudo apt-get install v4l-utils

sudo apt-get install libc6-dev libgdiplus libx11-dev
Create a new project
If there is not already a folder on the Raspberry Pi for code projects, create a folder for code projects. I created a folder called dev. Open a Terminal session and navigate to the folder where you want to create the new folder (eg Documents) and enter
mkdir dev
This makes the directory dev
Navigate to that directory
cd dev
then open Visual Studio Code. Note the 'dot' after the code, this tells Visual Studio Code to open the current folder.
code .
The terminal entries should look something like this:
~ $ cd Documents/
~/Documents $ mkdir dev
~/Documents $ cd dev/
~/Documents/dev $ code .
~/Documents/dev $
In Visual Studio Code create a new folder in the code (dev) folder, call it dotnetPiCam
Make sure you have the Explorer open (Ctrl+Shift+E), then click the New Folder icon, and name the new folder dotnetPiCam

Open the Terminal window in Visual Studio Code, you can use the menu to select Terminal - New Terminal or press Ctrl+Shift+`
The Terminal will open along the bottom of the Visual Studio Code window and it will open in the folder you have opened with Visual Studio Code. In this case it will be the dev folder.
Change the directory to the new folder just created.
cd dotnetPiCam/
To create the .NET 6 console application use the command
dotnet new console
The default name of the new project is the name of the folder in which the project is being created.
The output should look like this.
~/Documents/dev/dotnetPiCam $ dotnet new console
The template "Console App" was created successfully.

Processing post-creation actions...
Running 'dotnet restore' on /home/pi/Documents/dev/dotnetPiCam/dotnetPiCam.csproj...
  Determining projects to restore...
  Restored /home/pi/Documents/dev/dotnetPiCam/dotnetPiCam.csproj (in 590 ms).
Restore succeeded.
Also notice that files have been created in the Explorer view of Visual Studio Code
Run the new application from the Terminal window in Visual Studio Code with
dotnet run
This dotnet run command will compile the project code in the current folder and run it.
~/Documents/dev/dotnetPiCam $ dotnet run
Hello, World!
It does not do much yet, other than output Hello, World!
Get supported camera options
The initial step is to validate the code can connect to the camera attached to the Raspberry Pi and get the capabilites of the camera. In Visual Studio Code open the project file, dotnetPiCam.csproj
Add project references to the dotnet IoT libraries to a new ItemGroup as shown here
<Project Sdk="Microsoft.NET.Sdk">
   <PropertyGroup>
      <OutputType>Exe</OutputType>
      <TargetFramework>net6.0</TargetFramework>
      <ImplicitUsings>enable</ImplicitUsings>
      <Nullable>enable</Nullable>
   </PropertyGroup>
   <ItemGroup>
      <PackageReference Include="System.Device.Gpio" Version="2.0.0" />
      <PackageReference Include="Iot.Device.Bindings" Version="2.0.0" />
   </ItemGroup>
</Project>
Open the Program.cs code file and replace the existing two lines with the following code.
This code will output the list of supported formats and resolutions for the camera.
using Iot.Device.Media;

Console.WriteLine("Getting information about your camera...");

VideoConnectionSettings settings = new VideoConnectionSettings(busId: 0, captureSize: (2592, 1944), pixelFormat: PixelFormat.JPEG);

using VideoDevice device = VideoDevice.Create(settings);

IEnumerable<PixelFormat> formats = device.GetSupportedPixelFormats();

foreach (var format in formats)
{
    Console.WriteLine($"Pixel Format {format}");
    IEnumerable<Resolution> resolutions = device.GetPixelFormatResolutions(format);
    if (resolutions is not null)
    {
        foreach (var res in resolutions)
        {
            Console.WriteLine($"   min res: {res.MinWidth} x {res.MinHeight} ");
            Console.WriteLine($"   max res: {res.MaxWidth} x {res.MaxHeight} ");
        }
    }
}
Save the two edited files.
In the Terminal window, enter the dotnet run command to compile and run the application.
When this program is run in the terminal with dotnet run, the result is a list of the formats, and resolutions for each format, supported by the camera attached to the Raspberry Pi.
If the list looks a lot shorter than this (it only has 2 or 3 items) it is possible the 'Legacy Camera' option has not been set correctly, check the previous step.
~/Documents/dev/dotnetIoT $ dotnet run
Getting information about your camera...
Pixel Format YUV420
   min res: 32 x 32
   max res: 2592 x 1944
Pixel Format YUYV
   min res: 32 x 32
   max res: 2592 x 1944
Pixel Format RGB24
   min res: 32 x 32
   max res: 2592 x 1944
Pixel Format JPEG
   min res: 32 x 32
   max res: 2592 x 1944
Pixel Format H264
   min res: 32 x 32
   max res: 2592 x 1944
Pixel Format MJPEG
   min res: 32 x 32
   max res: 2592 x 1944
Pixel Format YVYU
   min res: 32 x 32
   max res: 2592 x 1944
Pixel Format VYUY
   min res: 32 x 32
   max res: 2592 x 1944
Pixel Format UYVY
   min res: 32 x 32
   max res: 2592 x 1944
Pixel Format NV12
   min res: 32 x 32
   max res: 2592 x 1944
Pixel Format BGR24
   min res: 32 x 32
   max res: 2592 x 1944
Pixel Format YVU420
   min res: 32 x 32
   max res: 2592 x 1944
Pixel Format NV21
   min res: 32 x 32
   max res: 2592 x 1944
Pixel Format BGRX32
   min res: 32 x 32
   max res: 2592 x 1944
This code creates a new VideoDevice object, for a specific size and format, however that is not yet used. The setting that is used is the busId, which is set to 0. Computer hardware communicates with other hardware using physical connections, these connections are known as Buses, the default Bus for the Raspberry Pi camera is Bus number 0.
By adding the using at the start of the line that creates the VideoDevice, the device object created, and any resources it uses, will be correctly cleaned up when the device variable goes out of scope. In this case the device variable goes out of scope when the program finishes.
VideoConnectionSettings settings = new VideoConnectionSettings(busId: 0, captureSize: (2592, 1944), pixelFormat: PixelFormat.JPEG);

using VideoDevice device = VideoDevice.Create(settings);
With a VideoDevice object created and stored in the device variable, the device variable can be queried for the formats supported on that camera, with the GetDevicePixelFormats method. This method returns a collection of PixelFormat objects.
An IEnumerable is any object that supports the IEnumerable interface, it might be a List or an Array, the implementation is not important, by supporting IEnumerable the collection can be enumerated, meaning that foreach loop can be used to walk through each item in the collection.
IEnumerable<PixelFormat> formats = device.GetSupportedPixelFormats();
For each of the PixelFormat types supported by the camera, there could be multiple resolutions available. Calling the GetPixelFormatResolutions method with the PixelFormat provides a collection of Resolution objects. This collection of Resolution objects can also be enumerated with the minimum and maximum resolutions output to the terminal.
IEnumerable<Resolution> resolutions = device.GetPixelFormatResolutions(format);
Capture an image
With the knowledge that the camera is connected, and can be addressed from the code, it is now possible to capture an image from the camera.
Edit the code in the Program.cs code file, remove the code that retrieves of the formats and resolutions, and instead use the camera to capture an image, and save it to the Pictures folder on the Raspberry Pi.
The code in the Program.cs file should now look like this.
using Iot.Device.Media;

VideoConnectionSettings settings = new VideoConnectionSettings(busId: 0, captureSize: (2592, 1944), pixelFormat: PixelFormat.JPEG);

using VideoDevice device = VideoDevice.Create(settings);

Console.WriteLine("Smile, you are on camera");
device.Capture("/home/pi/Pictures/capture.jpg");
Save the Program.cs file, and in the Terminal window, enter the dotnet run command again, to compile and run the application.
When this program is run in the terminal with dotnet run, a picture should be captured from the camera. Look in the Pictures folder (assuming the currently logged in user is pi) and the capture.jpg file should be there, open it to see the picture taken.
This picture captured uses the settings provided in the in VideoConnectionSettings, meaning it should be a JPEG with a resolution of 2592 x 1944.
The code to capture a single image from the camera is as simple as this device.Capture("/home/pi/Pictures/capture.jpg");.
NOTE: depending on the camera attached to the Raspberry Pi different resolutions and formats might be available. This is why the previous step is important. If this code is not working, check the format and resolution is supported by the camera. If the format and resolution is not supported, pick a format and resolution that is supported.
Capture video frames
Capturing a single picture can be useful, however sometimes the requirement is to capture a video. A video is a set of image frames captured in rapid succession.
To understand how to capture a video file with the Raspberry Pi camera, this step will capture image frames while the camera is capturing.
In the Pictures folder on the Raspberry Pi, create a new Frames folder. Any other folder could also be used, this seemed like the obvious place to store captured images from the camera.
mkdir /home/pi/Pictures/Frames
Then edit the Program.cs code file to start a continuous capture until a key is pressed on the keyboard.
NOTE: the VideoSettings has been changed to reduce the captureSize to 640 x 480. This reduces the size of the frames captured, which is faster, and uses less storage space.
using Iot.Device.Media;

VideoConnectionSettings settings = new VideoConnectionSettings(busId: 0, captureSize: (640, 480), pixelFormat: PixelFormat.JPEG);

int frame = 0;

using VideoDevice device = VideoDevice.Create(settings);

device.NewImageBufferReady += NewImageBufferReadyEventHandler;

device.StartCaptureContinuous();

CancellationTokenSource tokenSource = new CancellationTokenSource();

new Thread(() => { device.CaptureContinuous(tokenSource.Token); }).Start();

Console.WriteLine("Capturing video, press any key to stop");

while (!Console.KeyAvailable)
{
    Thread.SpinWait(1);
}

tokenSource.Cancel();
device.StopCaptureContinuous();

void NewImageBufferReadyEventHandler(object sender, NewImageBufferReadyEventArgs e)
{
    try
    {
        File.WriteAllBytes($"/home/pi/Pictures/Frames/frame{frame}.jpg", e.ImageBuffer);
        frame++;
        Console.Write(".");
    }
    catch (ObjectDisposedException)
    {
        // ignore this as its thrown when the stream is stopped
    }
}
Save the Program.cs file, and in the Terminal window, enter the dotnet run command again to compile and run the application.
When this program is run in the terminal with dotnet run, the program starts capturing image frames and saving them in the Frames folder created in the Pictures folder. Do not leave this running for too long as it will fill up the storage with images quickly. Run for a couple of seconds and then click a key on the keyboard to stop the program.
As noted above the settings are changed to reduce the size of the frames captured.
VideoConnectionSettings settings = new VideoConnectionSettings(busId: 0, captureSize: (640, 480), pixelFormat: PixelFormat.JPEG);
A integer variable is created to count the number of frames saved, this frame variable is used to name the frame image files.
int frame = 0;
Whenever the camera has an image ready to be processed, in this case saved, an event called NewImageBufferReady is raised. This code adds a method to be called by the event. The NewImageBufferReadyEventHandler method code will be explained later in this step.
device.NewImageBufferReady += NewImageBufferReadyEventHandler;
The next three lines of code prepare the camera device to start capturing a continuous set of images.
The CancellationTokenSource object is a way to signal to the thread capturing the images that it should stop.
A Thread is a mechanism in software to provide the illusion of more than a single stream of activity happening at the same time. In some hardware this might actually happen at the same time, in other hardware, the processing time is shared between the threads.
device.StartCaptureContinuous();
CancellationTokenSource tokenSource = new CancellationTokenSource();
new Thread(() => { device.CaptureContinuous(tokenSource.Token); }).Start();
The program then waits for a keyboard key to be pressed, before doing any other work.
while (!Console.KeyAvailable)
{
    Thread.SpinWait(1);
}
Once a key press has been detected, the CancellationTokenSource is used to cancel (or stop) the thread running the CaptureContinuous on the camera.
Then the camera device is instructed to stop the continuous capture.
tokenSource.Cancel();
device.StopCaptureContinuous();
At the end of the code file is the method that gets called each time a new image is available from the camera, on the NewImageBufferReady event.
This writes all the bytes in the image to a file, using the frame variable to name the file. The frame variable is incremented by 1, and a . is written to the output.
void NewImageBufferReadyEventHandler(object sender, NewImageBufferReadyEventArgs e)
{
    try
    {
        File.WriteAllBytes($"/home/pi/Pictures/Frames/frame{frame}.jpg", e.ImageBuffer);
        frame++;
        Console.Write(".");
    }
    catch (ObjectDisposedException)
    {
        // ignore this as its thrown when the stream is stopped
    }
}
It is a good practice for software to notify the person using it that something is happening, outputting the . characters on a line might not be as flashy as a progress bar, however it notifies you that the program is running and capturing images.
~/Documents/dev/dotnetPiCam $ dotnet run
Capturing video, press any key to stop
....................................................
The try and catch blocks of code are used to help the software handle unexpected scenarios, called exceptions. When code does something unexpected an exception is thrown, sometimes by the code, sometimes by the .NET runtime. In code this exception can be 'caught' and handled in a way that does not stop the program running. In this case the 'exception' being caught is being ignored as it is a known issue that when the camera capture stream is stopped it can throw an ObjectDisposedException. The ObjectDisposedException means the code is attempting to use an object that has already been destroy, or disposed.
Saving a video file
Most of the code is now in place to save a video. In the list of supported PixelFormat types should be PixelFormat.H264, this is a video format. Changing the VideoConnectionSettings.PixelFormat to PixelFormat.H264 provides a video stream to the NewImageBufferReadyEventHandler method shown in the previous step.
Edit the code in the Program.cs file as follows.
using Iot.Device.Media;

VideoConnectionSettings settings = new VideoConnectionSettings(busId: 0, captureSize: (640, 480), pixelFormat: PixelFormat.H264);

using VideoDevice device = VideoDevice.Create(settings);

using FileStream fileStream = File.Create("/home/pi/Videos/capture.H264");

device.NewImageBufferReady += NewImageBufferReadyEventHandler;

device.StartCaptureContinuous();

CancellationTokenSource tokenSource = new CancellationTokenSource();

new Thread(() => { device.CaptureContinuous(tokenSource.Token); }).Start();

Console.WriteLine("Capturing video, press any key to stop");
while (!Console.KeyAvailable)
{
    Thread.SpinWait(1);
}

tokenSource.Cancel();
device.StopCaptureContinuous();

async void NewImageBufferReadyEventHandler(object sender, NewImageBufferReadyEventArgs e)
{
    try
    {
        await fileStream.WriteAsync(e.ImageBuffer, 0, e.Length);
        Console.Write(".");
    }
    catch (ObjectDisposedException)
    {
        // ignore this as its thrown when the stream is stopped
    }
}
dotnet run command again to compile and run the application.
When this program is run in the terminal with dotnet run, the program starts capturing video and saving the video in the Videos folder. Again, do not leave this running for too long as it will fill up the storage with the video. Run for a few seconds and then click a key on the keyboard to stop the program.
In the /home/pi/Videos/ folder should be a file named capture.H264, this can played on a Raspberry Pi with an application like the VLC Media Player (which ships by default with most Raspbian distributions).
As mentioned above the settings used to create the VideoDevice have changed to use the PixelFormat.H264 format.
VideoConnectionSettings settings = new VideoConnectionSettings(busId: 0, captureSize: (640, 480), pixelFormat: PixelFormat.H264);
A file to store the video is created, and the returned FileStream instance stored in the fileStream variable. As with the VideoDevice the using keyword is at the start of the line. The using ensures any resources consumed by the FileStream are cleaned up when the program finishes.
NOTE: make sure on the Raspberry Pi the folder at this path /home/pi/Videos does exist. If not then change this path to a location of a folder that does exist to store the captured video.
using FileStream fileStream = File.Create("/home/pi/Videos/capture.H264");
In the NewImageBufferReadyEventHandler method the code saving the images has been replaced by code to write the ImageBuffer to the fileStream object. The ImageBuffer is a byte array containing the video from the camera encoded as H.264.
await fileStream.WriteAsync(e.ImageBuffer, 0, e.Length);
Conclusions
In this Note the IoT.Device.Bindings library has been used to capture images and video on a Raspberry Pi, with a camera kit attached. The IoT.Device.Bindings library provides a set of wrapper classes, and types, that make coding to support the camera, and other, devices simple. The System.Device.Gpio library is used by the IoT.Device.Bindings library to access the lower level protocols supported by many IoT devices.
This code was all written and tested on a Raspberry Pi 3 Model B Plus, attached to a Raspberry Pi camera kit.
Dr. Neil's Notes
Software > Coding
.NET Web Server on Raspberry Pi
Introduction
In previous Notes I have documented how to get a Raspberry Pi setup to develop with .NET, a few simple console programs that Animate ASCII art, display a clock, and display the weather. Most recently how to use the camera on a Raspberry Pi from simple .NET code.
In this Note I explain how to use .NET to create a simple web server on a Raspberry Pi.
The objective is to display a video on a web site hosted by the Raspberry Pi.
The code shown in this Note will work on any platform supported by .NET 6 (Windows, Mac, Linux). If you want to get a Raspberry Pi setup to run .NET code, follow the instructions in the .NET Development on a Raspberry Pi document. This document assumes you have installed .NET 6 and Visual Studio Code. This code will run on a Mac, Windows, Linux, and has been tested on a Raspberry Pi.
Create a new project
If there is not already a folder for code projects, create a folder for code projects. I created a folder called dev. Open a Terminal session and navigate to the folder where you want to create the new folder (eg Documents) and enter
mkdir dev
This makes the directory dev
Navigate to that directory
cd dev
then open Visual Studio Code. Note the 'dot' after the code, this tells Visual Studio Code to open the current folder.
code .
The terminal entries should look something like this:
~ $ cd Documents/
~/Documents $ mkdir dev
~/Documents $ cd dev/
~/Documents/dev $ code .
~/Documents/dev $
In Visual Studio Code create a new folder in the code (dev) folder, call it dotnetPiServer
Make sure you have the Explorer open (Ctrl+Shift+E), then click the New Folder icon, and name the new folder dotnetPiServer

Open the Terminal window in Visual Studio Code, you can use the menu to select Terminal - New Terminal or press Ctrl+Shift+`
The Terminal will open along the bottom of the Visual Studio Code window, and it will open in the folder you have opened with Visual Studio Code. In this case it will be the dev folder.
Change the directory to the new folder just created.
cd dotnetPiServer/
To create the .NET 6 web application use the command
dotnet new web
The default name of the new project is the name of the folder in which the project is being created.
The output should look like this.
~/Documents/dev $ cd dotnetPiServer/
~/Documents/dev/dotnetPiServer $ dotnet new web
The template "ASP.NET Core Empty" was created successfully.

Processing post-creation actions...
Running 'dotnet restore' on /home/pi/Documents/dev/dotnetPiServer/dotnetPiServer.csproj...
  Determining projects to restore...
  Restored /home/pi/Documents/dev/dotnetPiServer/dotnetPiServer.csproj (in 600 ms).
Restore succeeded.
Also notice that the files created are now shown in the Explorer view of Visual Studio Code
Run the new application from the Terminal window in Visual Studio Code with
dotnet run
This dotnet run command will compile the project code in the current folder and run it.
:~/Documents/dev/dotnetPiServer $ dotnet run
Building...
info: Microsoft.Hosting.Lifetime[14]
      Now listening on: https://localhost:7020
info: Microsoft.Hosting.Lifetime[14]
      Now listening on: http://localhost:5095
info: Microsoft.Hosting.Lifetime[0]
      Application started. Press Ctrl+C to shut down.
info: Microsoft.Hosting.Lifetime[0]
      Hosting environment: Development
info: Microsoft.Hosting.Lifetime[0]
      Content root path: /home/pi/Documents/dev/dotnetPiServer/
It does not do much yet, other than output Hello, World! on a web page.
Open a browser on your local device, (in my case a Raspberry Pi with Chromium)
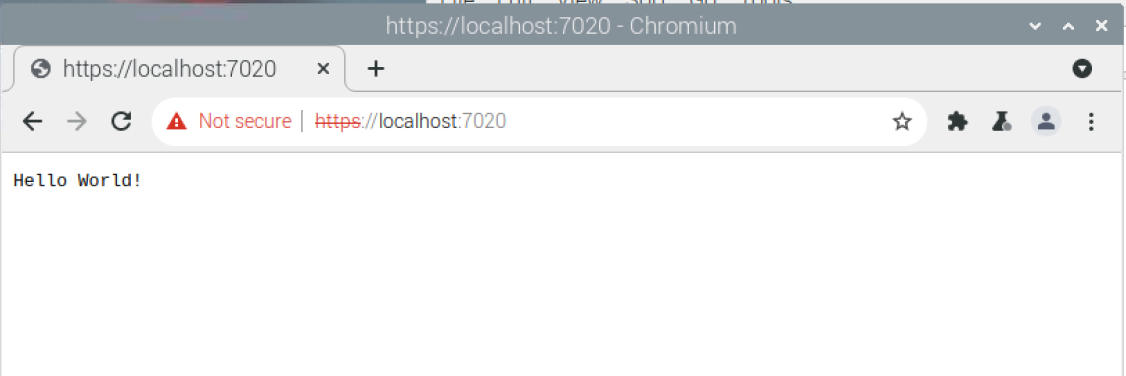
This is fine for localhost (the Raspberry Pi), however you need to be able to see the site from other machines on your network.
Access web page from another machine
Return to the Terminal window in Visual Studio code where the dotnet run command was entered.
Press ctrl+c to stop running the web app.
In the Terminal (SSH or Terminal on the Raspberry Pi) use the hostname command to to get the IP address of your local machine.
hostname -I
The address required is the string of digits and dots that look something like this 195.188.10.105
In the Terminal dotnet run with a url, replacing 195.188.10.105 with the IP address of your device.
dotnet run --urls=http://195.188.10.105:8080/
The Terminal window should then display the details of the running web server on the correct IP addesss, and on port 8080
:~/Documents/dev/dotnetPiServer $ dotnet run --urls=http://195.188.10.105:8080/
Building...
info: Microsoft.Hosting.Lifetime[14]
      Now listening on: http://195.188.10.105:8080
info: Microsoft.Hosting.Lifetime[0]
      Application started. Press Ctrl+C to shut down.
info: Microsoft.Hosting.Lifetime[0]
      Hosting environment: Development
info: Microsoft.Hosting.Lifetime[0]
      Content root path: /home/pi/Documents/dev/dotnetPiServer/
From another computer on the network, or even a phone or tablet, open a web browser and in the address enter the IP address of the Raspberry Pi with the port as listed in the Terminal on the Raspberry Pi.
For example
http://195.188.10.105:8080/
The browser should display the same page seen before, now from a different machine.
Congratulations you have built a simple web server.
Press ctrl+c to stop running the web app.
Change the content being displayed
In Visual Studio Code, open the Program.cs file in the dotnetPiServer folder (created in the previous steps)
It should look like this.
var builder = WebApplication.CreateBuilder(args);
var app = builder.Build();

app.MapGet("/", () => "Hello World!");
app.Run();
If you followed the .NET Console Animations notes you might deduce that you could change the Program.cs file as shown below to display some ASCII art on a web page.
var builder = WebApplication.CreateBuilder(args);
var app = builder.Build();

app.MapGet("/", () => GetPageContent());
app.Run();

string GetPageContent()
{
    System.Text.StringBuilder contentBuilder = new();
    contentBuilder.AppendLine(@"                ");
    contentBuilder.AppendLine(@"       |        ");
    contentBuilder.AppendLine(@"       |        ");
    contentBuilder.AppendLine(@"       ^        ");
    contentBuilder.AppendLine(@"      /_\       ");
    contentBuilder.AppendLine(@"     /___\      ");
    contentBuilder.AppendLine(@"    |     |     ");
    contentBuilder.AppendLine(@"    |= = =|     ");
    contentBuilder.AppendLine(@"    |     |     ");
    contentBuilder.AppendLine(@"    |     |     ");
    contentBuilder.AppendLine(@"    |     |     ");
    contentBuilder.AppendLine(@"    |     |     ");
    contentBuilder.AppendLine(@"    |     |     ");
    contentBuilder.AppendLine(@"    |     |     ");
    contentBuilder.AppendLine(@"    |     |     ");
    contentBuilder.AppendLine(@"    | | | |     ");
    contentBuilder.AppendLine(@"   /|=|=|=|\    ");
    contentBuilder.AppendLine(@"  / |     | \   ");
    contentBuilder.AppendLine(@" /  |#####|  \  ");
    contentBuilder.AppendLine(@"|  /       \  | ");
    contentBuilder.AppendLine(@"| /         \ | ");
    contentBuilder.AppendLine(@"|/           \| ");
    return contentBuilder.ToString();
}
In the Terminal window run the program (remember to replace IP_ADDRESS with the IP address of the Raspberry Pi)
dotnet run --urls=http://IP_ADDRESS:8080/
Test the web site by opening a browser on another machine and entering the URL address into the address bar.
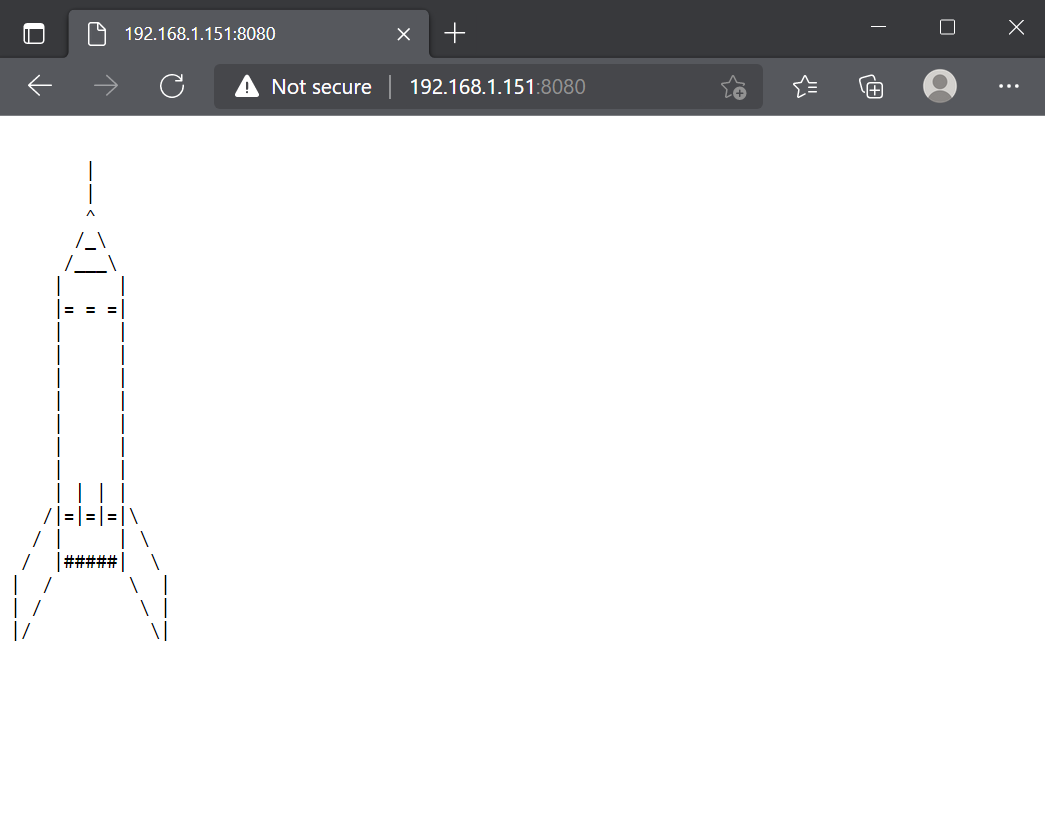
Back in the Raspberry Pi Terminal press ctrl+c to stop running the web app.
Display an HTML page
In this Note the goal is to display a video, to achieve this an HTML page will be created that can render HTML output from the Raspberry Pi web server.
Create a folder in the project folder named wwwroot, and in this folder create a file named index.html
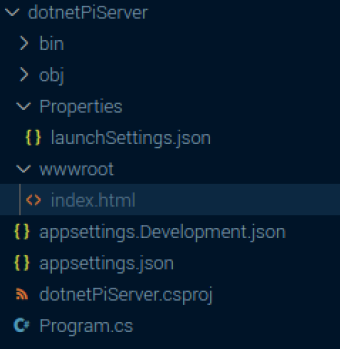
In Visual Studio Code open the index.html page and edit it to contain the following
<!doctype html>
<html>

<head>
    <title>Pi Server Home</title>
</head>

<body>
    <h1>Welcome to the Pi Server, powered by .NET</h1>
</body>

</html>
Return to the program.cs code file, and edit it to use the default files.
NOTE: Ordering of commands is important here
var builder = WebApplication.CreateBuilder(args);
var app = builder.Build();
app.UseDefaultFiles();
app.UseStaticFiles();

app.Run();
This is the whole program to serve up the HTML pages in the wwwroot folder created earlier.
In the Terminal window run the program again (remember to replace IP_ADDRESS with the IP address of the Raspberry Pi)
dotnet run --urls=http://IP_ADDRESS:8080/
Test the web site by opening the browser on another machine and entering the URL address into the address bar.
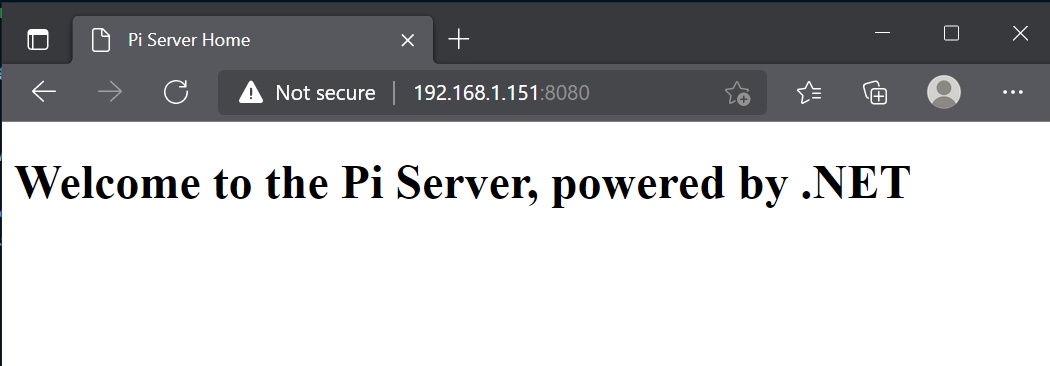
Back in the Raspberry Pi Terminal press ctrl+c to stop running the web app.
Display a video
To display a video on this index.html web page download a small video from a website. A small video is fine for this example. Save the example video it in the wwwroot folder/
Example videos can be downloaded from fileexamples.com.
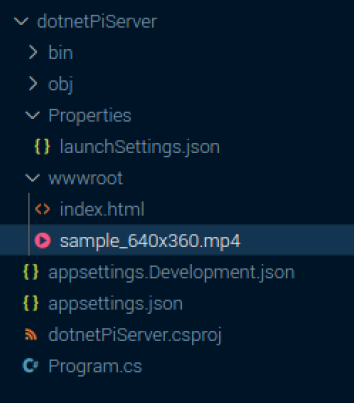
In Visual Studio Code edit the index.html page to include the video
<!doctype html>
<html>

<head>
    <title>Pi Server Home</title>
</head>

<body>
    <h1>Welcome to the Pi Server, powered by .NET</h1>
    <video width="320" height="240" controls autoplay>
        <source src="sample_640x360.mp4" type='video/mp4'>
    </video>
</body>

</html>
In the Terminal window run the program again (remember to replace IP_ADDRESS with the IP address of the Raspberry Pi)
dotnet run --urls=http://IP_ADDRESS:8080/
Test the web site by opening the browser on another machine and entering the URL address into the address bar.
You should see the video served from the web app in the web page.
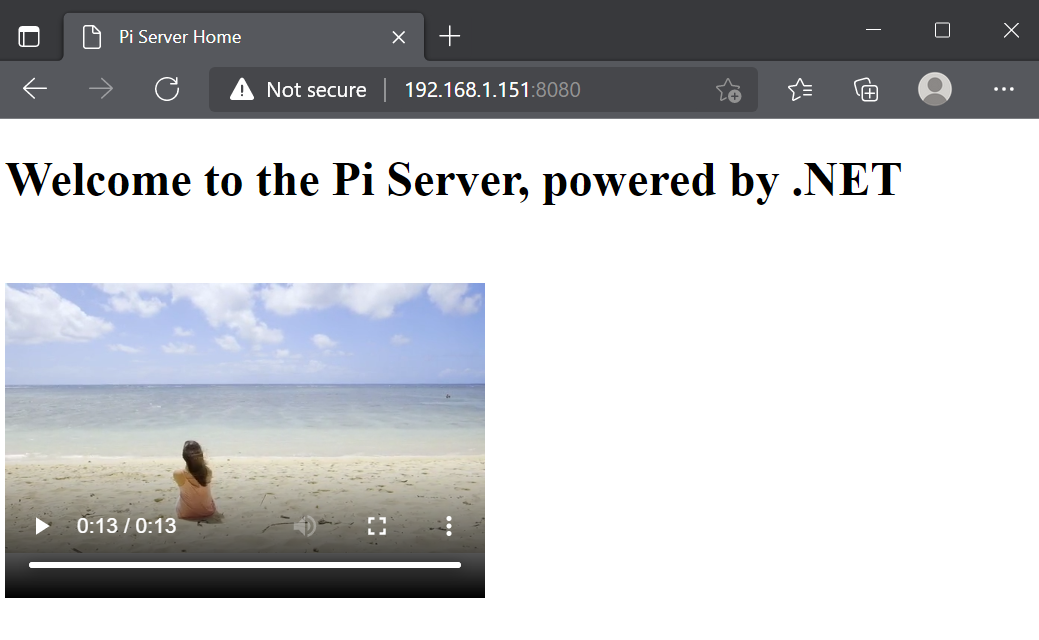
Back in the Terminal press ctrl+c to stop running the web app.
Conclusions
In this Note a new web application was created on a Raspberry Pi to display a video on a web page. The code was built and tested on a Raspberry Pi, however this code should run on any platform supported by .NET 6.
I hope this has helped you understand a few aspects of building a simple .NET 6 web application.
Dr. Neil's Notes
Software > Coding
.NET Camera Server on Raspberry Pi
Introduction
In previous Notes I have documented how to get a Raspberry Pi setup to develop with .NET, a few simple console programs that Animate ASCII art, display a clock, and display the weather. Most recently how to use the camera on a Raspberry Pi from simple .NET code, and how to create a web server on a Raspberry Pi.
In this Note I explain how to combine the last two Notes to use .NET to create a simple server on a Raspberry Pi that displays the camera feed to other machines on your network. Before reading this Note, it is recommended you read the Notes on how to use the camera on a Raspberry Pi from simple .NET code, and how to create a web server on a Raspberry Pi.
The code shown in this Note may work on other IoT platforms supported by .NET 6, it has been tested on a Raspberry Pi.
If you want to get a Raspberry Pi setup to run .NET code, follow the instructions in the .NET Development on a Raspberry Pi Note.
This Note assumes you have installed .NET 6 and Visual Studio Code.
Create the project
If there is not already a folder for code projects, create a folder for code projects. I created a folder called dev.
Open a Terminal window on the Raspberry Pi, and navigate to the folder where you want to create the new folder (e.g. Documents), then enter
mkdir dev
This makes the directory dev
Navigate to that directory
cd dev
Create a directory for this project, named dotnetPiCamServer
mkdir dotnetPiCamServer
Change the directory to the new folder just created.
cd dotnetPiCamServer/
To create the .NET 6 ASP.NET Core Web API application use the command
dotnet new webapi
The default name of the new project is the name of the folder in which the project is being created.
The Terminal should look like this.
~/Documents/dev $ mkdir dotnetPiCamServer
~/Documents/dev $ cd dotnetPiCamServer/
~/Documents/dev/dotnetPiCamServer $ dotnet new webapi
The template "ASP.NET Core Web API" was created successfully.

Processing post-creation actions...
Running 'dotnet restore' on /home/pi/Documents/dev/dotnetPiCamServer/dotnetPiCamServer.csproj...
  Determining projects to restore...
  Restored /home/pi/Documents/dev/dotnetPiCamServer/dotnetPiCamServer.csproj (in 7.99 sec).
Restore succeeded.
This creates a new web API app from a template that serves random weather data from a WeatherForecast endpoint.
Compile and run the new application from the Terminal window with dotnet run
The dotnet run command will compile the project code in the current folder and run it.
To run the application to support a specific IP address (or URL) enter the --urls parameter as below.
NOTE: this should be the IP address of your Raspberry Pi, check the Note on creating a web server on a Raspberry Pi for more information.
~/Documents/dev/dotnetPiCamServer $ dotnet run --urls=http://192.108.1.151:8080
Building...
info: Microsoft.Hosting.Lifetime[14]
      Now listening on: http://192.168.1.151:8080
info: Microsoft.Hosting.Lifetime[0]
      Application started. Press Ctrl+C to shut down.
info: Microsoft.Hosting.Lifetime[0]
      Hosting environment: Development
info: Microsoft.Hosting.Lifetime[0]
      Content root path: /home/pi/Documents/dev/dotnetPiCamServer/
Then on another computer, phone, or tablet that is on the same network as the Raspberry Pi, open a web browser window, and enter the address that was specified in the previous step, along with the WeatherForecast endpoint.
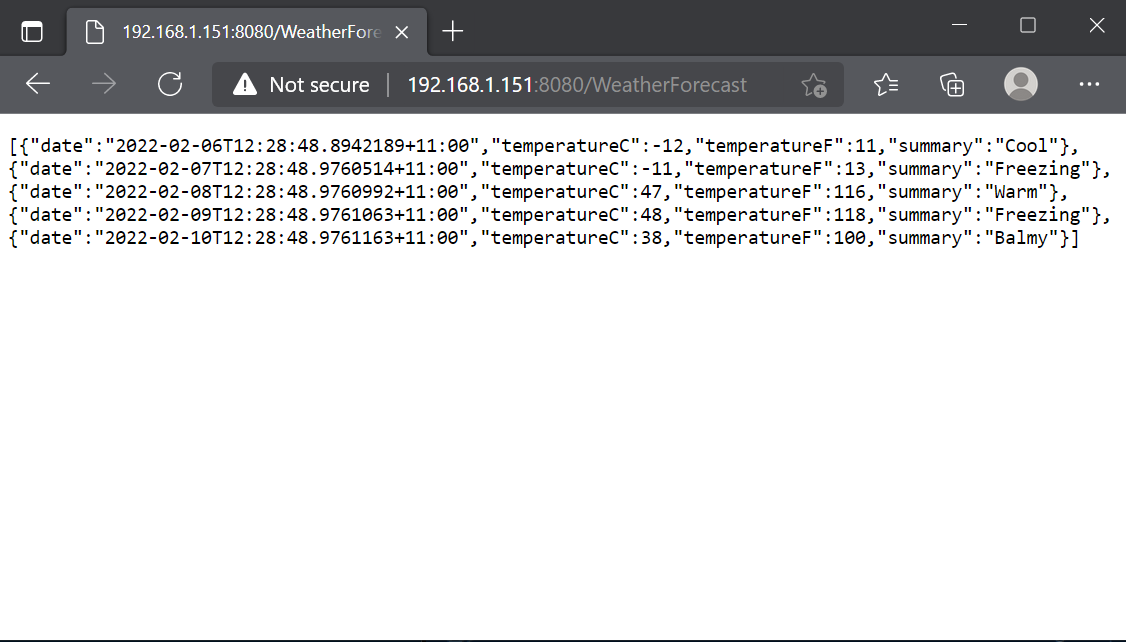
Return to the Terminal window where the dotnet run command was entered.
Press ctrl+c to stop running the program.
Remove the sample code
To make this code return a video feed from the Raspberry Pi camera, start by removing the fake WeatherForecast endpoint that was created as part of the dotnet new webapi template.
In the Terminal window used in the previous step, start Visual Studio Code with the code . command. This will open Visual Studio Code with the current folder on the Raspberry Pi desktop.
Delete the WeatherForecast.cs file in the root of the folder
Rename the WeatherForecastController.cs file to VideoController.cs
The files and folders in the dotnetPiCamServer folder should now look like this
~/Documents/dev/dotnetPiCamServer $ tree
.
├── appsettings.Development.json
├── appsettings.json
├── Camera.cs
├── Controllers
│   └── VideoController.cs
├── dotnetPiCamServer.csproj
├── Program.cs
└── Properties
    └── launchSettings.json
In Visual Studio Code edit the contents of the renamed VideoController.cs file to return a blank Video page as follows
using Microsoft.AspNetCore.Mvc;
namespace dotnetPiCamServer.Controllers;

[ApiController]
[Route("[controller]")]
public class VideoController : ControllerBase
{
    private readonly ILogger<WeatherForecastController> _logger;

    public VideoController(ILogger<VideoController> logger)
    {
        _logger = logger;
    }

    [HttpGet(Name = "GetVideo")]
    public void Get()
    {

    }
}
Run the application to support the IP address (or URL) of the Raspberry Pi, using the --urls parameter as shown below.
NOTE: this should be the IP address of your Raspberry Pi, check the Note on creating a web server on a Raspberry Pi for more information.
~/Documents/dev/dotnetPiCamServer $ dotnet run --urls=http://192.168.1.151:8080
Then on another computer, phone, or tablet that is on the same network as the Raspberry Pi, open a web browser window, and enter the address that was specified in the previous step, along with the Video endpoint. The weather information should be gone and a blank page returned.
Return to the Terminal window where the dotnet run command was entered.
Press ctrl+c to stop running the program.
Add the IoT packages
In visual Studio Code, open the project file dotnetPiCamServer.csproj. Edit the project file to include references to the IoT packages. Two packages need to be entered, the same packages that were added in the Note on using the camera on a Raspberry Pi from simple .NET code
<PackageReference Include="System.Device.Gpio" Version="2.0.0" />
<PackageReference Include="Iot.Device.Bindings" Version="2.0.0" />
The complete project file should like like this
<Project Sdk="Microsoft.NET.Sdk.Web">

  <PropertyGroup>
    <TargetFramework>net6.0</TargetFramework>
    <Nullable>enable</Nullable>
    <ImplicitUsings>enable</ImplicitUsings>
  </PropertyGroup>

  <ItemGroup>
    <PackageReference Include="Swashbuckle.AspNetCore" Version="6.2.3" />
    <PackageReference Include="System.Device.Gpio" Version="2.0.0" />
    <PackageReference Include="Iot.Device.Bindings" Version="2.0.0" />
  </ItemGroup>

</Project>
Create a Camera class
In the same folder that contains the Program.cs file and the dotnetPiCamServer.csproj file, add a new file named Camera.cs.
In Visual Studio Code open the Camera.cs file to add the code to access the camera. If you followed the Note on using the camera on a Raspberry Pi from simple .NET code, then this code should look familiar to you.
using Iot.Device.Media;

public class Camera
{
    VideoConnectionSettings settings;
    VideoDevice device;
    CancellationTokenSource tokenSource = new CancellationTokenSource();

    public event VideoDevice.NewImageBufferReadyEvent NewImageReady
    {
        add { device.NewImageBufferReady += value; }
        remove { device.NewImageBufferReady -= value; }
    }

    public Camera()
    {
        settings = new VideoConnectionSettings(
            busId: 0,
            captureSize: (640, 480),
            pixelFormat: PixelFormat.JPEG
        );
        device = VideoDevice.Create(settings);
        device.ImageBufferPoolingEnabled = true;
    }

    public void StartCapture()
    {
        if (!device.IsOpen)
        {
            device.StartCaptureContinuous();
        }

        if (!device.IsCapturing)
        {
            new Thread(() =>
                {
                    device.CaptureContinuous(tokenSource.Token);
                }
            ).Start();
        }
    }

    public void StopCapture()
    {
        if (device.IsCapturing)
        {
            tokenSource.Cancel();
            tokenSource = new CancellationTokenSource();
            device.StopCaptureContinuous();
        }
    }
}
This Camera class encapsulates the code required to interact with the camera attached to the Raspberry Pi.
The event is defined to enable other code to receive notifications when a frame from the camera becomes available to render.
public event VideoDevice.NewImageBufferReadyEvent NewImageReady
{
    add { device.NewImageBufferReady += value; }
    remove { device.NewImageBufferReady -= value; }
}
The constructor is the method used to create an instance of this class that can by used by other code to control the camera.
A constructor does not return any type, as it creates an instance of the class, as an object.
For the camera class, the constructor initializes the settings to use when working with the camera. Then an instance of a VideoDevice is created with the settings defined. Setting the ImageBufferPoolingEnabled enables the VideoDevice to create a pool (or collection) of images buffers that can be reused. This helps with performance as memory does not need to be allocated for each new frame being captured by the camera.
public Camera()
{
    settings = new VideoConnectionSettings(
        busId: 0,
        captureSize: (640, 480),
        pixelFormat: PixelFormat.H264
    );
    device = VideoDevice.Create(settings);
    device.ImageBufferPoolingEnabled = true;
}
The StartCapture() and StartCapture() methods do what you would expect from the method names. The StartCapture method sets the VideoDevice to start continuous capture, and then creates a thread (code that will run on it's own until cancelled or finished) to keep capturing frames. The CancellationTokenSource passed to the CaptureContinuous method in the thread can be used in the StopCapture method to stop the continuous capture of frames, and end the thread.
Instantiate a single instance of the Camera class
For this project only a single instance of the camera class is needed for the web server to serve the frames from the camera. In this ASP.NET Core web application the Camera class can be created as a singleton using the line
builder.Services.AddSingleton<Camera>();
This creates the Camera as a singleton instance that can be obtained by an endpoint.
The program.cs file should now look like this:
var builder = WebApplication.CreateBuilder(args);

// Add services to the container.
builder.Services.AddControllers();
// Learn more about configuring Swagger/OpenAPI at https://aka.ms/aspnetcore/swashbuckle
builder.Services.AddEndpointsApiExplorer();
builder.Services.AddSwaggerGen();

builder.Services.AddSingleton<Camera>();

var app = builder.Build();

// Configure the HTTP request pipeline.
if (app.Environment.IsDevelopment())
{
    app.UseSwagger();
    app.UseSwaggerUI();
}
app.UseHttpsRedirection();
app.UseAuthorization();
app.MapControllers();

app.Run();
Stream the Camera Frames
In Visual Studio Code edit the VideoController.cs file to use the camera stream to show image frames in the response returned from the Video endpoint.
The code should look like this:
using Microsoft.AspNetCore.Mvc;
using Iot.Device.Media;
using Microsoft.AspNetCore.Http.Features;
using System.Buffers;
using System.Text;

namespace dotnetPiCamServer.Controllers;

[ApiController]
[Route("[controller]")]
public class VideoController : ControllerBase
{
    private readonly ILogger<VideoController> _logger;
    private readonly Camera _camera;

    public VideoController(ILogger<VideoController> logger, Camera camera)
    {
        _logger = logger;
        _camera = camera;
    }

    [HttpGet(Name = "GetVideo")]
    public void Get()
    {
        var bufferingFeature =
            HttpContext.Response.HttpContext.Features.Get<IHttpResponseBodyFeature>();
        bufferingFeature?.DisableBuffering();

        HttpContext.Response.StatusCode = 200;
        HttpContext.Response.ContentType = "multipart/x-mixed-replace; boundary=--frame";
        HttpContext.Response.Headers.Add("Connection", "Keep-Alive");
        HttpContext.Response.Headers.Add("CacheControl", "no-cache");
        _camera.NewImageReady += WriteFrame;

        try
        {
            _logger.LogWarning($"Start streaming video");
            _camera.StartCapture();

            while (!HttpContext.RequestAborted.IsCancellationRequested) { }
        }
        catch (Exception ex)
        {
            _logger.LogError($"Exception in streaming: {ex}");
        }
        finally
        {
            HttpContext.Response.Body.Close();
            _logger.LogInformation("Stop streaming video");
        }

        _camera.NewImageReady -= WriteFrame;
        _camera.StopCapture();
    }

    private async void WriteFrame(object sender, NewImageBufferReadyEventArgs e)
    {
        try
        {
            await HttpContext.Response.BodyWriter.WriteAsync(CreateHeader(e.Length));
            await HttpContext.Response.BodyWriter.WriteAsync(
                e.ImageBuffer.AsMemory().Slice(0, e.Length)
            );
            await HttpContext.Response.BodyWriter.WriteAsync(CreateFooter());
        }
        catch (ObjectDisposedException)
        {
            // ignore this as its thrown when the stream is stopped
        }

        ArrayPool<byte>.Shared.Return(e.ImageBuffer);
    }

    private byte[] CreateHeader(int length)
    {
        string header =
            $"--frame\r\nContent-Type:image/jpeg\r\nContent-Length:{length}\r\n\r\n";
        return Encoding.ASCII.GetBytes(header);
    }

    private byte[] CreateFooter()
    {
        return Encoding.ASCII.GetBytes("\r\n");
    }
}
The constructor of the VideoController class now has a parameter for the Camera object. This camera is provided by the ASP.NET Core runtime, because in the previous step the Camera was defined a singleton added to the available Services.
A local readonly variable is set to reference the Camera object.
private readonly Camera _camera;

public VideoController(ILogger<VideoController> logger, Camera camera)
{
    _logger = logger;
    _camera = camera;
}
The Get method that is called when the 'Video` endpoint is being retrieved does the work of creating the http response to the request.
The properties set on the HttpContext.Response provide information about the response. StatusCode 200 is used to indicate success. The ContentType is defined to notify the receiver (a web browser) of the format to expect in the response. The Headers provide information about the connection and content that helps the receiver determine if they should cache the result (no), and drop the connection (no again), when the response is received.
The NewImageReady event on the camera is set to be handled by the WriteFrame method.
The try code block calls the StartCapture method on the camera, and then starts a loop doing nothing until the current HttpContext requests a cancellation. In the Note on how to use the camera on a Raspberry Pi from simple .NET code a loop was created to capture frames until a key was pressed, this replaces that code.
The catch code block will output to the log that something went wrong when capturing the frames in the video stream.
A finally code block is always called even when an exception is caught in the catch block. The code in this finally block ends the video stream by closing the connection to the endpoint.
Once all the action has happened the handler for the new frames can be removed, and the camera told to stop capturing video input.
[HttpGet(Name = "GetVideo")]
public void Get()
{
    var bufferingFeature =
        HttpContext.Response.HttpContext.Features.Get<IHttpResponseBodyFeature>();
    bufferingFeature?.DisableBuffering();

    HttpContext.Response.StatusCode = 200;
    HttpContext.Response.ContentType = "multipart/x-mixed-replace; boundary=--frame";
    HttpContext.Response.Headers.Add("Connection", "Keep-Alive");
    HttpContext.Response.Headers.Add("CacheControl", "no-cache");
    _camera.NewImageReady += WriteFrame;

    try
    {
        _logger.LogWarning($"Start streaming video");
        _camera.StartCapture();

        while (!HttpContext.RequestAborted.IsCancellationRequested) { }
    }
    catch (Exception ex)
    {
        _logger.LogError($"Exception in streaming: {ex}");
    }
    finally
    {
        HttpContext.Response.Body.Close();
        _logger.LogInformation("Stop streaming video");
    }

    _camera.NewImageReady -= WriteFrame;
    _camera.StopCapture();
}
The WriteFrame method outputs information about the frame and the frame bytes to the response. The CreateHeader method builds the header string containing the length of the image frame (in bytes). Then the ImageBuffer from the camera is written to the response. Then a 'footer' is added to make clear this is the end of the frame, this Encoding.ASCII.GetBytes("\r\n"); sends a return (\r) and new line (\n) after each frame.
NOTE: the ImageBuffer is returned to the ArrayPool of memory to be used again by another future frame. This is how the setting device.ImageBufferPoolingEnabled = true in the camera is used to reduce the amount of memory created and released during the lifetime of the application.
private async void WriteFrame(object sender, NewImageBufferReadyEventArgs e)
{
    try
    {
        await HttpContext.Response.BodyWriter.WriteAsync(CreateHeader(e.Length));
        await HttpContext.Response.BodyWriter.WriteAsync(
            e.ImageBuffer.AsMemory().Slice(0, e.Length)
        );
        await HttpContext.Response.BodyWriter.WriteAsync(CreateFooter());
    }
    catch (ObjectDisposedException)
    {
        // ignore this as its thrown when the stream is stopped
    }

    ArrayPool<byte>.Shared.Return(e.ImageBuffer);
}

private byte[] CreateHeader(int length)
{
    string header =
        $"--frame\r\nContent-Type:image/jpeg\r\nContent-Length:{length}\r\n\r\n";
    return Encoding.ASCII.GetBytes(header);
}

private byte[] CreateFooter()
{
    return Encoding.ASCII.GetBytes("\r\n");
}
Run the application to support the IP address (or URL) of the Raspberry Pi, using the --urls parameter as below.
NOTE: this should be the IP address of your Raspberry Pi, check the Note on creating a web server on a Raspberry Pi for more information.
~/Documents/dev/dotnetPiCamServer $ dotnet run --urls=http://192.168.1.151:8080
Then on another computer, phone, or tablet that is on the same network as the Raspberry Pi, open a web browser window, and enter the address that was specified in the previous step, along with the Video endpoint.
The video from the Raspberry Pi should now be streamed to the web page. (Shown here viewing the back of my desktop computer)
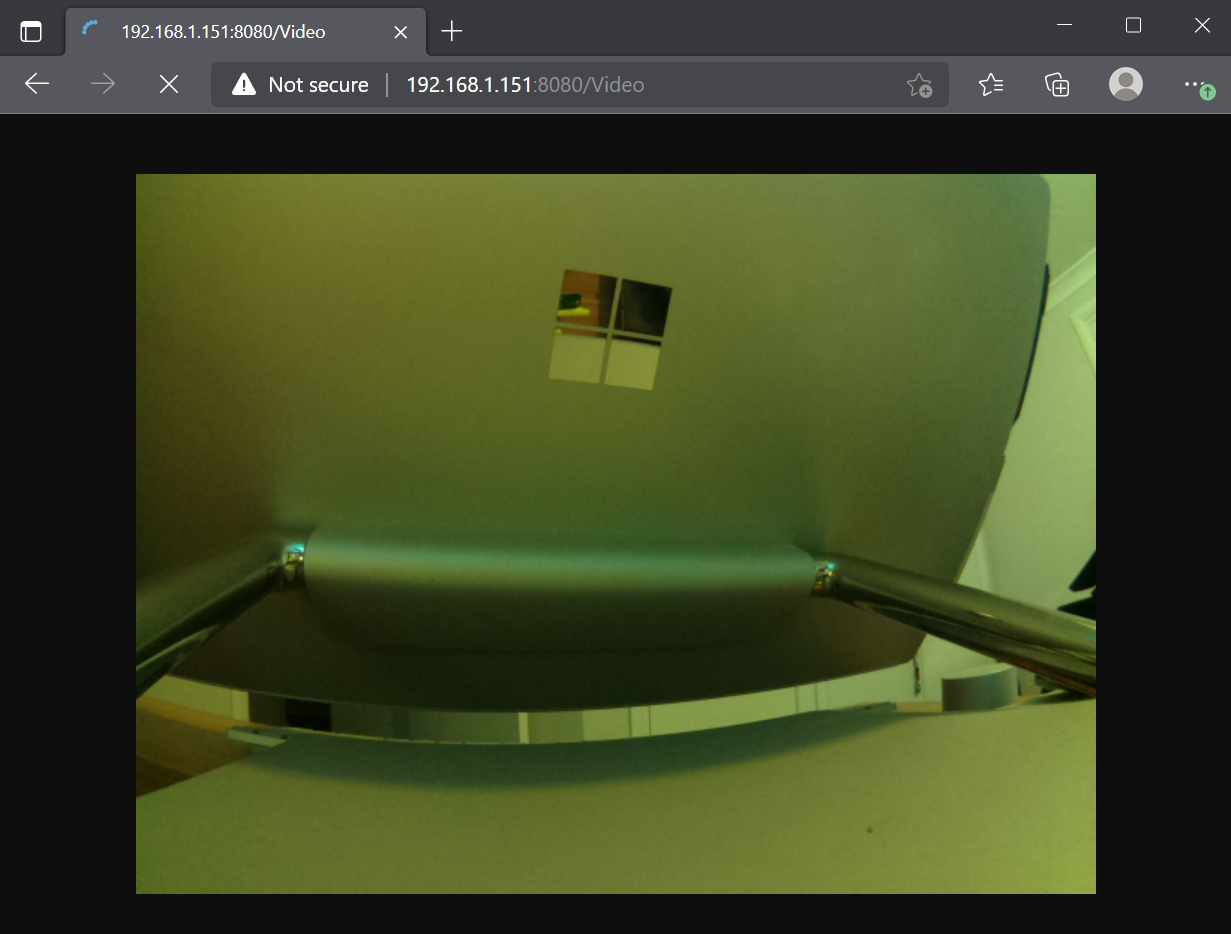
Return to the Terminal window where the dotnet run command was entered.
Press ctrl+c to stop running the program.
Conclusions
In this Note the knowledge of how to capture video from a Raspberry Pi has been combined with knowledge of creating a web application served from a Raspberry Pi. The end result is the Raspberry Pi is now able to server a stream of image frames from the camera, to a webpage displayed on other machines on the same network.
It should be noted that this is very much a toy at the moment. There is not security to protect against anyone else viewing the camera feed.
Dr. Neil's Notes
Software > Coding
.NET GUI application on Raspberry Pi with Avalonia
Introduction
In previous Notes I have documented how to get a Raspberry Pi setup to develop with .NET, a few simple console programs that Animate ASCII art, display a clock, and display the weather.
In this Note I explain how to build a desktop application on the Raspberry Pi that has a window displaying a the time and weather. This will combine the experience of building the console application to display the clock and the weather. The graphical user interface (or GUI) will be built using an open source GUI toolkit called Avalonia.
Before reading this Note, it is recommended you read the Notes on how to display a clock, and display the weather on the Raspberry Pi.
The code shown in this Note may work on other platforms supported by .NET 6, it has been tested on a Raspberry Pi, Windows, and Mac.
If you want to get a Raspberry Pi setup to run .NET code, follow the instructions in the .NET Development on a Raspberry Pi Note.
This Note assumes you have installed .NET 6 and Visual Studio Code.
Create the project
If there is not already a folder for code projects, create a folder for code projects. I created a folder called dev.
Open a Terminal window on the Raspberry Pi, and navigate to the folder where you want to create the new folder (e.g. Documents), then enter
 mkdir dev
 ```

This makes the directory **dev**

Navigate to that directory

```console
 cd dev
 ```

Create a directory for this project, named **dotnetPiGui**

```console
 mkdir dotnetPiGui
 ```

Change the directory to the new folder just created.

```console
 cd dotnetPiGui/
 ```

To make it simpler to create projects that support Avalonia install the dotnet project templates for Avalonia

```console
dotnet new -i Avalonia.Templates
Create a simple Avalonia GUI application with the following command
dotnet new avalonia.app
~/Documents/dev/dotnetPiGui $ tree
.
├── App.axaml
├── App.axaml.cs
├── dotnetPiGui.csproj
├── MainWindow.axaml
├── MainWindow.axaml.cs
└── Program.cs

0 directories, 6 files
Compile and run the new application from the Terminal window with dotnet run
The dotnet run command will compile the project code in the current folder and run it.
dotnet run
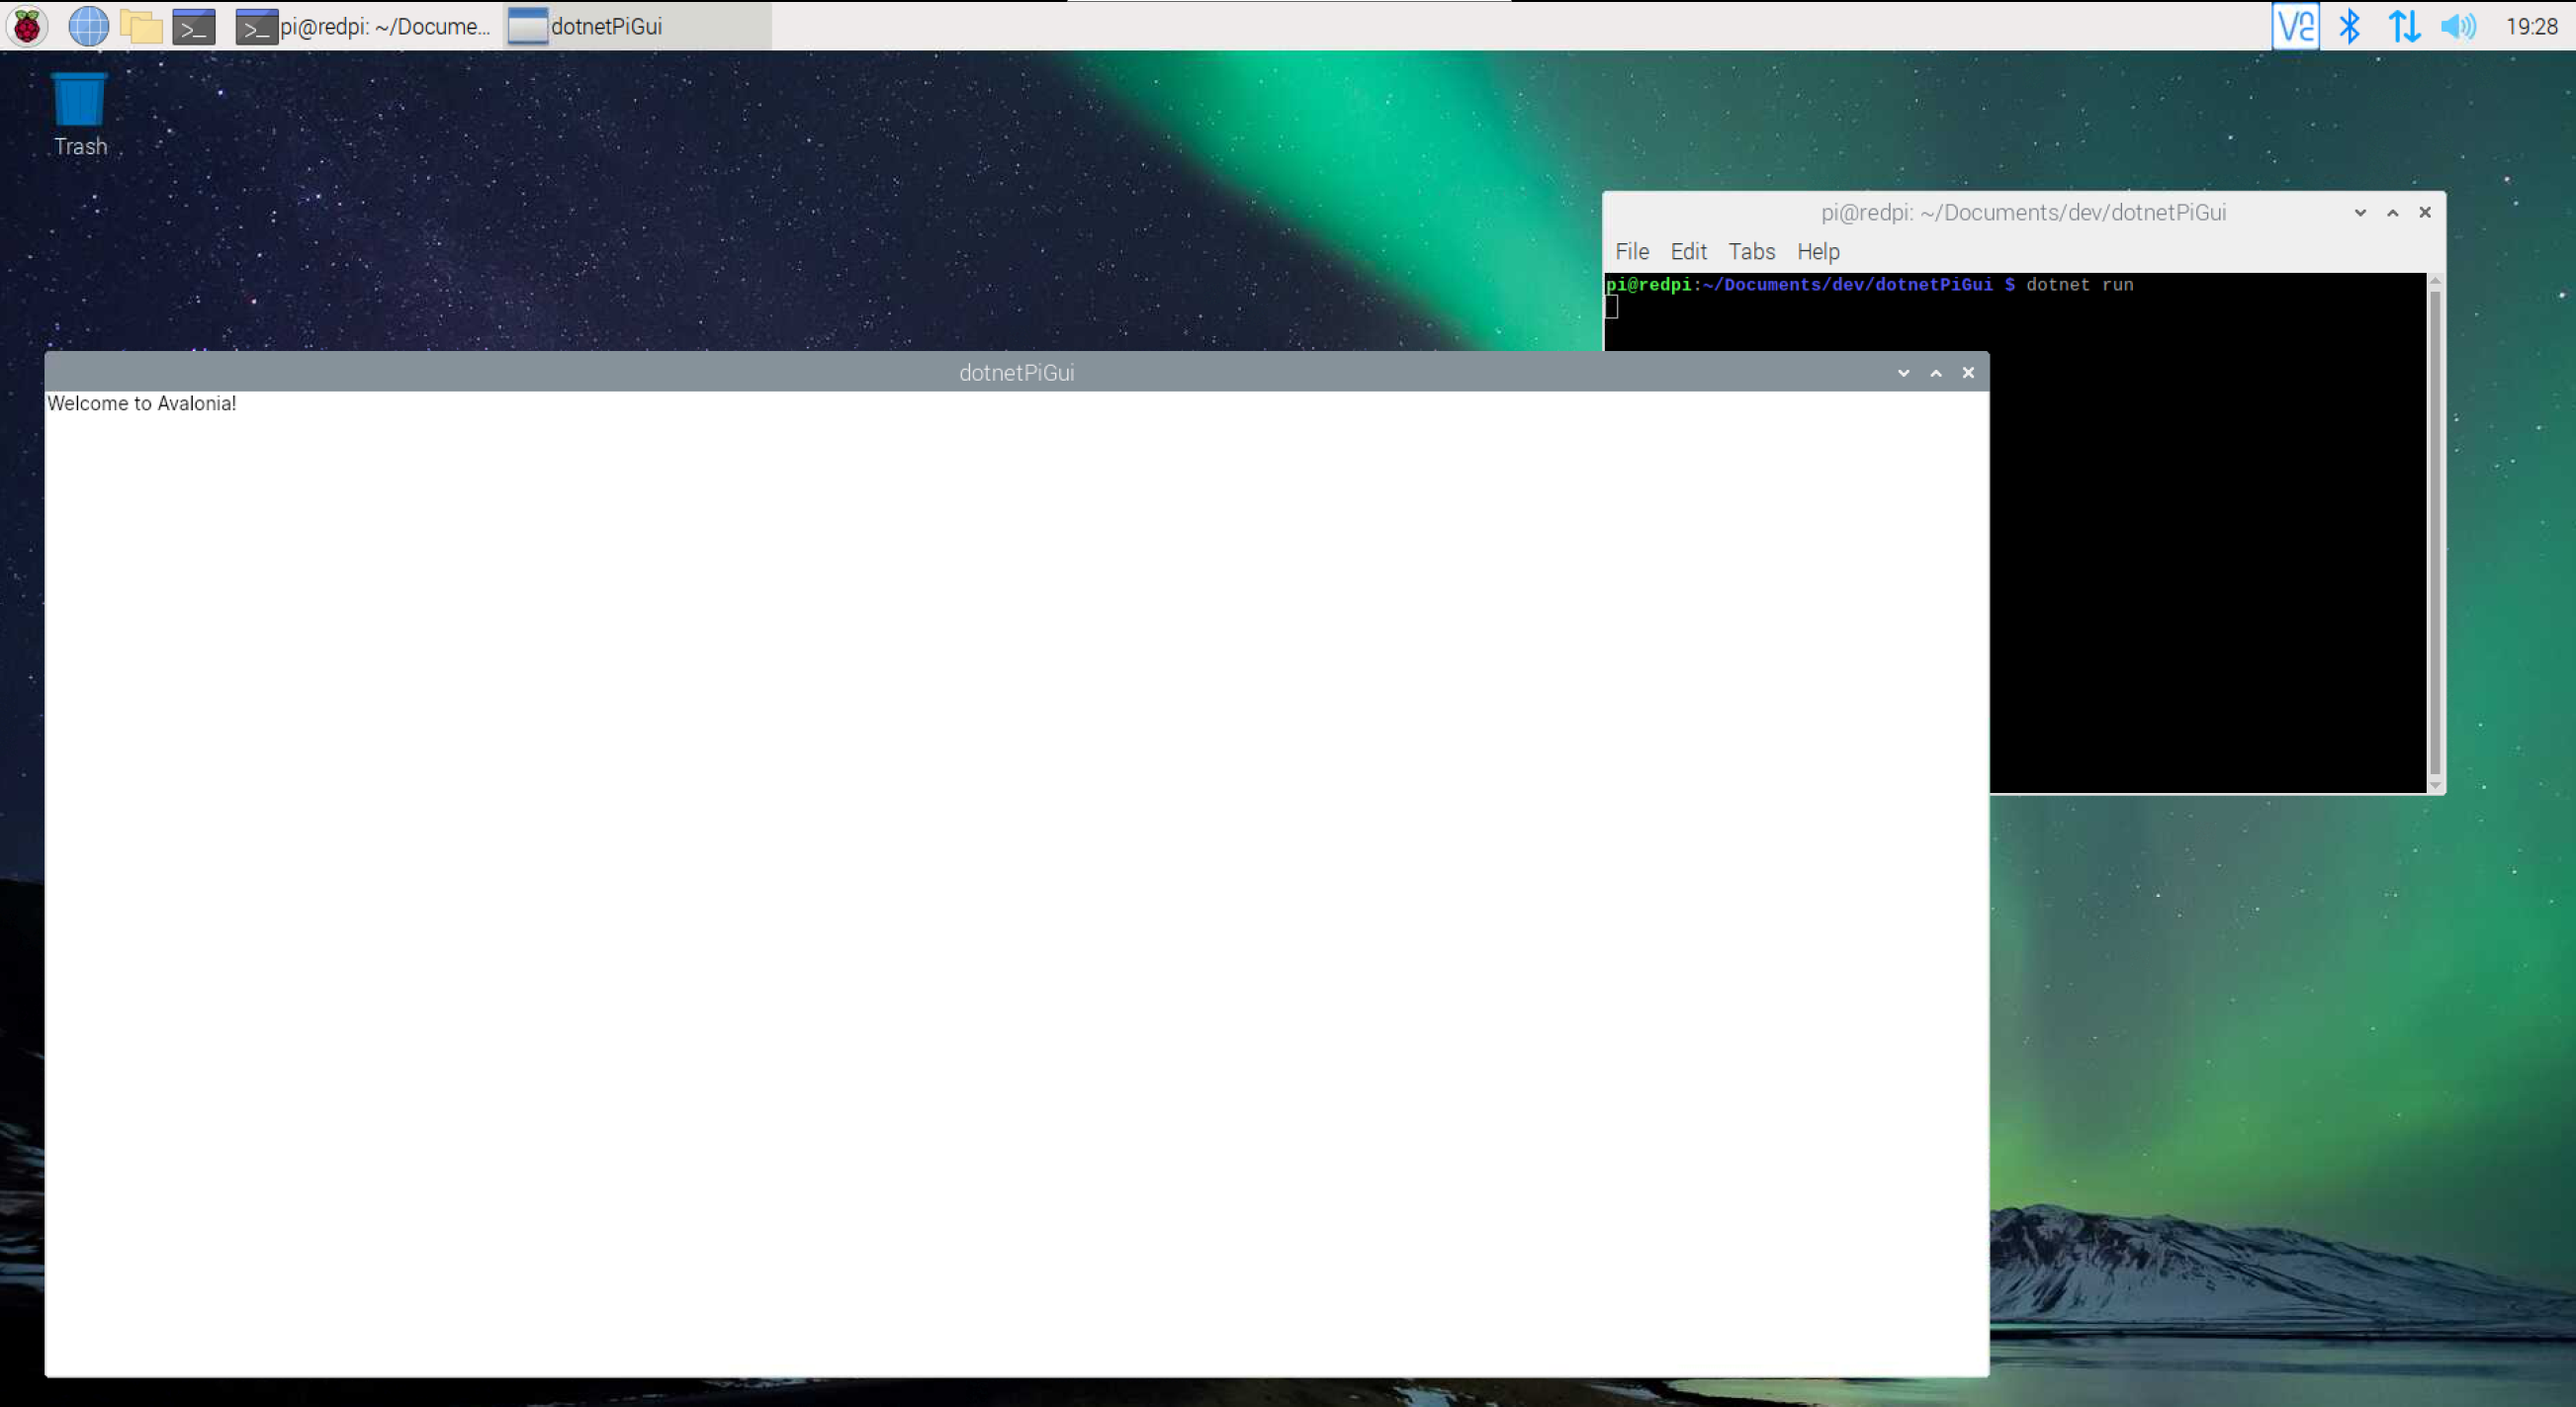
Close the new application by clicking on the close (X) button in the top right on the window.
Change the window
From the Terminal open Visual Studio Code. Note the 'dot' after the code, this tells Visual Studio Code to open the current folder.
code .
In Visual Studio Code open the MainWindow.axaml file. This file defines how the window is displayed. It should look like this.
<Window xmlns="https://github.com/avaloniaui"
        xmlns:x="http://schemas.microsoft.com/winfx/2006/xaml"
        xmlns:d="http://schemas.microsoft.com/expression/blend/2008"
        xmlns:mc="http://schemas.openxmlformats.org/markup-compatibility/2006"
        mc:Ignorable="d" d:DesignWidth="800" d:DesignHeight="450"
        x:Class="dotnetPiGui.MainWindow"
        Title="dotnetPiGui">
    Welcome to Avalonia!
</Window>
The Window defines, as you might expect, a window to display on the screen.
The first lines have namespace import attributes for the file, these xmlns (xml namespace) attributes enable components in the imported namespaces to be accessed in this Window.
The x:Class attribute defines the code class that controls this Window, this will be important in the next step.
The Title attribute defines the title displayed at the top of the window.
The contents of the Window are currently the text Welcome to Avalonia!
To change the title and the background of the window, and remove the contents, edit the MainWindow.axaml file as follows
<Window xmlns="https://github.com/avaloniaui"
        xmlns:x="http://schemas.microsoft.com/winfx/2006/xaml"
        xmlns:d="http://schemas.microsoft.com/expression/blend/2008"
        xmlns:mc="http://schemas.openxmlformats.org/markup-compatibility/2006"
        mc:Ignorable="d" d:DesignWidth="800" d:DesignHeight="450"
        x:Class="dotnetPiGui.MainWindow"
        Title="Pi GUI"
        Background="#011627">

</Window>
This has removed the content, set the title, and changed the background colour to a dark blue. The hex colour 011627 is used here.
Save the the MainWindow.axaml file.
Compile and run the new application from the Terminal window with dotnet run
dotnet run
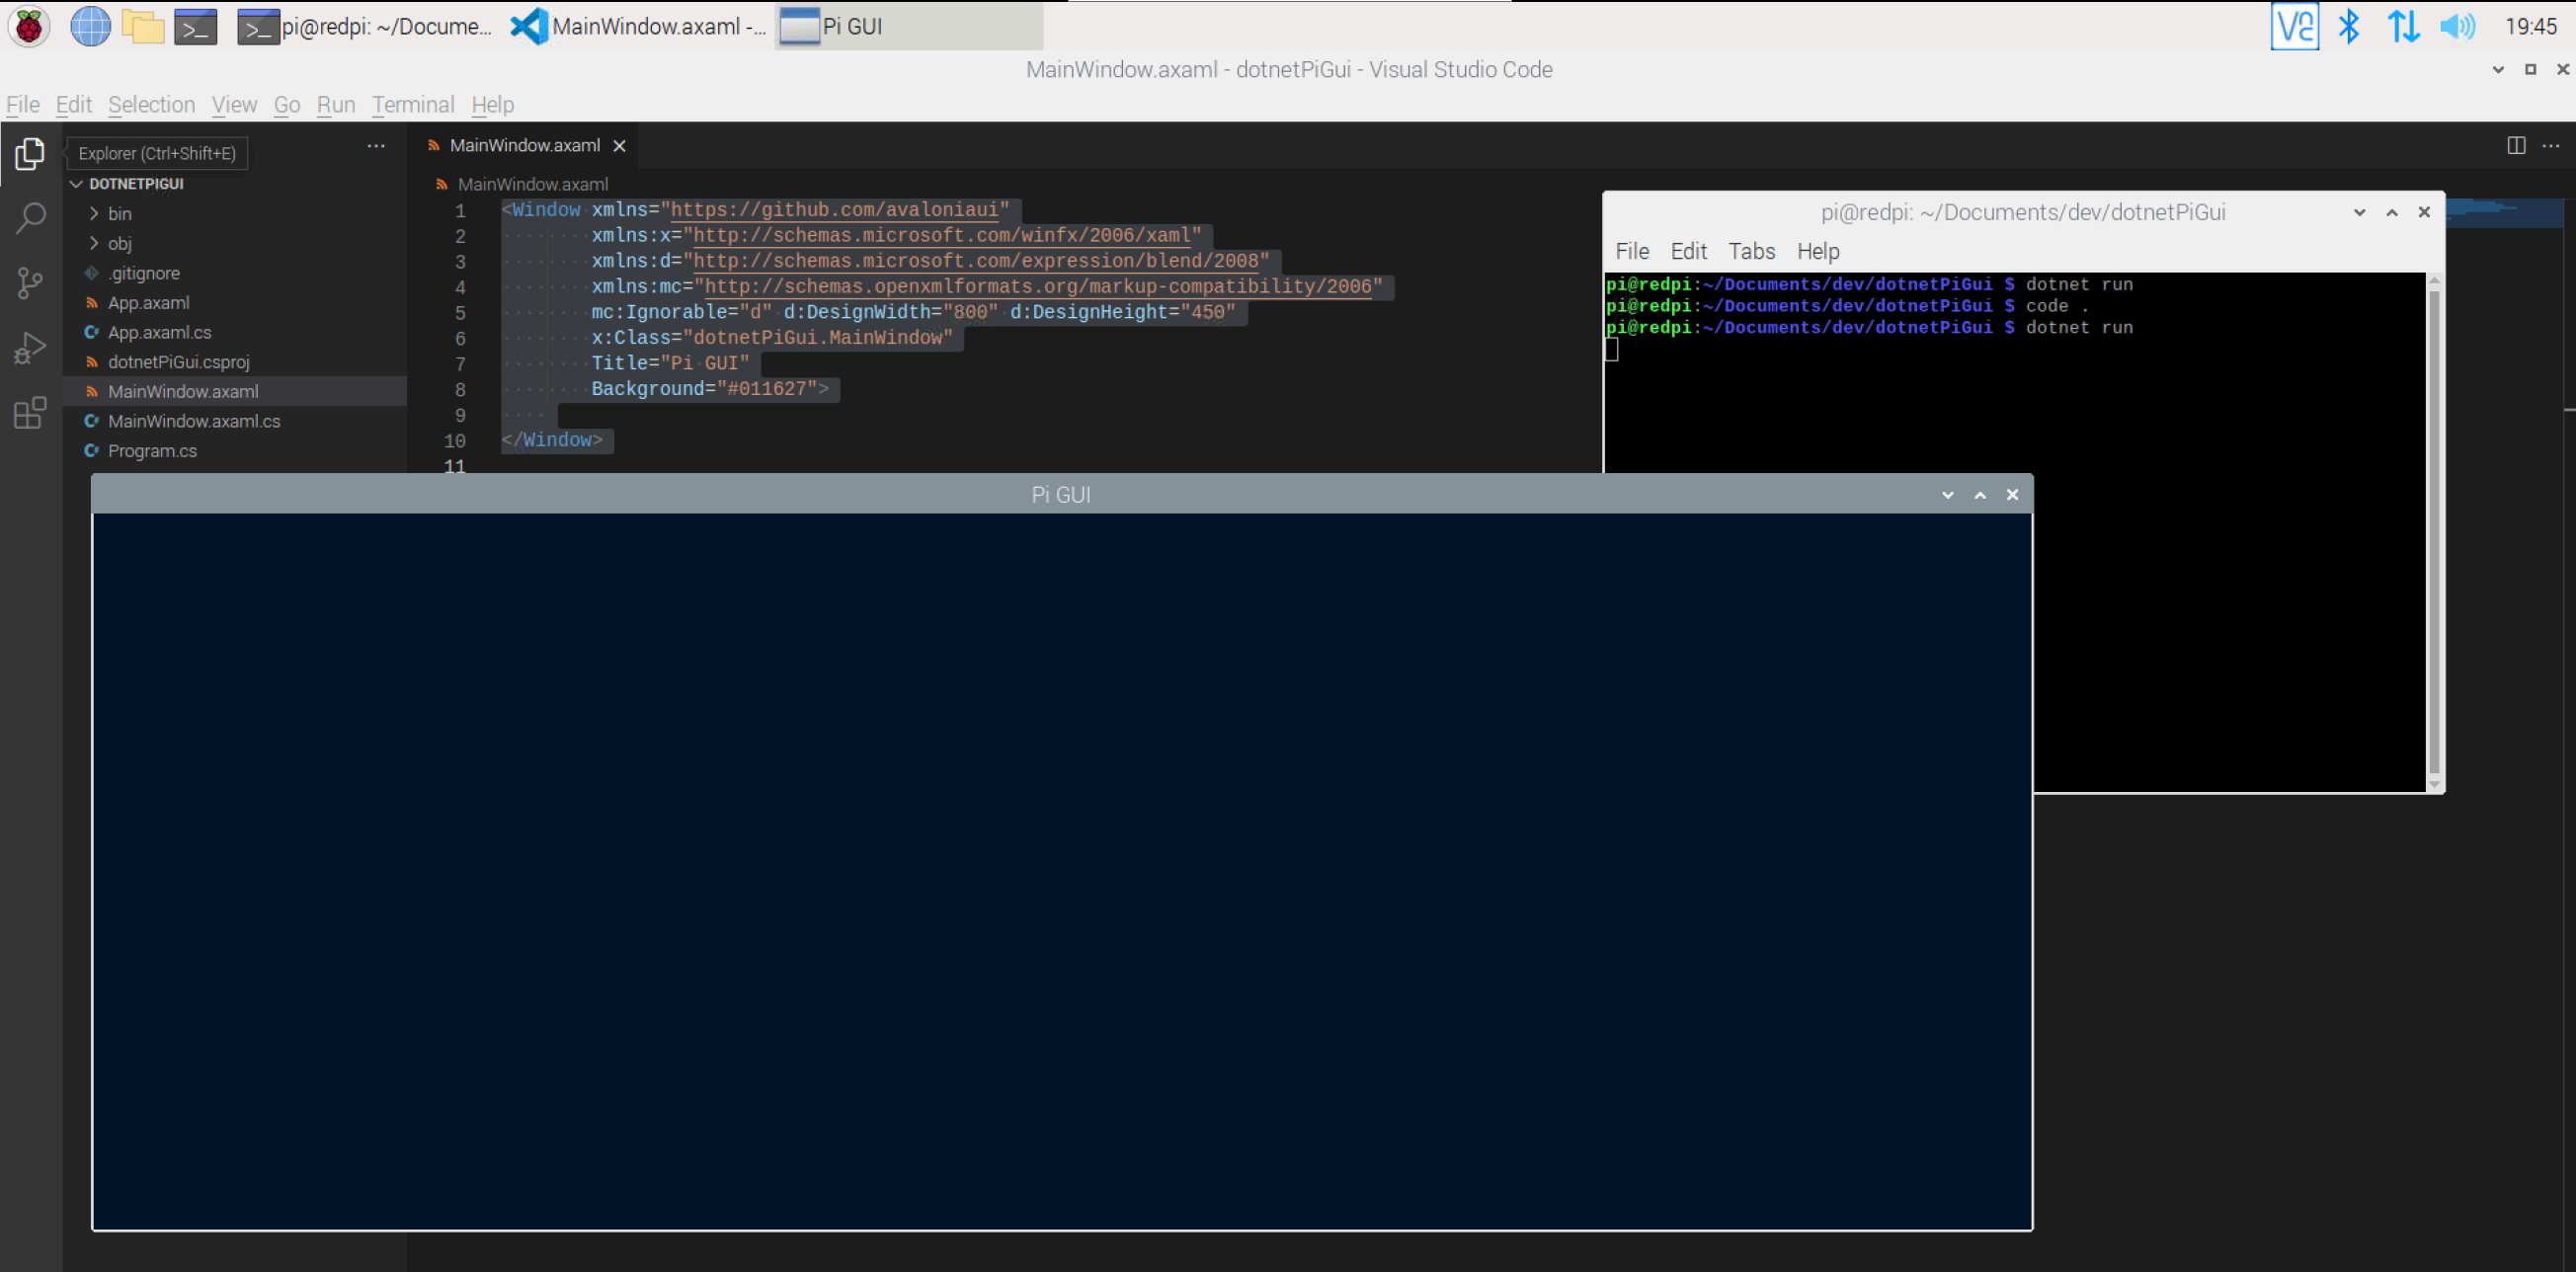
Close the new application by clicking on the close (X) button in the top right on the window.
Display the time
In this step the time will be displayed in the window. This uses some of the same code that is explained in the Note on how to display a clock in the Terminal.
In Visual Studio Code open the MainWindow.axaml file.
In the Window element contents add a TextBlock
<TextBlock Margin="20" FontSize="38" FontFamily="Consolas" Foreground="Green" Text="{Binding Time}" />
A TextBlock element displays (as the name suggests) a block of text in the window.
Each attribute in the TextBlock defines some aspect of how it is displayed. For a full list of attributes see the Avalonia documentation.
The Margin defines the space provided around all sides of the control.
The FontSize is the size of the font used to render the text.
The FontFamily defines the group (or family) of font to use to render the text.
The Foreground is the colour used to draw the text.
The Text defines the text to display. While it is possible to hardcode a text string in here, the Binding instructs the code to use the value of a variable for the text displayed, more on this later.
The full MainWindow.axaml file should look like this
<Window xmlns="https://github.com/avaloniaui"
        xmlns:x="http://schemas.microsoft.com/winfx/2006/xaml"
        xmlns:d="http://schemas.microsoft.com/expression/blend/2008"
        xmlns:mc="http://schemas.openxmlformats.org/markup-compatibility/2006"
        mc:Ignorable="d" d:DesignWidth="800" d:DesignHeight="450"
        x:Class="dotnetPiGui.MainWindow"
        Title="Pi GUI"
        Background="#011627">
    <TextBlock Margin="20" FontSize="38" FontFamily="Consolas" Foreground="Green" Text="{Binding Time}" />
</Window>
Save the the MainWindow.axaml file.
In Visual Studio Code open the MainWindow.axaml.cs file.
Add a property for the Time that was used in the binding in the previous step.
using Avalonia.Controls;
using System;

namespace dotnetPiGui
{
    public partial class MainWindow : Window
    {
        DateTime time;

        public string Time
        {
                get { return time.ToString("dd MMM yy HH:mm"); }
                set {  }
        }

        public MainWindow()
        {
            time = DateTime.Now;
            InitializeComponent();
            DataContext = this;
        }
    }
}
Save the the MainWindow.axaml.cs file.
In the updated code a DateTime variable named time is created in the class to store the time.
Then a property is created named Time (uppercase T) that can return the time as a string.
NOTE: that the using System; line has been added to the top of the file, this allows the code classes in the System namespace to be referenced. DateTime is in the System namespace.
In the MainWindow constructor method, before InitializeComponent method is called, the time variable is set to the current time.
After the InitializeComponent method is called the DataContext is set to this.
The DataContext is used to inform the binding system which object has the properties being bound in the user interface. In the previous step the Text attribute was set to {Binding Time}, this means the Time property of the currently bound object is used to display the text in the TextBlock. The this keyword is used to indicate the current instance of the class (or the object) should be referenced.
All of this means that the Time property will be used to retrieve the text to display in the TextBlock.
Compile and run the new application from the Terminal window with dotnet run
dotnet run
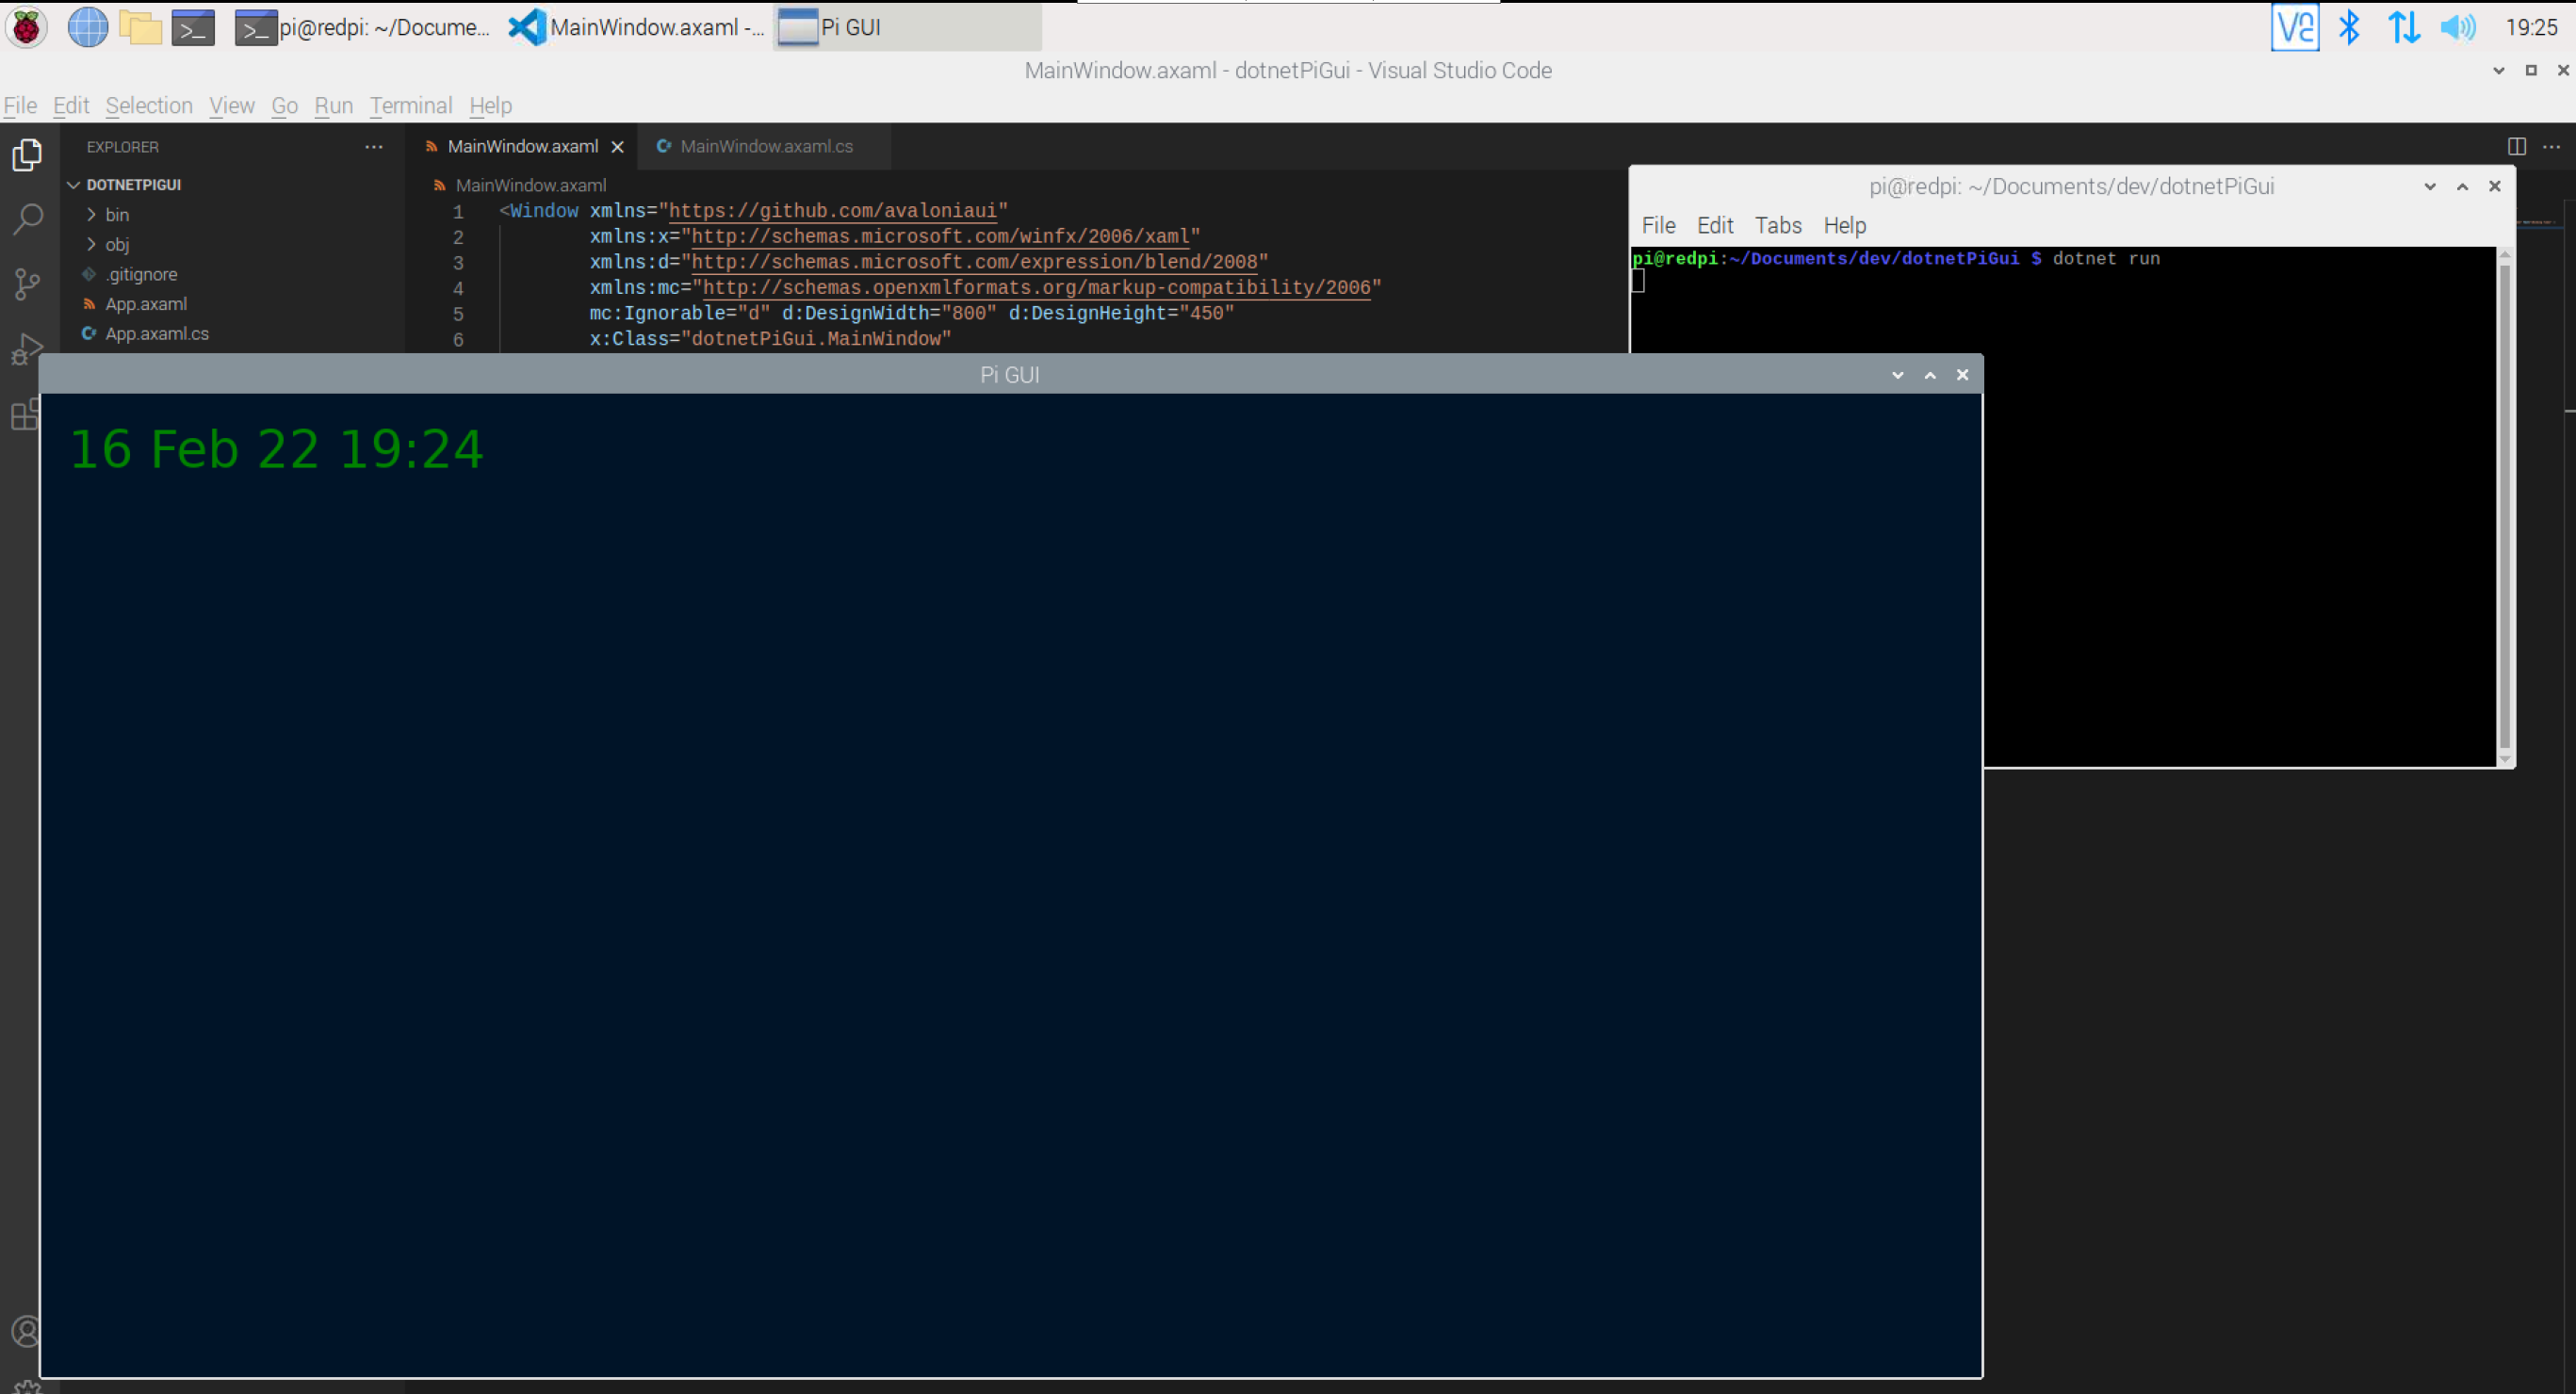
Close the new application by clicking on the close (X) button in the top right on the window.
Update the time
To make this useful the time needs to update and display the correct time.
In Visual Studio Code open the MainWindow.axaml.cs file.
At the top of the file add more namespaces to allow the code to use the classes in those namespaces
using System.ComponentModel;
using System.Runtime.CompilerServices;
using System.Threading;
using System.Threading.Tasks;
Add the interface INotifyPropertyChanged to the MainWindow class declaration. This interface can be used by the binding to discover when a property that is bound in the user interface has changed.
public partial class MainWindow : Window, INotifyPropertyChanged
In the MainWindow class add an event of type PropertyChangedEvenHandler named PropertyChanged, the ? in the declaration means the event can be null or not set. The new keyword is used to replace a PropertyChanged event that is already supported in the Window class.
Add a method named NotifyPropertyChanged to the MainWindows class. This method with use the [CallerMemberName] attribute, this attribute informs the compiler that the parameter propertyName should be set to the name of the method or property that called the method.
The code in the NotifyPropertyChanged method calls (or invokes) any handlers that have been added to listen to the PropertyChanged, passing the name of the property in the propertyName variable.
        public new event PropertyChangedEventHandler? PropertyChanged;
        private void NotifyPropertyChanged([CallerMemberName] String propertyName = "")
    {
        PropertyChanged?.Invoke(this, new PropertyChangedEventArgs(propertyName));
    }
Modify the Time property to call the NotifyPropertyChanged method when ever it is set.
        public string Time
    {
        get { return time.ToString("dd MMM yy HH:mm"); }
        set { NotifyPropertyChanged(); }
    }
UpdateGUI that is called from a new Thread.
The UpdateGui method runs forever in a loop, updating the time variable, and setting the Time property, forcing the PropertyChanged event to be raised.
        public MainWindow()
        {
                time = DateTime.Now;
                InitializeComponent();
                DataContext = this;
                var t = new Thread(new ThreadStart(async () => await UpdateGUI()));
                t.Start();
        }

        private async Task UpdateGUI()
    {
            while (true)
        {
            time = DateTime.Now;
            Time = string.Empty;
            await Task.Delay(1000);
        }
    }
The complete code file should now look like this.
using Avalonia.Controls;
using System;
using System.ComponentModel;
using System.Runtime.CompilerServices;
using System.Threading;
using System.Threading.Tasks;

namespace dotnetPiGui
{
    public partial class MainWindow : Window, INotifyPropertyChanged
    {
        public new event PropertyChangedEventHandler? PropertyChanged;
        private void NotifyPropertyChanged([CallerMemberName] String propertyName = "")
    {
        PropertyChanged?.Invoke(this, new PropertyChangedEventArgs(propertyName));
    }

        DateTime time;
    public string Time
    {
        get { return time.ToString("dd MMM yy HH:mm"); }
        set { NotifyPropertyChanged(); }
    }

        public MainWindow()
        {
                time = DateTime.Now;
                InitializeComponent();
                DataContext = this;
                var t = new Thread(new ThreadStart(async () => await UpdateGUI()));
                t.Start();
        }

        private async Task UpdateGUI()
    {
            while (true)
        {
            time = DateTime.Now;
            Time = string.Empty;
            await Task.Delay(1000);
        }
    }
    }
}
Compile and run the new application from the Terminal window with dotnet run
dotnet run
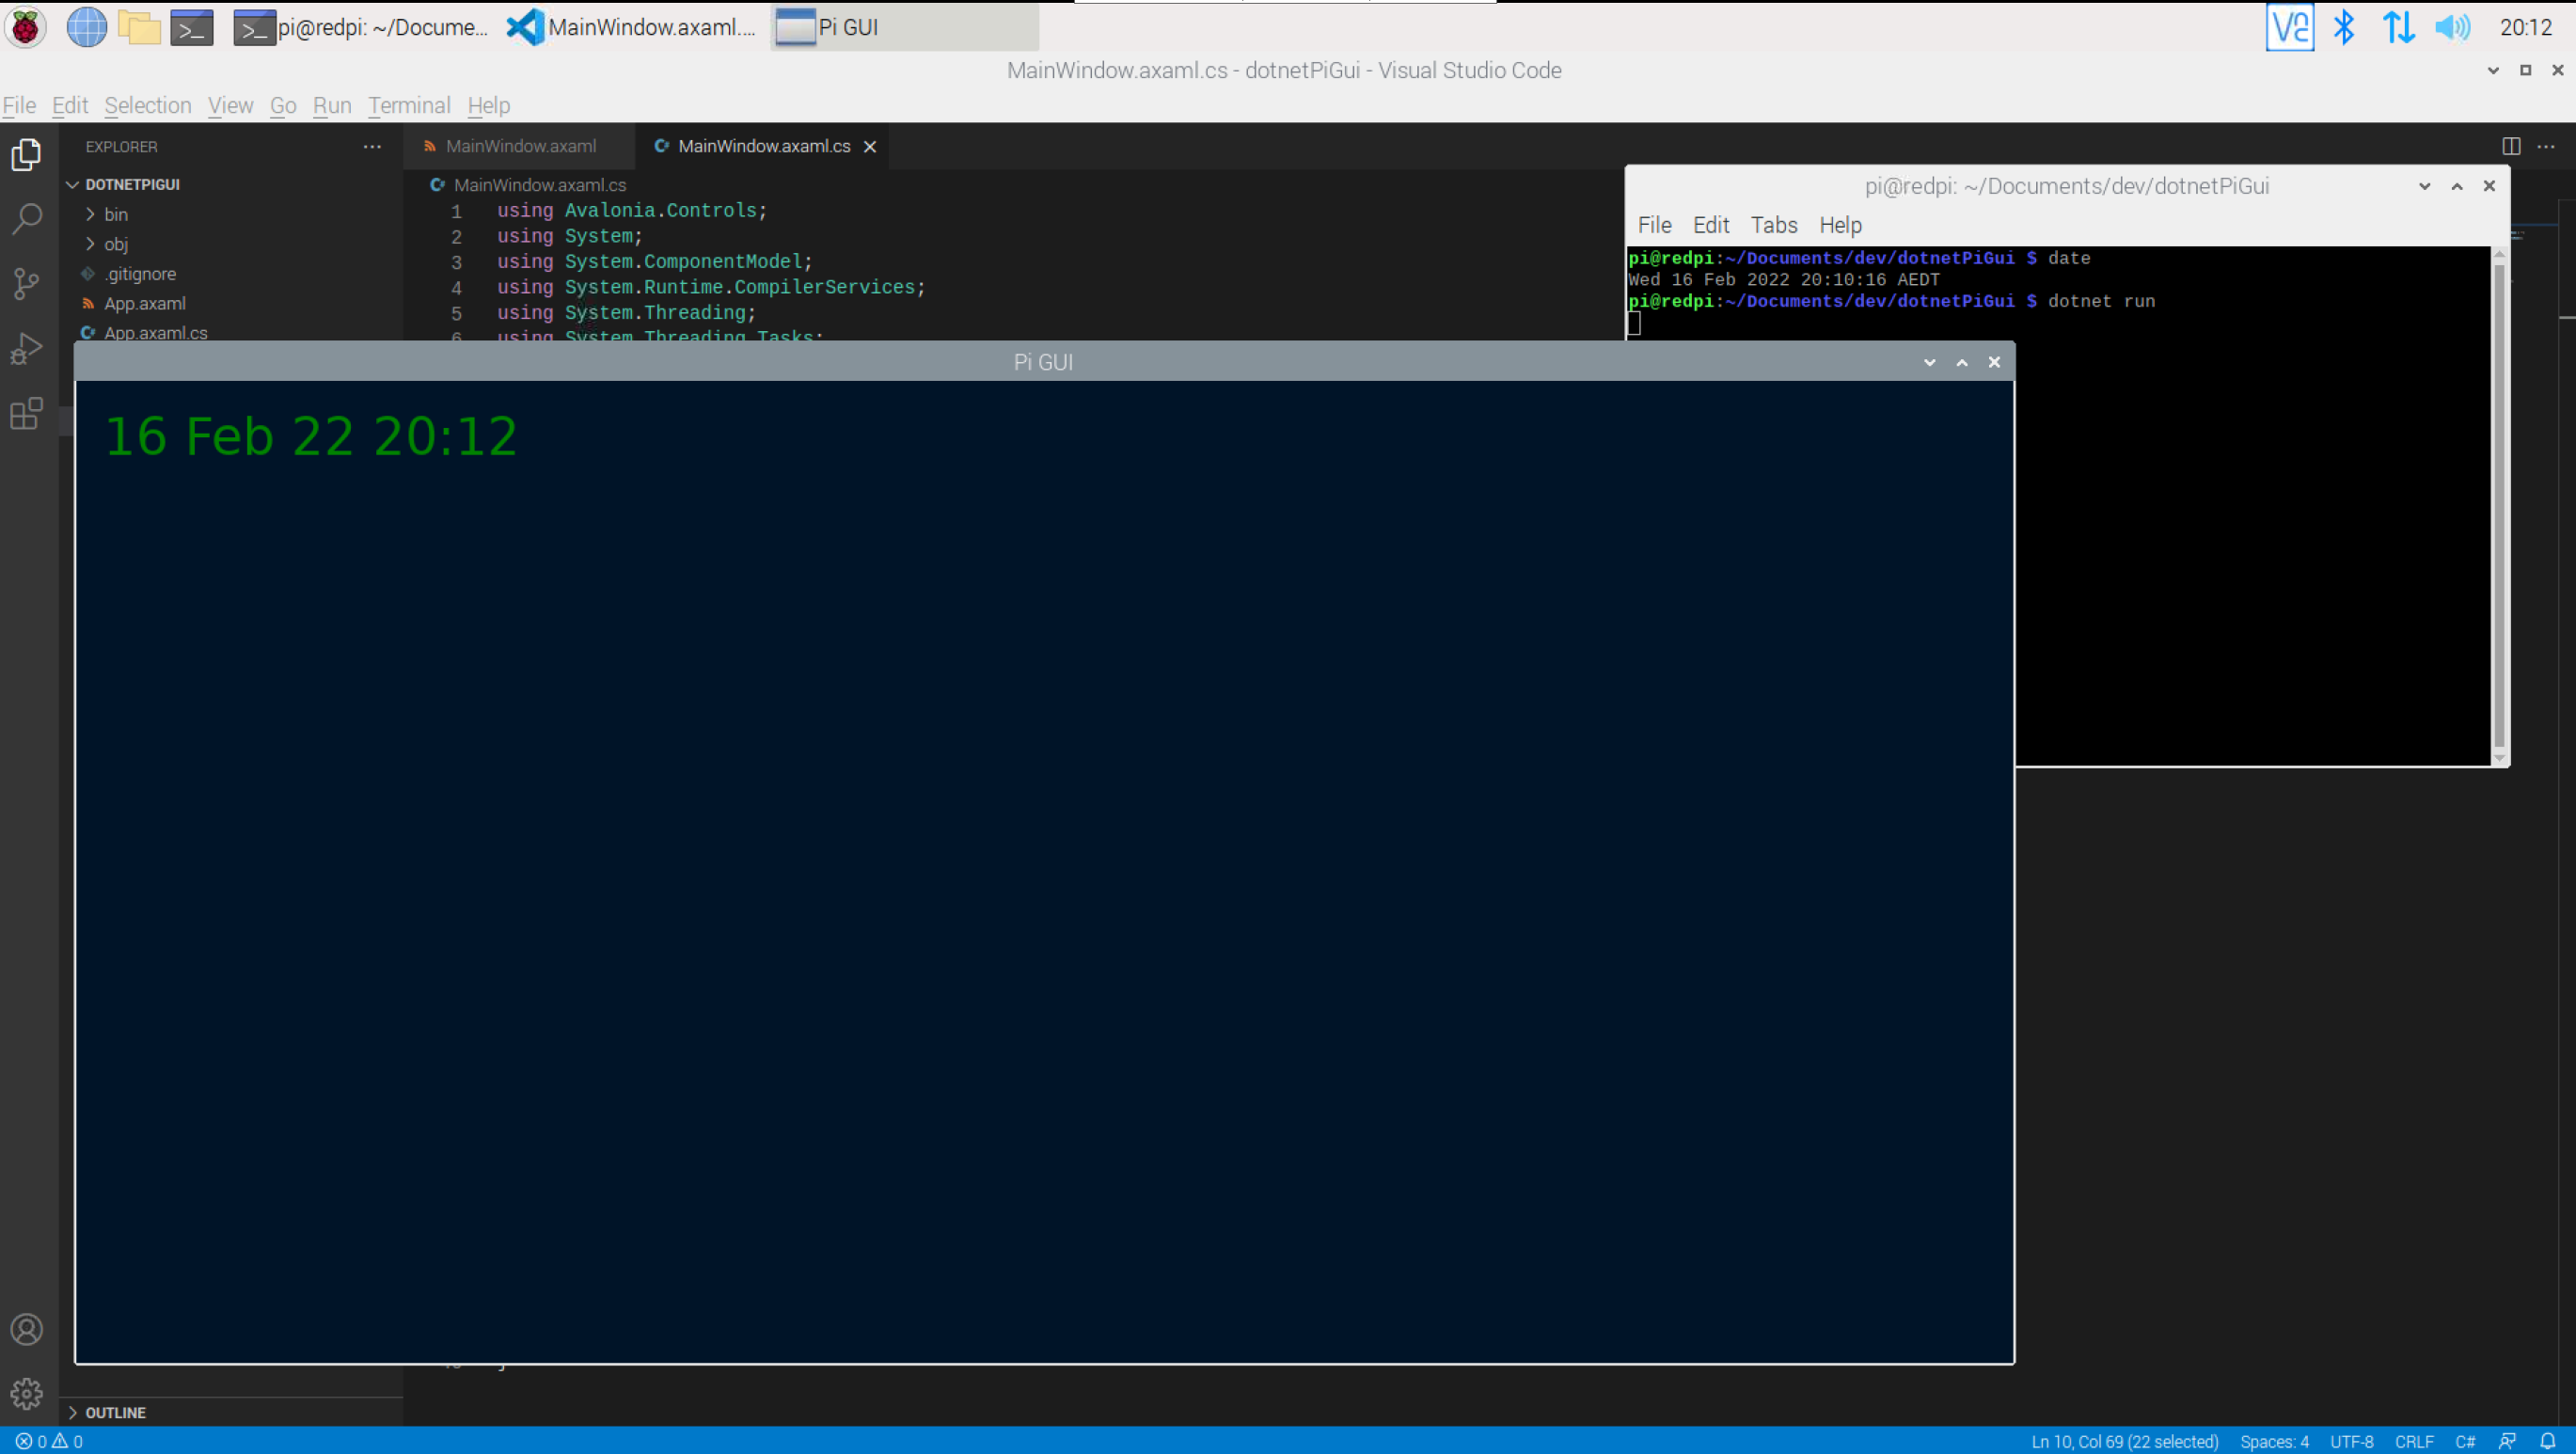
Close the new application by clicking on the close (X) button in the top right on the window.
Display the weather
To display the weather the code that from the Note on how to display the weather in a Terminal will be used. To understand how to get a key for the OpenWeather service please review the Note.
In Visual Studio Code open the MainWindow.axaml file.
In the Window element contents add another TextBlock below the TextBox that displays the time.
<TextBlock Margin="20" FontSize="38" FontFamily="Consolas" Foreground="Green" Text="{Binding Weather}" />
Then place both the TextBlock elements inside a StackPanel element.
The StackPanel element, stacks the contained items. The default is a vertical stack, so the items appear in a list above one another. It is possible to change a StackPanel so it stacks horizontally, using the Orientation attribute. Further discussion of layout will continue later in this Note.
<StackPanel>
        <TextBlock Margin="20" FontSize="38" FontFamily="Consolas" Foreground="Green" Text="{Binding Time}" />
        <TextBlock Margin="20" FontSize="38" FontFamily="Consolas" Foreground="Green" Text="{Binding Weather}" />
</StackPanel>
The contents of the MainWindow.axaml file should now look like this
<Window xmlns="https://github.com/avaloniaui"
        xmlns:x="http://schemas.microsoft.com/winfx/2006/xaml"
        xmlns:d="http://schemas.microsoft.com/expression/blend/2008"
        xmlns:mc="http://schemas.openxmlformats.org/markup-compatibility/2006"
        mc:Ignorable="d" d:DesignWidth="800" d:DesignHeight="450"
        x:Class="dotnetPiGui.MainWindow"
        Title="Pi GUI"
        Background="#011627">
    <StackPanel>
        <TextBlock Margin="20" FontSize="38" FontFamily="Consolas" Foreground="Green" Text="{Binding Time}" />
        <TextBlock Margin="20" FontSize="38" FontFamily="Consolas" Foreground="Green" Text="{Binding Weather}" />
    </StackPanel>
</Window>
Save the MainWindow.axaml file.
In Visual Studio Code open the dotnetPiGui.csproj file. This file was generated by the call to dotnet new at the start of this Note.
Add package references the OpenWeather package. This imports the Weather.NET library to the code, enabling the OpenWeather methods to be called.
<PackageReference Include="Weather.NET" Version="1.1.0" />
The dotnetPiGui.csproj file should look like this.
<Project Sdk="Microsoft.NET.Sdk">
        <PropertyGroup>
                <OutputType>WinExe</OutputType>
                <TargetFramework>net6.0</TargetFramework>
                <Nullable>enable</Nullable>
            <!--Avalonia doesen't support TrimMode=link currently,but we are working on that https://github.com/AvaloniaUI/Avalonia/issues/6892 -->
                <TrimMode>copyused</TrimMode>
            <BuiltInComInteropSupport>true</BuiltInComInteropSupport>
        </PropertyGroup>
        <ItemGroup>
                <None Remove=".gitignore" />
        </ItemGroup>
        <ItemGroup>
                <!--This helps with theme dll-s trimming.
                If you will publish your application in self-contained mode with p:PublishTrimmed=true and it will use Fluent theme Default theme will be trimmed from the output and vice versa.
                https://github.com/AvaloniaUI/Avalonia/issues/5593 -->
                <TrimmableAssembly Include="Avalonia.Themes.Fluent" />
                <TrimmableAssembly Include="Avalonia.Themes.Default" />
        </ItemGroup>
        <ItemGroup>
                <PackageReference Include="Avalonia" Version="0.10.12" />
                <PackageReference Include="Avalonia.Desktop" Version="0.10.12" />
                <!--Condition below is needed to remove Avalonia.Diagnostics package from build output in Release configuration.-->
                <PackageReference Condition="'$(Configuration)' == 'Debug'"
                  Include="Avalonia.Diagnostics" Version="0.10.12" />
                <PackageReference Include="XamlNameReferenceGenerator" Version="1.3.4" />
                <PackageReference Include="Weather.NET" Version="1.1.0" />
        </ItemGroup>
</Project>
Save the dotnetPiGui.csproj file.
In Visual Studio Code open the MainWindow.axaml.cs file.
At the top of the file add three new using statements to import the namespaces for the OpenWeather API.
using Weather.NET;
using Weather.NET.Enums;
using Weather.NET.Models.WeatherModel;
Inside the MainWindow class add local member variables for the WeatherClient and WeatherModel.
Create a string for the city you wish to retrieve the weather for.
NOTE: replace the YOUR KEY GOES HERE with the key from the OpenWeather Service, see the Note on how to display the weather for information on how to get a key for the OpenWeather Service.
WeatherClient client = new WeatherClient("YOUR KEY GOES HERE");
WeatherModel? currentWeather;
const string weatherCity = "Sydney, NSW";
Below the Time property, create a property for the Weather, this property provides the weather text to the TextBlock defined in the previous step.
NOTE: the character \u2103 is the Unicode character for degrees Celsius, ℃. The Unicode character for Fahrenheit is \u2109, ℉.
public string  Weather
{
  get
  {
    if (currentWeather is not null)
    {
      var weather = $"{currentWeather.CityName}, {currentWeather.Weather[0].Title},   {currentWeather.Main.Temperature}\u2103";
      return weather;
    }
    return string.Empty;
  }
  set { NotifyPropertyChanged(); }
}
In the UpdateGui method, add code to retrieve the weather before the loop.
if (currentWeather == null)
{
        currentWeather = client.GetCurrentWeather(cityName: weatherCity, measurement: Measurement.Metric);
        Weather = string.Empty;
}
The code in the MainWindow.axaml.cs file should look like this
using Avalonia.Controls;
using System;
using System.ComponentModel;
using System.Runtime.CompilerServices;
using System.Threading;
using System.Threading.Tasks;
using Weather.NET;
using Weather.NET.Enums;
using Weather.NET.Models.WeatherModel;

namespace dotnetPiGui
{
    public partial class MainWindow : Window, INotifyPropertyChanged
    {
        WeatherClient client = new WeatherClient("YOUR KEY GOES HERE");
        WeatherModel? currentWeather;
        const string weatherCity = "Sydney, NSW";

        public new event PropertyChangedEventHandler? PropertyChanged;
        private void NotifyPropertyChanged([CallerMemberName] String propertyName = "")
        {
                PropertyChanged?.Invoke(this, new PropertyChangedEventArgs(propertyName));
        }

        DateTime time;
        public string Time
        {
                get { return time.ToString("dd MMM yy HH:mm"); }
                set { NotifyPropertyChanged(); }
        }

        public string  Weather
        {
                get
                {
                        if (currentWeather is not null)
                        {
                                var weather = $"{currentWeather.CityName}, {currentWeather.Weather[0].Title}, {currentWeather.Main.Temperature}\u2103";
                                return weather;
                        }
                        return string.Empty;
                }
                set { NotifyPropertyChanged(); }
        }

        public MainWindow()
        {
            time = DateTime.Now;
            InitializeComponent();
            DataContext = this;
            var t = new Thread(new ThreadStart(async () => await UpdateGUI()));
            t.Start();
        }

        private async Task UpdateGUI()
        {
                if (currentWeather == null)
                {
                        currentWeather = client.GetCurrentWeather(cityName: weatherCity, measurement: Measurement.Metric);
                        Weather = string.Empty;
                }

                while (true)
                {
                        time = DateTime.Now;
                        Time = string.Empty;
                        await Task.Delay(1000);
                }
        }
    }
}
Save the MainWindow.axaml.cs file.
Compile and run the new application from the Terminal window with dotnet run
dotnet run
The project will be built and then run, showing the window with the time and weather.
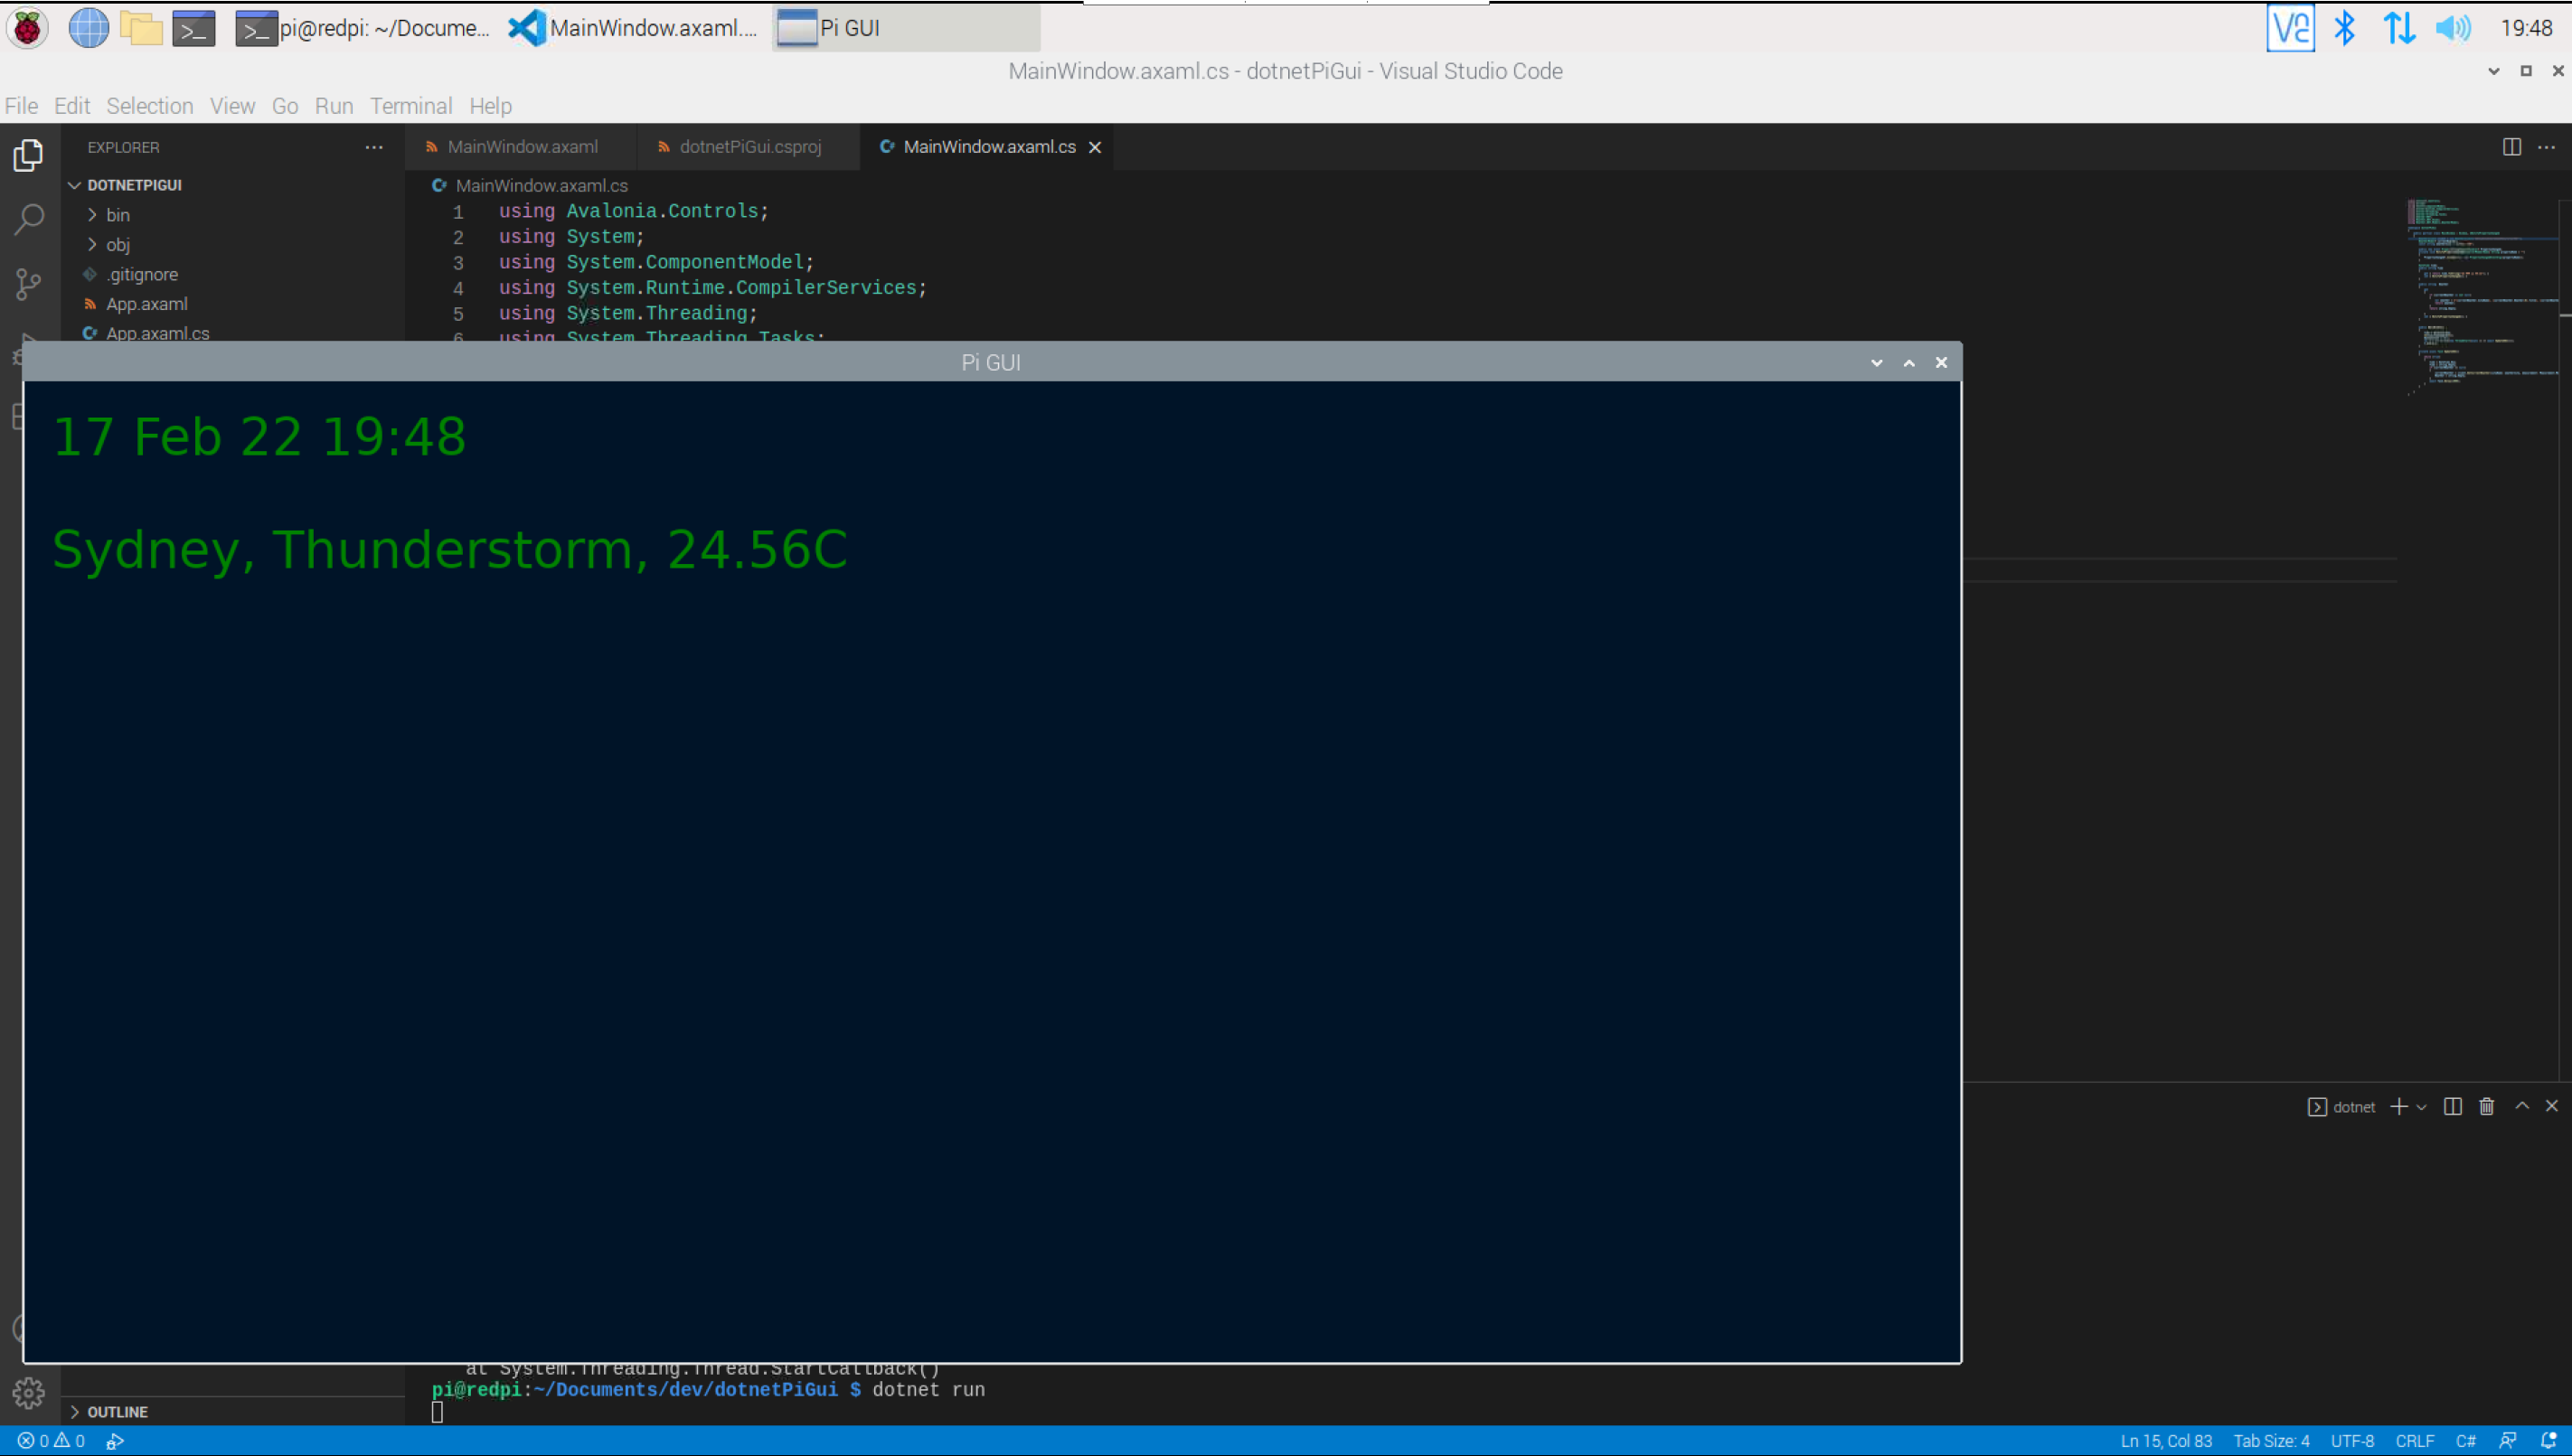
Close the new application by clicking on the close (X) button in the top right on the window.
Update the weather
In the Note on how to display the weather in the Terminal, the weather was updated at a different cadence to the time. In this step the same idea will be used.
In Visual Studio Code open the MainWindow.axaml.cs file.
In the MainWindow class add the following variables to set the period for checking the weather, and the current count towards that period.
const int checkWeatherPeriod = 60;
int currentPeriodSeconds = 0;
In the while loop of the UpdateGUI method add the following code to update the weather when the counter gets to the value of the period. The counter is then reset to 0 and the count starts again.
if (currentPeriodSeconds > checkWeatherPeriod)
{
        currentWeather = client.GetCurrentWeather(cityName: weatherCity, measurement: Measurement.Metric);
        currentPeriodSeconds = 0;
}
currentPeriodSeconds++;
Save the MainWindow.axaml.cs file.
Compile and run the new application from the Terminal window with dotnet run
dotnet run
The project will be built and then run, showing the window with the time and weather. If you wait longer enough, and the weather has changed, it will be reflected in the output.
NOTE: in this code the checkWeatherPeriod is set to 60, approximately every 60 seconds the weather will be updated. It is not exactly 60 seconds because the code takes some amount of time to run, and the Task.Delay(1000) is not guaranteed to wait exactly 1000 milliseconds.
IF this was an application for the real world the period would likely be set to longer, if the weather is only updated once every 5 minutes, that is probably enough, and in some circumstances, every 30 minutes might be fine too.

Close the new application by clicking on the close (X) button in the top right on the window.
Adjust the layout
In the previous steps the time and weather have been stacked vertically. However it might be good to place the TextBlocks in different locations.
In this step the code for the user interface will be adjusted to change the layout of the window contents.
In Visual Studio Code open the MainWindow.axaml file.
Edit the window contents to remove the StackPanel and use a Grid instead. The Grid has three RowDefinitions, the first and last rows are defined as having a Height of 50, the second row has a Height of *, the * character is used to define a row should fill the remaining space.
The TextBlock elements contain Grid.Row attributes, these Grid.Row attributes define in which row to display the TextBlock element. Also notice the weather and time have been swapped around, so the weather is displayed in the first row (0 is the first, as the list is zero indexed), and the time is displayed in the third row (1 in a zero indexed collection).
<Window xmlns="https://github.com/avaloniaui"
        xmlns:x="http://schemas.microsoft.com/winfx/2006/xaml"
        xmlns:d="http://schemas.microsoft.com/expression/blend/2008"
        xmlns:mc="http://schemas.openxmlformats.org/markup-compatibility/2006"
        mc:Ignorable="d" d:DesignWidth="800" d:DesignHeight="450"
        x:Class="dotnetPiGui.MainWindow"
        Title="Pi GUI"
        Background="#011627">
    <Grid>
        <Grid.RowDefinitions>
            <RowDefinition Height = "50" />
            <RowDefinition Height = "*" />
            <RowDefinition Height = "50" />
        </Grid.RowDefinitions>
        <TextBlock Grid.Row="0" Margin="20" FontSize="38" FontFamily="Consolas" Foreground="Green" Text="{Binding Weather}" />
        <TextBlock Grid.Row="2" Margin="20" FontSize="38" FontFamily="Consolas" Foreground="Green" Text="{Binding Time}" />
    </Grid>
</Window>
Save the MainWindow.axaml file.
Compile and run the new application from the Terminal window with dotnet run
dotnet run
The project will be built and then run, showing the window with the the new layout.
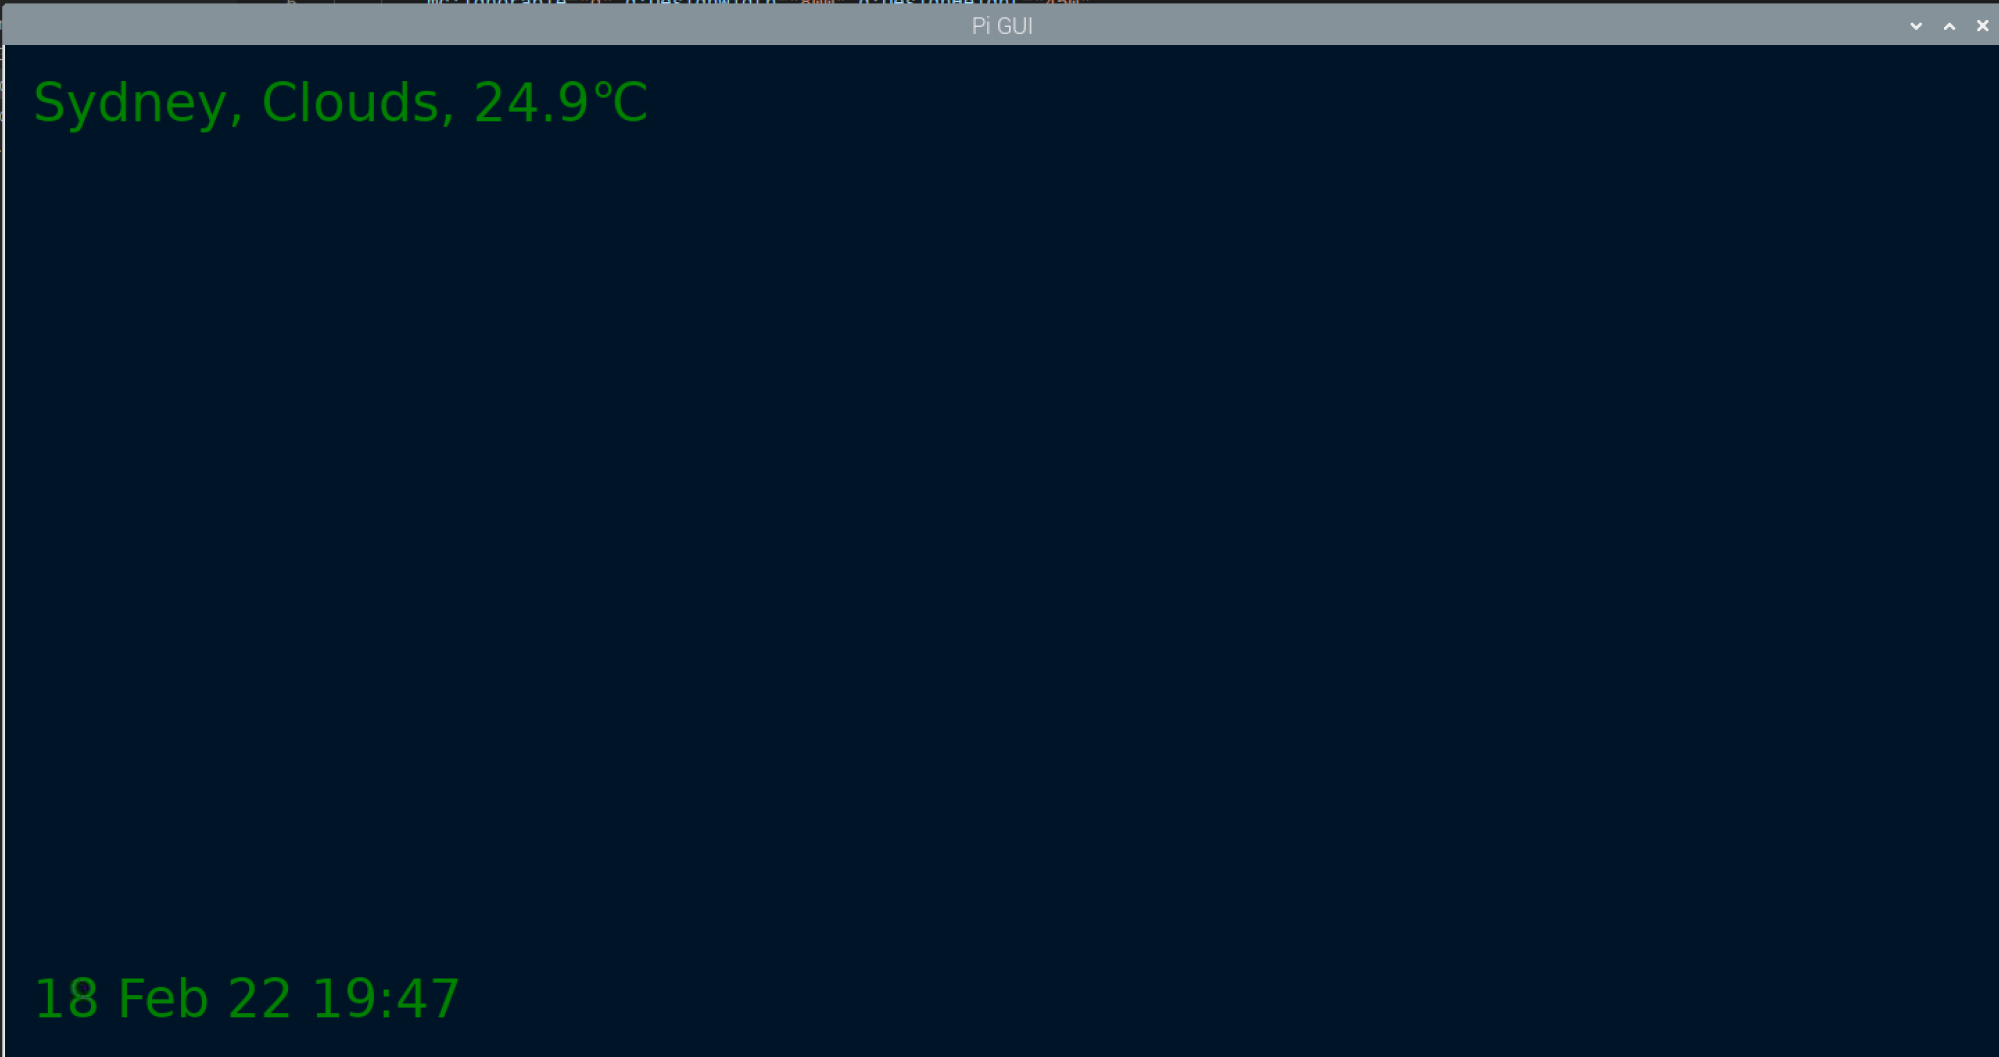
Close the new application by clicking on the close (X) button in the top right on the window.
Conclusion
In this Note a new GUI application has been created for the Raspberry Pi, this application displays the time and weather. While it is very simple, it has provided an introduction to working with Avalonia in .NET to create a GUI that will work on multiple platforms, including a Raspberry Pi.
Dr. Neil's Notes
Software > Coding
.NET Picture Frame application on Raspberry Pi with Avalonia
Introduction
In previous Notes I have documented how to get a Raspberry Pi setup to develop with .NET, a few simple console programs that Animate ASCII art, display a clock, and display the weather. A recent Note explained how to create a .NET GUI application on Raspberry Pi with Avalonia.
In this Note I explain how to build a desktop GUI application on the Raspberry Pi that displays a series of pictures. The graphical user interface (or GUI) will be built using an open source GUI toolkit called Avalonia.
Before reading this Note, it is recommended you read the Note on how to create a .NET GUI application on Raspberry Pi with Avalonia.
The code shown in this Note may work on other platforms supported by .NET 6, it has been tested on a Raspberry Pi, Windows, and Mac.
If you want to get a Raspberry Pi setup to run .NET code, follow the instructions in the .NET Development on a Raspberry Pi Note.
This Note assumes you have installed .NET 6 and Visual Studio Code.
Create the project
If there is not already a folder for code projects, create a folder for code projects. I created a folder called dev.
Open a Terminal window on the Raspberry Pi, and navigate to the folder where you want to create the new folder (e.g. Documents), then enter
 mkdir dev
 ```

This makes the directory **dev**

Navigate to that directory

```console
 cd dev
 ```

Create a directory for this project, named **dotnetPiPictureFrame**

```console
 mkdir dotnetPiPictureFrame
 ```

Change the directory to the new folder created.

```console
 cd dotnetPiPictureFrame/
 ```

If you have not already installed the Avalonia project templates, install the project templates for Avalonia

```console
dotnet new -i Avalonia.Templates
Create a simple Avalonia GUI application with the following command
dotnet new avalonia.app
tree command
~/Documents/dev/dotnetPiPictureFrame $ tree
.
├── App.axaml
├── App.axaml.cs
├── dotnetPiPictureFrame.csproj
├── MainWindow.axaml
├── MainWindow.axaml.cs
└── Program.cs

0 directories, 6 files
Compile and run the new application from the Terminal window with dotnet run
The dotnet run command will compile the project code in the current folder and run it.
dotnet run

Close the new application by clicking on the close (X) button in the top right on the window.
Display an Image
Open Visual Studio Code from the dotnetPiPictureFrame folder
code .
In the root folder create a new code file named PictureConverter.cs. This class will implement an IValueConverter interface.
This class will convert a file path of an image file to be loaded as a bitmap, to display in the window.
In the Note on how to create a .NET GUI application on Raspberry Pi with Avalonia the time and weather were displayed by binding a string to the Text value of a TextBlock. With an Image control the source of the image needs to be bound to a bitmap. However images are stored as files, and the file path is a string. This PictureConverter class will take a file path and attempt to load it as an image and return a Bitmap to be rendered.
The code should look like this.
using Avalonia.Data.Converters;
using Avalonia.Media.Imaging;
using System;
using System.Globalization;
using System.IO;

namespace dotnetPiPictureFrame
{
    internal class PictureConverter : IValueConverter
    {
        public object? Convert(object? value, Type targetType, object? parameter, CultureInfo culture)
        {
            if (value == null)
                return null;

            if (value is string filepath
             && File.Exists(filepath))
            {
                return new Bitmap(filepath);
            }

            throw new NotSupportedException();
        }

        public object? ConvertBack(object? value, Type targetType, object? parameter, CultureInfo culture)
        {
            throw new NotImplementedException();
        }
    }
}
The important work this code is doing happens in these lines
if (value is string filepath
    && File.Exists(filepath))
{
    return new Bitmap(filepath);
}
The value being converted can be any type of object, so the first check is if the value is a string. Then the File.Exists method returns true if the filepath is a valid file. An extra check at this point would be to make sure the file is an image. For now it is assumed it is an image.
Given a valid file path, a Bitmap is loaded from the file, and returned as the converted object.
Save the PictureConverter.cs file.
To make the binding simpler the ReactiveUI library will be used to help notify the user interface when a bound value changes. In the Note on how to create a .NET GUI application on Raspberry Pi with Avalonia the INotifyPropertyChanged interface was implemented. The ReactiveUI library makes this even simpler.
In the Terminal (in the dotnetPiPictureFrame folder) enter
dotnet add package ReactiveUI
Return to Visual Studio Code and create a new code file named PictureViewModel.cs.
The PictureViewModel class will expose the path to a picture as a property named Path. The class will inherit from a ReactiveObject. The ReactiveObject comes from the ReactiveUI library added in the previous step.
An important line to note in the code is
this.RaiseAndSetIfChanged(ref path, value);
This RaiseAndSetIfChanged will update the private path member, and raise a notification to any objects listening for changes, such as a user interface object such as an Image
using ReactiveUI;

namespace dotnetPiPictureFrame
{
    public class PictureViewModel : ReactiveObject
    {
        string? path;

        public string? Path
        {
            get => path;
            set => this.RaiseAndSetIfChanged(ref path, value);
        }
    }
}
Save the PictureViewModel.cs file.
In Visual Studio Code open the MainWindow.axaml file to update the visual elements displayed in the window.
In the Window element attributes add a namespace reference for the namespace of this project dotnetPiPictureFrame
xmlns:local="using:dotnetPiPictureFrame"
Also edit the Title attribute, and add a Background attribute for the Window element.
    Title="PictureFrame"
    Background="Black"
The Window element should now look like this.
<Window xmlns="https://github.com/avaloniaui"
        xmlns:x="http://schemas.microsoft.com/winfx/2006/xaml"
        xmlns:d="http://schemas.microsoft.com/expression/blend/2008"
        xmlns:mc="http://schemas.openxmlformats.org/markup-compatibility/2006"
        xmlns:local="using:dotnetPiPictureFrame"
        mc:Ignorable="d" d:DesignWidth="800" d:DesignHeight="450"
        x:Class="dotnetPiPictureFrame.MainWindow"
        Title="PictureFrame"
        Background="Black">
Directly below the Window opening element (shown above) add a Window.Resources element. This element will contain a mapping of the PictureConverter class created earlier to a resource that can be used in this Window. The Key picConverter provides a way to access the resource. This will be used in the next step.
    <Window.Resources>
        <local:PictureConverter x:Key="picConverter"/>
    </Window.Resources>
In the contents of the Window element, replace the Hello Avalonia! text with an Image element.
The Image has a Source that defines the image to display, this is bound to a Path property (sound familiar) and uses the picConverter resources to convert the Path into a bitmap.
<Image x:Name="Picture" Source="{Binding Path, Converter={StaticResource picConverter}}"/>
Save the MainWindow.axaml file.
In Visual Studio Code open the MainWindow.axaml.cs file to add a small amount of code that allows an image to be displayed on the screen.
In the MainWindow class add a new instance of the PictureViewModel class declared earlier.
public PictureViewModel pictureVM = new PictureViewModel();
In the constructor of the MainWindow class set the DataContext to the pictureVM variable just declared.
Then set the Path to the file path of an image file, for example /home/pi/Pictures/field.jpg.
Make sure you have that file on your device.
public MainWindow()
{
    InitializeComponent();
    DataContext = pictureVM;
    pictureVM.Path = @"PATH TO IMAGE FILE";
}
Save the MainWindow.axaml.cs file.
Compile and run the new application from the Terminal window with dotnet run
The dotnet run command will compile the project code in the current folder and run it.
dotnet run
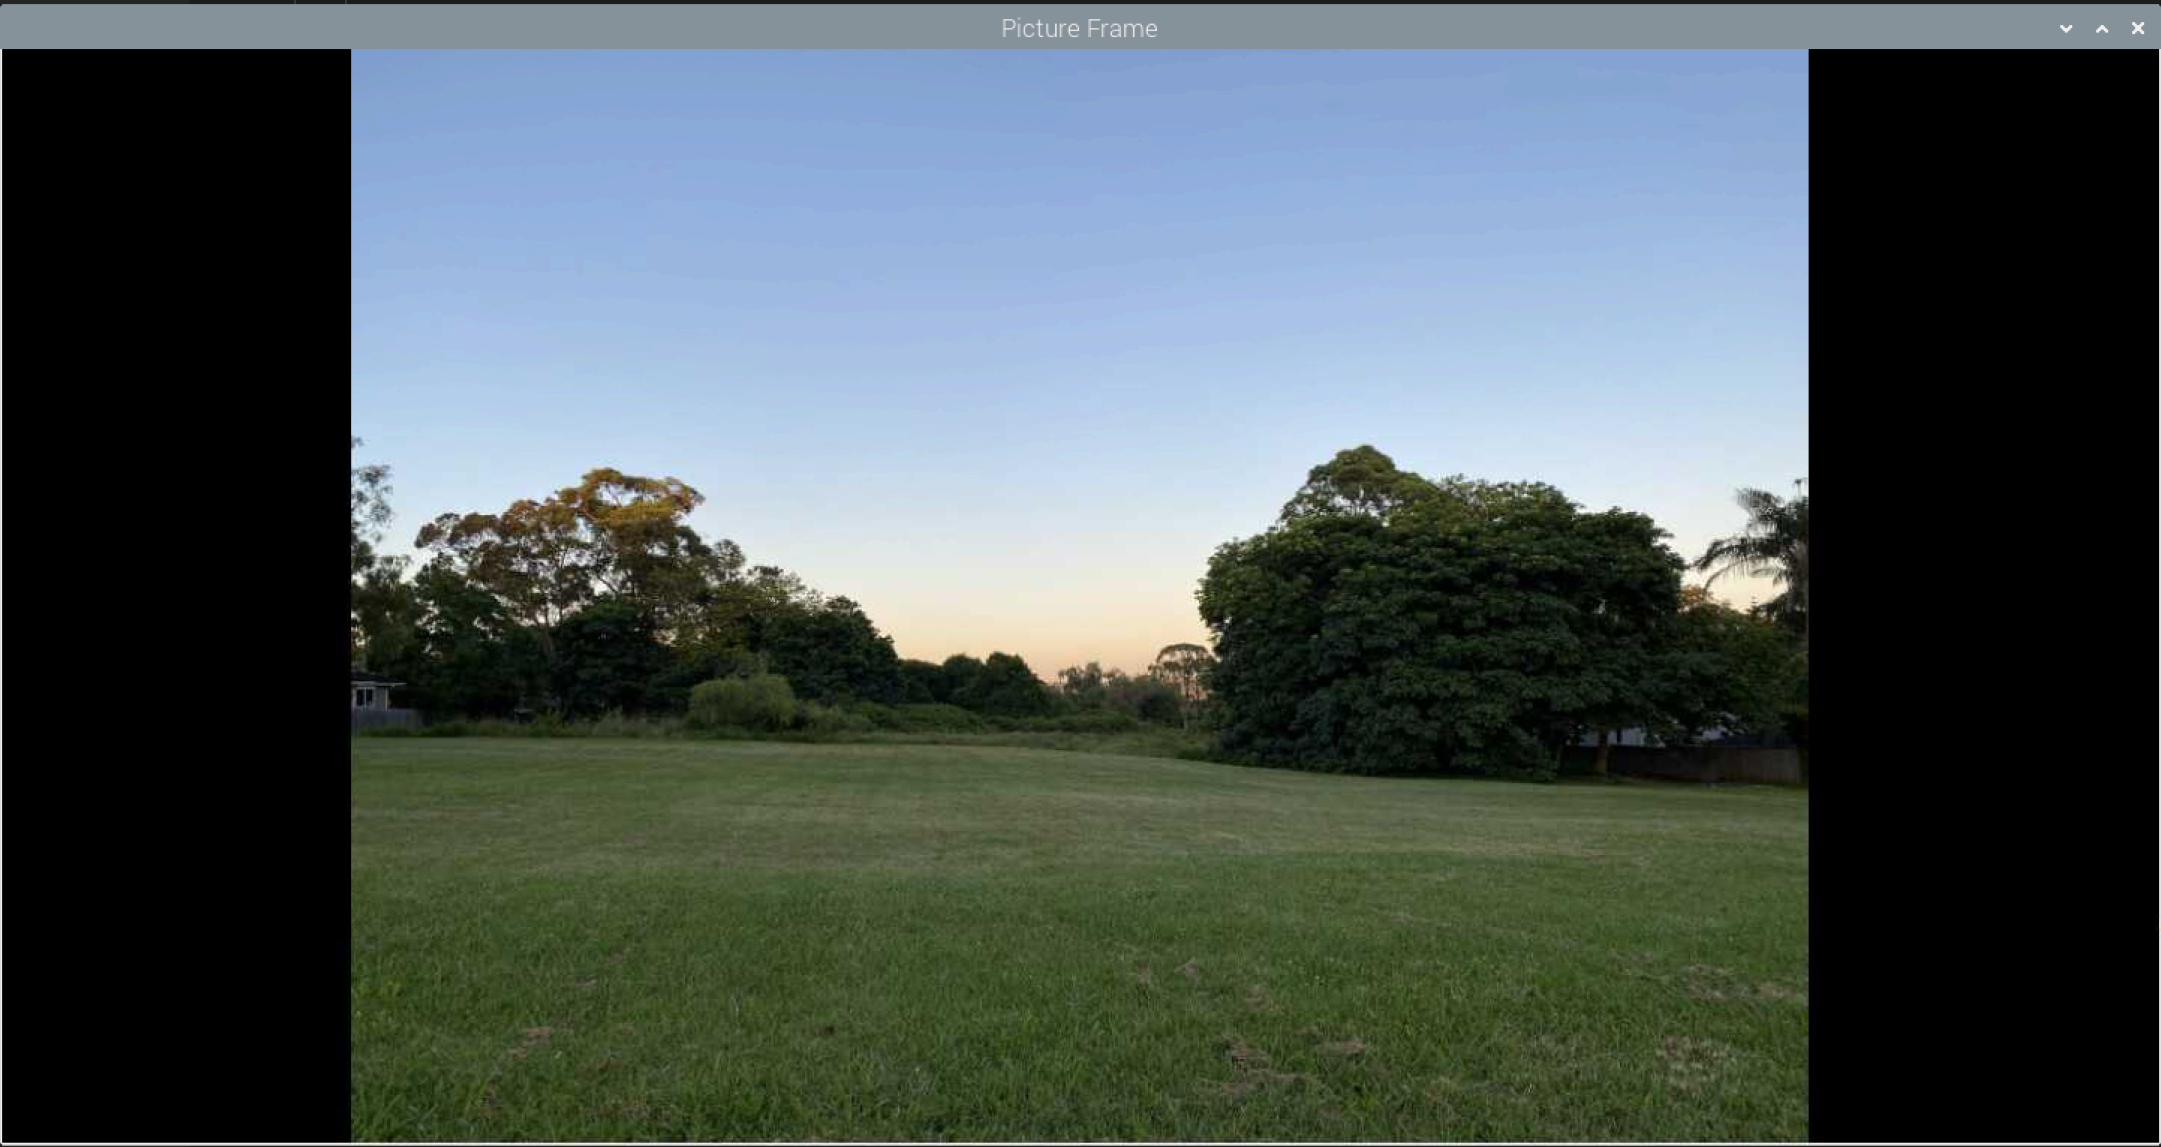
Close the new application by clicking on the close (X) button in the top right on the window.
Change the Image
Showing a single image is rather boring, the code in this section will display each image in a folder in turn.
In Visual Studio Code open the MainWindow.axaml.cs file.
At the top of the file below the last using statement, add the following using namespaces. These namespaces will support reading from the file system, and threading to iterate through the images in a folder.
using System.IO;
using System.Threading.Tasks;
In the MainWindow constructor remove the line that sets the image path, and add lines to start a new thread to call the UpdateGUI method. This is similar to the steps used in the Note on how to create a .NET GUI application on Raspberry Pi with Avalonia to update the clock.
public MainWindow()
{
    InitializeComponent();
    DataContext = pictureVM;
    Task.Run(async() => await UpdateGUI());
}
In the MainWindow class add the UpdateGUI method to get a list of the jpg files from a folder. On the Raspberry Pi the /home/pi/Pictures folder can be used (make sure you save some images in the folder), on other platforms change this to the path of a folder that has images.
The while loop then changes the Path of the pictureVM to the file path of a file in the folder.
Then waits 10 seconds (10000 milliseconds) before looping again.
private async Task UpdateGUI()
{
    var files = Directory.GetFiles(@"/home/pi/Pictures", "*.jpg");
    int currentFile = 0;
    while (true)
    {
        pictureVM.Path = files[currentFile];
        currentFile++;
        if (currentFile >= files.Length)
        {
            currentFile = 0;
        }
        await Task.Delay(10000);
    }
}
Save the MainWindow.axaml.cs file.
Compile and run the new application from the Terminal window with dotnet run
dotnet run
The project will be built and then run, each jpg image in the folder referenced should be shown for 10 seconds. If you do not see any images, then make sure the folder is correct and the folder contains several jpg files.
Close the new application by clicking on the close (X) button in the top right on the window.
Animate the Image
In the previous step the images change suddenly. The following code will animate the images in and out of the screen.
In Visual Studio Code open the MainWindow.axaml file.
Below the </Window.Resources> element add the following <Window.Styles>.
Two Style animations are defined, one for exiting and one for entering. These will be used to animate the image exiting and entering the screen.
<Window.Styles>
    <Style Selector="Image.exiting">
        <Style.Animations>
        <Animation Duration="0:0:1" FillMode="Forward">
            <KeyFrame Cue="0%">
            <Setter Property="Opacity" Value="1.0"/>
            <Setter Property="TranslateTransform.X" Value="0.0"/>
            </KeyFrame>
            <KeyFrame Cue="100%">
            <Setter Property="Opacity" Value="0.0"/>
            <Setter Property="TranslateTransform.X" Value="1920.0"/>
            </KeyFrame>
        </Animation>
        </Style.Animations>
    </Style>
    <Style Selector="Image.entering">
    <Style.Animations>
        <Animation Duration="0:0:1" FillMode="Forward">
        <KeyFrame Cue="0%">
            <Setter Property="Opacity" Value="0.0"/>
            <Setter Property="TranslateTransform.X" Value="-1920.0"/>
        </KeyFrame>
        <KeyFrame Cue="100%">
            <Setter Property="Opacity" Value="1.0"/>
            <Setter Property="TranslateTransform.X" Value="0.0"/>
        </KeyFrame>
        </Animation>
    </Style.Animations>
    </Style>
</Window.Styles>
The exiting style contains an Animation that animates the Opacity from 1.0 (fully opaque), to 0.0 (transparent), and also animates the horizontal position of the image with TranslateTransform.X from 0.0 to 1920.0. This will make the image fade and slide towards the right of the screen.
The entering style contains an Animation that animates the Opacity from 0.0 (transparent), to 1.0 (opaque), and also animates the horizontal position of the image with TranslateTransform.X from -1920.0 to 0.0. This will make the image fade in and slide in from the left of the screen.
Save the MainWindow.axaml file.
In Visual Studio Code open the MainWindow.axaml.cs file.
At the top of the file add another namespace using for Avalonia.Threading.
using Avalonia.Threading;
In the MainWindow class below the declaration of the pictureVM variable add a declaration of an Image
Image? image;
At the end of the MainWindow constructor method add code to retrieve the Image named Picture.
image = this.FindControl<Image>("Picture");
This Picture name is given to the Image in the MainWindow.axaml file.
Edit the UpdateGUI method to change the image between having the entering and exiting class in the list of classes. The class is used to define which animation should be played.
After the exiting class is added the delay is set to 1 second (1000 milliseconds), after the entering class is set the delay is set to 10 seconds (10000 milliseconds).
Note: changing the image.Classes requires calling the Dispatcher.UIThread.Post method. The image object belongs to the thread that renders the user interface, any changes made to it need to be done in the same thread.
private async Task UpdateGUI()
{
    var files = Directory.GetFiles(@"/home/pi/Pictures", "*.jpg");
    int currentFile = 0;
    bool entering = false;
    while (true)
    {
        if (image is not null)
        {
            if (entering)
            {
                Dispatcher.UIThread.Post(() => image.Classes.Remove("exiting"));
                pictureVM.Path = files[currentFile];
                currentFile++;
                if (currentFile >= files.Length)
                {
                    currentFile = 0;
                }
                Dispatcher.UIThread.Post(() => image.Classes.Add("entering"));
                await Task.Delay(10000);
            }
            else
            {
                Dispatcher.UIThread.Post(() => image.Classes.Remove("entering"));
                Dispatcher.UIThread.Post(() => image.Classes.Add("exiting"));
                await Task.Delay(   1000);
            }
        }
        entering = !entering;
    }
}
Save the MainWindow.axaml.cs file.
Compile and run the new application from the Terminal window with dotnet run
dotnet run
The project will be built and then run, each jpg image in the folder referenced should be shown for 10 seconds then animate towards the right and fade, a second later a new image should slide in from the left of the window.
Close the new application by clicking on the close (X) button in the top right on the window.
Conclusion
In this Note an Avalonia app has been created in .NET 6 that can animate a series of images in a folder on the screen. This was built on a Raspberry Pi and could be turned into software that runs a picture frame by making the Window full screen and hiding the title bar.
Optional Make the Window Full Screen
To make the window full screen and hide the title bar add the following attributes to the Window element in the MainWindow.axaml file.
SystemDecorations="None"
WindowState="FullScreen"
Complete Code Listings
Below are the complete code listings for this Note.
You can also find a version of the code, along with some guides on building a Digital Picture Frame on this dotnetPiPictureFrame GitHub repository
MainWindow.axaml
<Window xmlns="https://github.com/avaloniaui"
    xmlns:x="http://schemas.microsoft.com/winfx/2006/xaml"
    xmlns:d="http://schemas.microsoft.com/expression/blend/2008"
    xmlns:mc="http://schemas.openxmlformats.org/markup-compatibility/2006"
    xmlns:local="using:dotnetPiPictureFrame"
    mc:Ignorable="d" d:DesignWidth="800" d:DesignHeight="450"
    x:Class="dotnetPiPictureFrame.MainWindow"
    Title="Picture Frame"
    Background="Black">
    <Window.Resources>
        <local:PictureConverter x:Key="picConverter"/>
    </Window.Resources>
    <Window.Styles>
        <Style Selector="Image.exiting">
            <Style.Animations>
                <Animation Duration="0:0:1" FillMode="Forward">
                    <KeyFrame Cue="0%">
                    <Setter Property="Opacity" Value="1.0"/>
                    <Setter Property="TranslateTransform.X" Value="0.0"/>
                    </KeyFrame>
                    <KeyFrame Cue="100%">
                    <Setter Property="Opacity" Value="0.0"/>
                    <Setter Property="TranslateTransform.X" Value="1920.0"/>
                    </KeyFrame>
                </Animation>
            </Style.Animations>
        </Style>
        <Style Selector="Image.entering">
            <Style.Animations>
                <Animation Duration="0:0:1" FillMode="Forward">
                    <KeyFrame Cue="0%">
                        <Setter Property="Opacity" Value="0.0"/>
                    <Setter Property="TranslateTransform.X" Value="-1920.0"/>
                    </KeyFrame>
                    <KeyFrame Cue="100%">
                        <Setter Property="Opacity" Value="1.0"/>
                        <Setter Property="TranslateTransform.X" Value="0.0"/>
                    </KeyFrame>
                </Animation>
            </Style.Animations>
        </Style>
    </Window.Styles>
    <Image x:Name="Picture" Source="{Binding Path, Converter={StaticResource picConverter}}"/>
</Window>
MainWindow.axaml.cs
using Avalonia.Controls;
using Avalonia.Threading;
using System.IO;
using System.Threading;
using System.Threading.Tasks;

namespace dotnetPiPictureFrame
{
    public partial class MainWindow : Window
    {
        public PictureViewModel pictureVM = new PictureViewModel();
        Image? image;

        public MainWindow()
        {
            InitializeComponent();
            DataContext = pictureVM;
            image = this.FindControl<Image>("Picture");
            var t = new Thread(new ThreadStart(async () => await UpdateGUI()));
            t.Start();
        }

        private async Task UpdateGUI()
        {
            var files = Directory.GetFiles(@"/home/pi/Pictures", "*.jpg");
            int currentFile = 0;
            bool entering = false;
            while (true)
            {
                if (image is not null)
                {
                    if (entering)
                    {
                        Dispatcher.UIThread.Post(() => image.Classes.Remove("exiting"));
                        pictureVM.Path = files[currentFile];
                        currentFile++;
                        if (currentFile >= files.Length)
                        {
                            currentFile = 0;
                        }
                        Dispatcher.UIThread.Post(() => image.Classes.Add("entering"));
                        await Task.Delay(10000);
                    }
                    else
                    {
                        Dispatcher.UIThread.Post(() => image.Classes.Remove("entering"));
                        Dispatcher.UIThread.Post(()=>image.Classes.Add("exiting"));
                        await Task.Delay(1000);
                    }
                }
                entering = !entering;
            }
        }
    }
}
Dr. Neil's Notes
Software > Coding
.NET camera feed viewer on Raspberry Pi with Avalonia
Introduction
In previous Notes I have documented how to get a Raspberry Pi setup to develop with .NET, a few simple console programs that Animate ASCII art, display a clock, and display the weather. Recent Notes have explored how to create a .NET Camera Server on Raspberry Pi and how to create a .NET picture frame on a Raspberry Pi with Avalonia.
This Note explains how to build a desktop GUI application on the Raspberry Pi that displays the camera feed from a different Raspberry Pi. The graphical user interface (or GUI) will be built using an open source GUI toolkit called Avalonia.
Before reading this Note, it is recommended you read the Notes on how to create a .NET GUI application on Raspberry Pi with Avalonia, how to create a .NET Camera Server on Raspberry Pi and how to create a .NET picture frame on a Raspberry Pi with Avalonia.
The code shown in this Note may work on other platforms supported by .NET 6, it has been tested on a Raspberry Pi, Windows, and Mac.
If you want to get a Raspberry Pi setup to run .NET code, follow the instructions in the .NET Development on a Raspberry Pi Note.
This Note assumes you have installed .NET 6 and Visual Studio Code.
Create the project
If there is not already a folder for code projects, create a folder for code projects. I created a folder called dev.
Open a Terminal window on the Raspberry Pi, and navigate to the folder where you want to create the new folder (e.g. Documents), then enter
 mkdir dev
 ```

This makes the directory **dev**

Navigate to that directory

```console
 cd dev
 ```

Create a directory for this project, named **dotnetPiCamViewer**

```console
 mkdir dotnetPiCamViewer
 ```

Change the directory to the new folder created.

```console
 cd dotnetPiCamViewer/
 ```

If you have not already installed the Avalonia project templates, install the project templates for Avalonia

```console
dotnet new -i Avalonia.Templates
Create a simple Avalonia GUI application with the following command
dotnet new avalonia.app
tree command
/Documents/dev/dotnetPiCamViewer $ tree
.
├── App.axaml
├── App.axaml.cs
├── dotnetPiCamViewer.csproj
├── MainWindow.axaml
├── MainWindow.axaml.cs
└── Program.cs

0 directories, 6 files
Compile and run the new application from the Terminal window with dotnet run
The dotnet run command will compile the project code in the current folder and run it.
dotnet run

Close the new application by clicking on the close (X) button in the top right on the window.
Convert the feed to an Image
In the Note on how to create a .NET picture frame on a Raspberry Pi with Avalonia, the picture frame app displays the pictures from file in a folder, one picture after the next, pausing 10 seconds between pictures. In the Note on how to create a .NET Camera Server on Raspberry Pi, a web server is created that streams the images from the camera over a web API, one after the other.
In this Note a feed from a camera server will be consumed, and the results displayed an image at time on the screen.
Open Visual Studio Code from the dotnetPiCamViewer folder.
code .
In Visual Studio Code open the MainWindow.axaml file to edit the user interface.
Change the Title attribute to "Camera Viewer". Replace the "Hello to Avalonia!" text with an Image named FrameImage.
<Window xmlns="https://github.com/avaloniaui"
        xmlns:x="http://schemas.microsoft.com/winfx/2006/xaml"
        xmlns:d="http://schemas.microsoft.com/expression/blend/2008"
        xmlns:mc="http://schemas.openxmlformats.org/markup-compatibility/2006"
        mc:Ignorable="d" d:DesignWidth="800" d:DesignHeight="450"
        x:Class="dotnetPiCamViewer.MainWindow"
        Title="Camera Viewer">
    <Image x:Name="FrameImage" />
</Window>
Save the MainWindow.axaml file.
In Visual Studio Code open the MainWindow.axaml.cs file to edit the code.
At the top of the file add using statements to import the namespaces used in the code that follows.
using Avalonia.Media.Imaging;
using Avalonia.Threading;
using System;
using System.IO;
using System.Net.Http;
using System.Threading.Tasks;
In the MainWindow class add member variables to:
- hold the URL of the video feed,
- a reference to the Image in the user interface,
- a Bitmap for the current frame
NOTE: The URL in the VideoUrl variable should be the correct URL of the dotnetPiCamServer as described in the Note on how to create a .NET Camera Server on Raspberry Pi. To see the code that is sending the image frames, review that Note.
string VideoUrl => @"http://192.168.1.152:8080/Video";
Image image;
Bitmap? frameImage;
In the MainWindow class constructor initialize the image variable and start a new Task that will run while the program runs to update the frames from the camera feed.
public MainWindow()
{
    InitializeComponent();
    image = this.FindControl<Image>("FrameImage");
    Task.Run(async() => await UpdateFrameImage());
}
Most of the work is done in the UpdateFrameImage method. This method opens an HTTP request to the camera server and starts retrieving the frame images to display on the screen.
async Task UpdateFrameImage()
{
    if (image != null)
    {
        HttpClient client = new HttpClient();

        using HttpResponseMessage response = await client.GetAsync(VideoUrl, HttpCompletionOption.ResponseHeadersRead);

        using HttpContent content = response.Content;
        using var stream = await content.ReadAsStreamAsync();

        byte[] buffer = new byte[4096];
        var lengthMarker = "Content-Length:";
        var endMarker = "\r\n\r\n";

        while (true)
        {
            try
            {
                Array.Fill<byte>(buffer, 0, 0, buffer.Length);
                int len = await stream.ReadAsync(buffer, 0, buffer.Length);
                var header = System.Text.Encoding.Default.GetString(buffer);

                var lengthStart = header.IndexOf(lengthMarker) + lengthMarker.Length;
                var lengthEnd = header.IndexOf(endMarker);
                if (lengthEnd > lengthStart)
                {
                    var lengthString = header.Substring(lengthStart, lengthEnd - lengthStart);

                    int frameSize = int.Parse(lengthString);
                    byte[] frameBuffer = new byte[frameSize];

                    int totalBytesCopied = (int)len - (lengthEnd + endMarker.Length);
                    if (totalBytesCopied > 0)
                    {
                        Array.Copy(buffer, lengthEnd + endMarker.Length, frameBuffer, 0, totalBytesCopied);
                    }

                    while (totalBytesCopied < frameSize)
                    {
                        totalBytesCopied += await stream.ReadAsync(frameBuffer, totalBytesCopied, frameBuffer.Length - totalBytesCopied);
                        await Task.Yield();
                    }
                    using MemoryStream ms = new(frameBuffer);
                    frameImage = new Bitmap(ms);

                    await Dispatcher.UIThread.InvokeAsync(() => { image.Source = frameImage; });
                }
            }
            catch(Exception ex)
            {
                Console.WriteLine(ex.ToString());
            }
        }
    }
}
To explain this method in stages. An HttpClient object is created to connect to the server that sends the images from the camera. The server is located at the URL in the VideoUrl variable declared earlier.
The GetAsync method, called with the URL, retrieves a response that contains information about the content provided by the server. The content of the response is read into a stream variable.
HttpClient client = new HttpClient();

using HttpResponseMessage response = await client.GetAsync(VideoUrl, HttpCompletionOption.ResponseHeadersRead);
using HttpContent content = response.Content;
using var stream = await content.ReadAsStreamAsync();
To read the stream a byte array is created, that can hold the response content.
Two hardcoded strings that represent the start and end points of the information to extract. For more information on how the content is sent review the Note on how to create a .NET Camera Server on Raspberry Pi.
byte[] buffer = new byte[4096];
var lengthMarker = "Content-Length:";
var endMarker = "\r\n\r\n";
The buffer byte array is initialized at the start of the loop, this allows the same byte array to be reused. If you reuse a byte array it is important to clear it, before filling it again, otherwise it will have content from the last loop.
The response content is then read into the byte array, and copied into a string. This makes it easier to convert to a string that represents the initial header information.
Array.Fill<byte>(buffer, 0, 0, buffer.Length);
int len = await stream.ReadAsync(buffer, 0, buffer.Length);
var header = System.Text.Encoding.Default.GetString(buffer);
Then the string between "Content-Length:" and "\r\n\r\n" is extracted into the lengthString variable, and then converted to an int to get the size of the frame image.
var lengthStart = header.IndexOf(lengthMarker) + lengthMarker.Length;
var lengthEnd = header.IndexOf(endMarker);
if (lengthEnd > lengthStart)
{
    var lengthString = header.Substring(lengthStart, lengthEnd - lengthStart);

    int frameSize = int.Parse(lengthString);
The totalBytesCopied variable is then set to the number of bytes that can be copied from the buffer after the endMarker, if any. This is then copied from the buffer, into the frameBuffer byte array.
While the totalBytesCopied is less than the size of the image frame, the stream is read into the frameBuffer, until a whole image frame has been received.
int totalBytesCopied = (int)len - (lengthEnd + endMarker.Length);
if (totalBytesCopied > 0)
{
    Array.Copy(buffer, lengthEnd + endMarker.Length, frameBuffer, 0, totalBytesCopied);
}

while (totalBytesCopied < frameSize)
{
    totalBytesCopied += await stream.ReadAsync(frameBuffer, totalBytesCopied, frameBuffer.Length - totalBytesCopied);
    await Task.Yield();
}
Once the frameBuffer has been filled up with all the bytes for the image, a new Bitmap is created from the bytes in the frameImage class variable.
using MemoryStream ms = new(frameBuffer);
frameImage = new Bitmap(ms);
Once a Bitmap is created it can be set to the display source of the image. This is being done on the UIThread as it will update the user interface, and the user interface is owned by a specific thread.
await Dispatcher.UIThread.InvokeAsync(() => { image.Source = frameImage; });
Save the MainWindow.axaml.cs file.
Compile and run the new application from the Terminal window with dotnet run
dotnet run
The project will be built and then run, if you have the camera server running on another Raspberry Pi, and the URL has been correctly set, you should see the feed from the other camera in the new application.
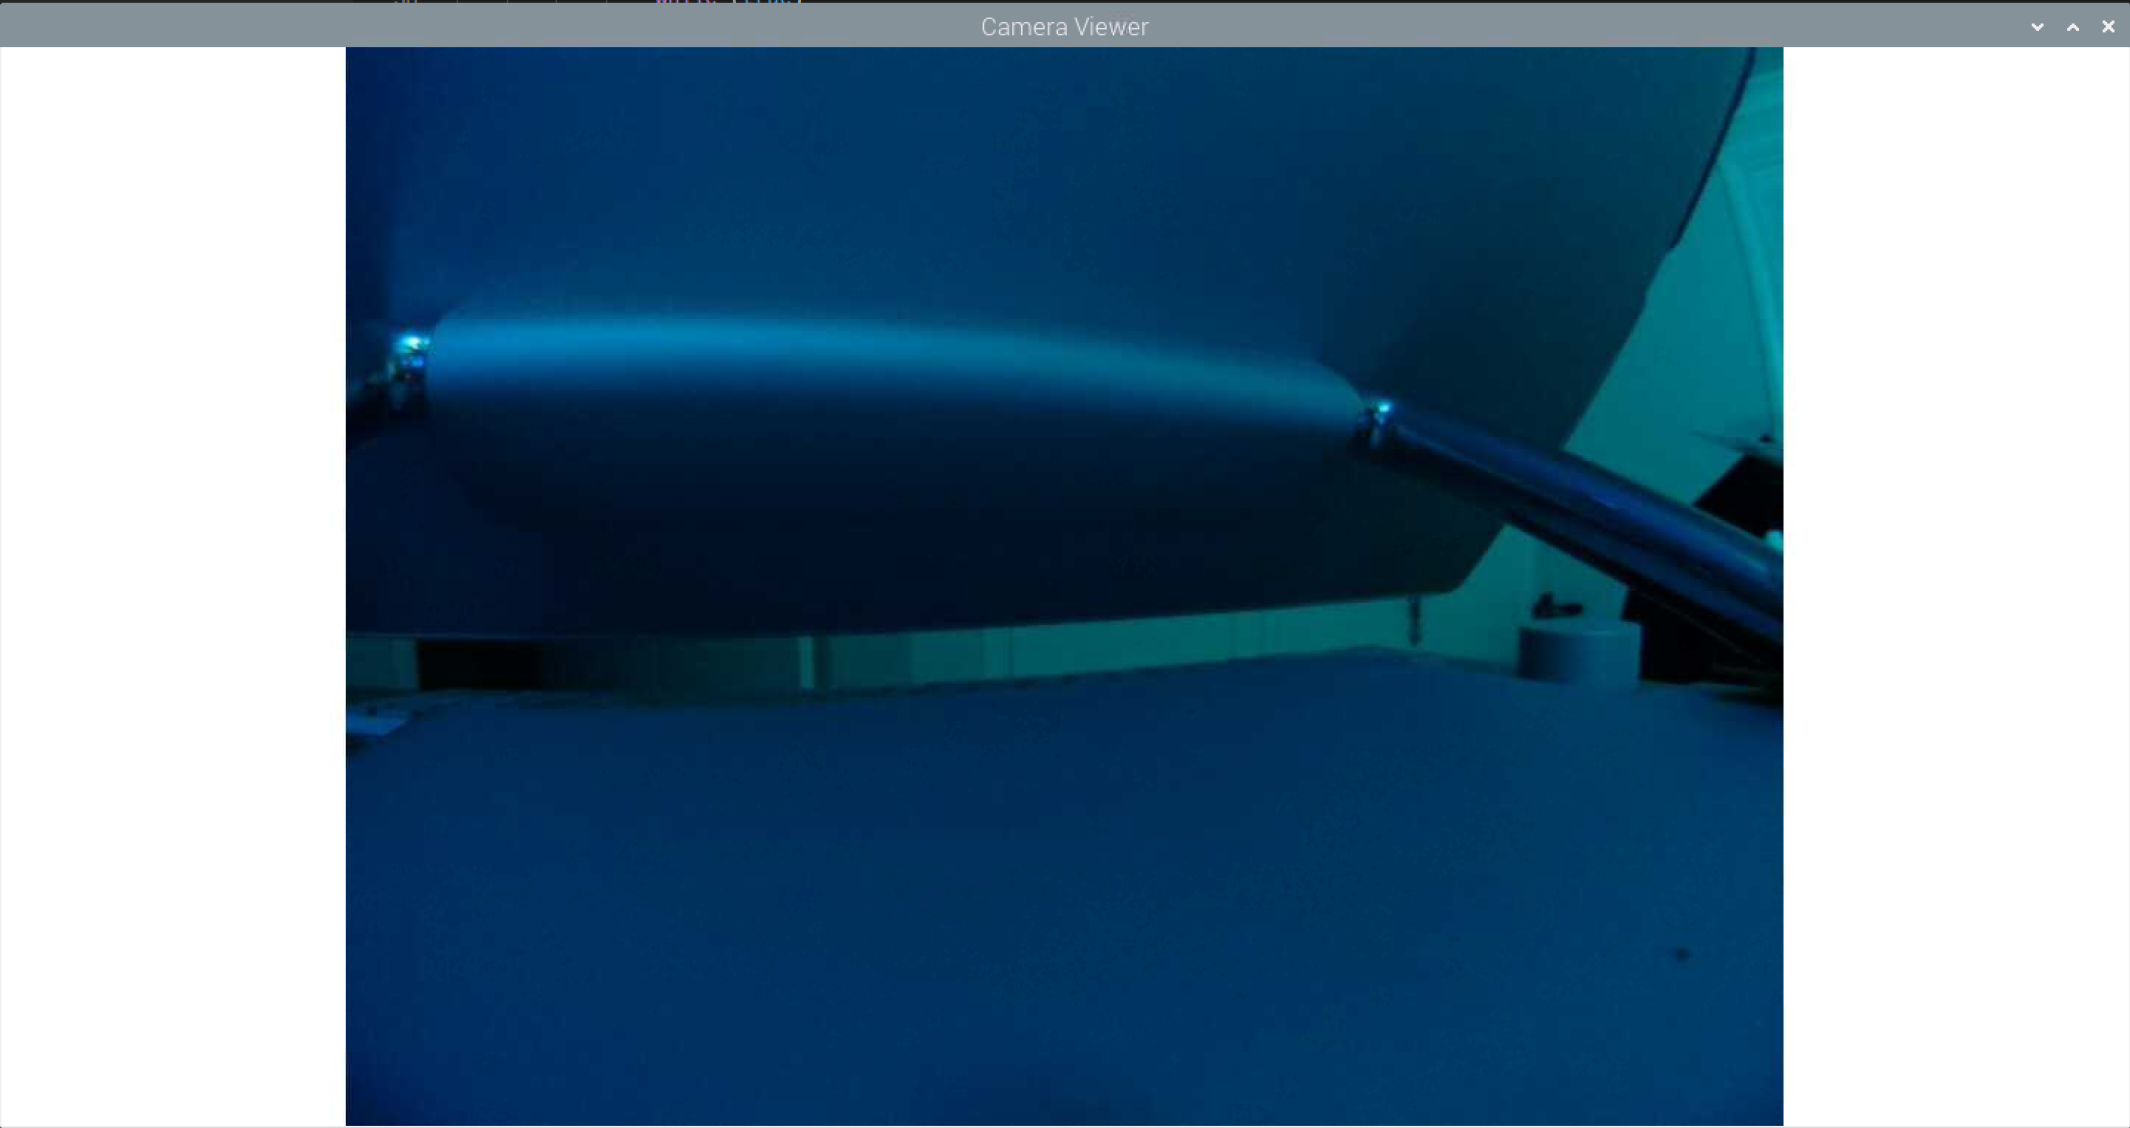
Close the new application by clicking on the close (X) button in the top right on the window.
Conclusions
This Note provides an explanation of how to create a user interface application on a Raspberry Pi that can display the camera feed from another Raspberry Pi, as described in the Note on how to create a .NET Camera Server on Raspberry Pi.
The code reads the stream of frame images from the server and displays the images in a window on the screen.
This code should run on any platform supported by .NET 6 and Avalonia.
Dr. Neil's Notes
Software > Coding
Building a Glowbit Server
Introduction
The Glowbit product from Core Electronics is an array of LEDs setup for easy programming using a micro-controller development board. In this project I used five Glowbit Matrix 8 x 8 modules and a Raspberry Pi Pico W. Connecting the Glowbit modules in a 5 x 1 array created a rectangular display. Connecting the Raspberry Pi Pico allowed for wireless control.
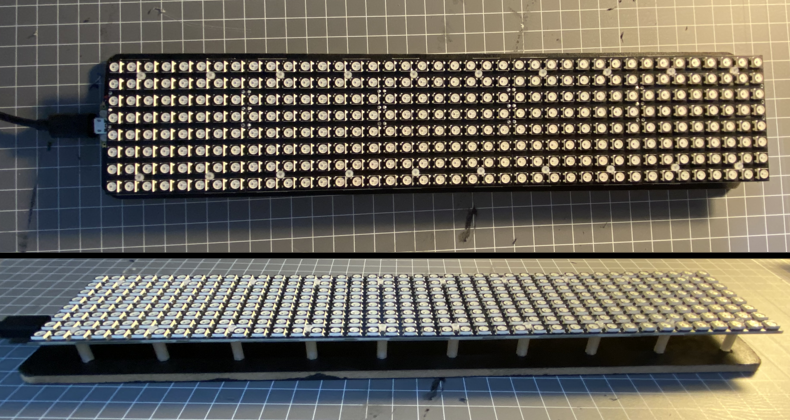

The Hardware
Connecting the Glowbit Matrix modules is well documented on the Core Electronics web site. The image below is taken from their website.
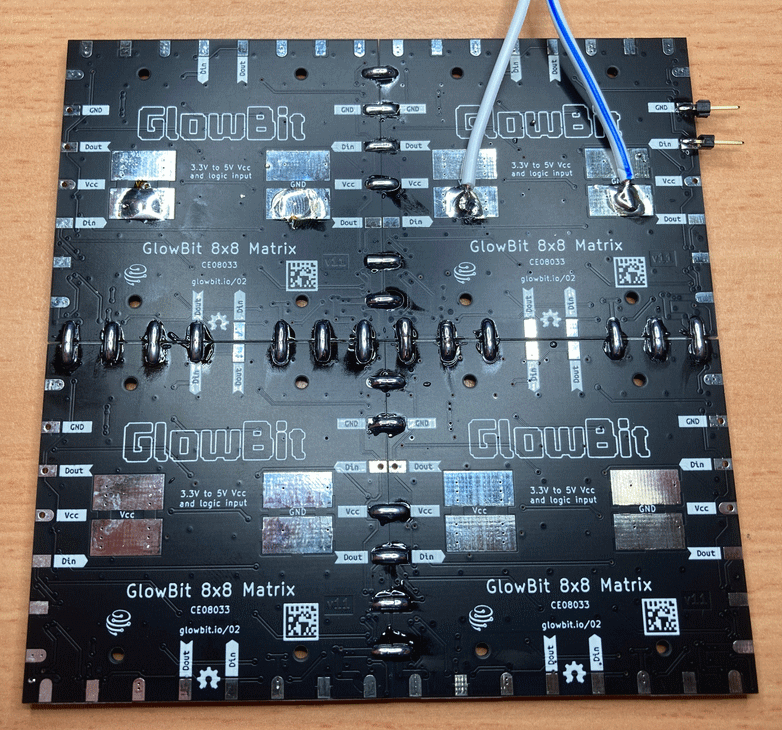
Originally I expected I was going to need another power supply for the Glowbit array, however the power from the Pico was more than sufficient to illuminate all the LEDs ins the array. This is 320 LEDs being controlled and powered from a $10 micro-controller board. I started testing the setup with a solderless bread-board as shown.
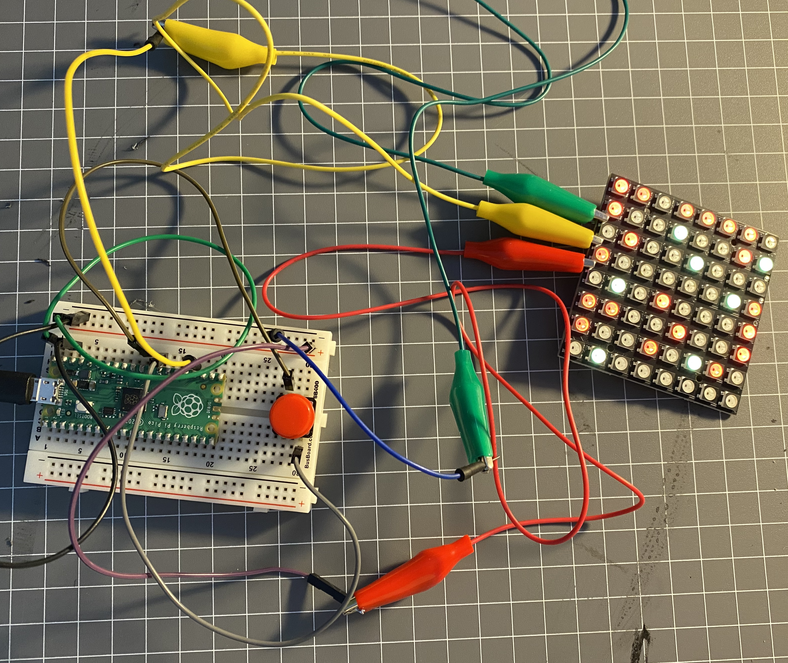
Then using some cheap offcut plyboard (that was packaging from something unrelated), I cut and drilled a board to mount the 5x1 Glowbit matrix array.
After soldering the 5 Glowbit Matrix modules to each other, I mounted them to the board. After testing the LEDs worked, I added the Raspberry Pi Pico W to the board under the LED modules and to one side. To achieve this I removed the modules from the board, soldered the wires to the Pico, and then mounted the Pico first, and then the modules back on the board.
The Software
There are two parts to the software project. The first is building the code to control the LEDs in the Glowbit matrix. The second part is the web app on the Pico W, so that it can be connected from another device to control the LEDs.
The LED Actions
In order to speed up the development of the code to control the LEDs I started by building a Glowbit emulator. This allows me to write and test code on my PC without having to upload to the Pico and test on the actual hardware each time. You can find the code for the Glowbit Emulator here.
The image below shows the emulator running in a Debian Terminal through WSL2 on a Windows PC.
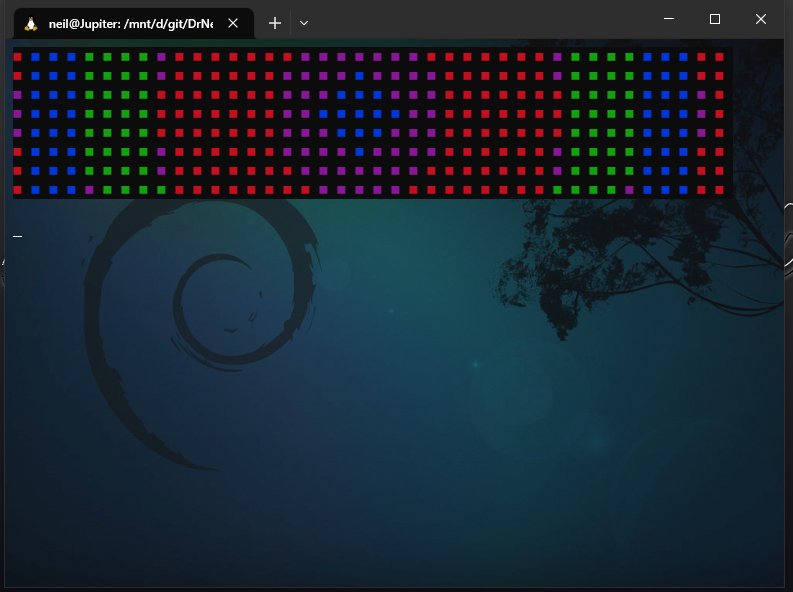
With the emulator python module I can then import the emulator on the PC and the actual Glowbit code on the target device.
try:
    import glowbitEmulator as glowbit
except:
    import glowbit
In an actions.py file I created an actions python class to encapsulate the different animations to play on the LEDs.
import _thread
import time

class actions():

    def __init__(self):
        self.matrix = glowbit.matrix8x8(1, 5)
        self.animate = False
        self.lock = _thread.allocate_lock()
This code initializes a glowbit matrix8x8 array of 1 row and 5 columns. If I wanted to use less or more of the glowbit modules, this is where I can change the shape and size of the modules.
The self.animate flag is used to indicate if an animation is running.
The self.lock allows for a thread to lock a resource while using it. This is used to wait for an animation to complete before starting a new animation in the LED array.
    def getLock(self):
        self.animate = False
        self.lock.acquire()
showText method.
    def showText(self, text, colour = 0xFF0000):
        self.getLock()
        self.matrix.blankDisplay()
        self.matrix.printTextWrap(text,0,0, colour)
        self.matrix.pixelsShow()
        self.lock.release()
showText method the lock is acquired, then the matrix methods are used to display the text. Finally the lock is released.
The setColour method is similar.
    def setColour(self, colour):
        self.getLock()
        for i in range(self.matrix.numLEDs):
            self.matrix.pixelSet(i, colour)
        self.matrix.pixelsShow()
        self.lock.release()
The showText and setColour methods are fairly simple as they displays static content and then finish by releasing the lock.
The showScrollingText method will scroll text across the LEDs until the animate flag is set to false, by another method calling getLock.
    def showScrollingText(self, text, colour = 0xFF0000):
        self.animate = True
        self.matrix.blankDisplay()
        while self.animate:
            self.matrix.addTextScroll(text,0,0,colour)
            while self.animate and self.matrix.scrollingText:
                self.matrix.updateTextScroll()
                self.matrix.pixelsShow()
                time.sleep(0.2)
        self.lock.release()
showScrollingText method sets animate to True at the start to indicate it is now animating. Then the matrix is cleared with the blankDisplay() method.
The while loop will keep scrolling the text forever while the animate flag is True.
The cycle method also continues to animate while the animate flag is set to True. This cycle code is mostly taken from the Glowbit demo code, and modified to support the animate flag and lock.release() when finished.
    def cycle(self):
        self.animate = True
        self.matrix.blankDisplay()
        maxX = int(self.matrix.numLEDsX)
        maxY = int(self.matrix.numLEDsY)
        ar = self.matrix.ar
        pixelSetXY = self.matrix.pixelSetXY
        wheel = self.matrix.wheel
        show = self.matrix.pixelsShow
        while self.animate:
            for colourOffset in range(255):
                for x in range(maxX):
                    for y in range(maxY):
                        temp1 = (x-((maxX-1) // 2))
                        temp1 *= temp1
                        temp2 = (y-((maxY-1) // 2))
                        temp2 *= temp2
                        r2 = temp1 + temp2
                        # Square root estimate
                        r = 5
                        r = (r + r2//r) // 2
                        pixelSetXY(x,y,wheel((r*300)//maxX - colourOffset*10))
                show()
                if not self.animate:
                    break

            time.sleep(0.2)
        self.lock.release()
To define the actions that can be called on this actions class, the class exposes a list of actions.
def actionList(self):
        return ['off', 'red', 'green', 'blue', 'warning', 'cycle']
To call the different actions a callAction method determines which actions is requested and calls the correct method for that action.
def callAction(self, action, params):
        if action == 'off':
            self.getLock()
            self.matrix.blankDisplay()
            self.lock.release()
        elif action == 'red':
            self.setColour(0xFF0000)
        elif action == 'green':
            self.setColour(0x00FF00)
        elif action == 'blue':
            self.setColour(0x0000FF)
        elif action == 'warning':
            self.getLock()
            _thread.start_new_thread(self.showScrollingText, ('WARNING!!',))
        elif action == 'cycle':
            self.getLock()
            _thread.start_new_thread(self.cycle, ())
        elif action == 'text':
            if (len(params)>0):
                text = params[0][2:]
                print(text)
                colour = 0xFFFFFF
                if (len(params)>1):
                    colour = int(params[1][3:], 16)
                self.showText(text, colour)
        elif action == 'stext':
            self.getLock()
            if (len(params)>0):
                text = params[0]
                print(text)
                colour = 0xFFFFFF
                if (len(params)>1):
                    colour = int(params[1], 16)
                _thread.start_new_thread(self.showScrollingText, (text, colour,))
This callActions method uses the name of the action to determine which method to run. For the text and stext methods the params contain an array to determine the text and the colour of the text to display on the LEDs.
Note that the cycle and showScrollingText methods are started on another thread. The Raspberry Pi Pico supports two cores, and so this allows the animation to be displayed in a thread while the application can still receive commands to change the display.
In order to test the actions class in the emulator, I wrote an actionRunner.py script in another file.
import actions

actions = actions.actions()
actionList = actions.actionList()

while True:
    actionNumber = 0
    for a in actionList:
        print(str(actionNumber) + ": " + a)
        actionNumber += 1

    routineNumber = input("Enter routine number: ")

    if routineNumber.isdigit() and int(routineNumber) < len(actionList):
        routine = actionList[int(routineNumber)]
        actions.callAction(routine, [])
    else:
        actions.callAction("text", ["t="+routineNumber])
Notice that if the number entered is not a digit that matches the action list, then the entered text is displayed on the LEDs.
Running this in the emulator looks like this:
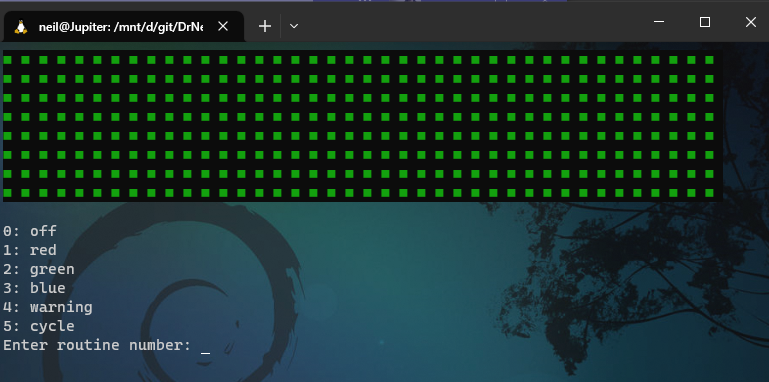
The Web App
To call the actions through a web page, or a REST service, requires that the actionRunner script shown in the previous step is written as a web application.
Building a web app in micro-python is well documented, however for completeness I will outline the code here.
To display a web page with the actions requires an HTML response is created. This is done in a webPage method.
def webpage(value):
    html = f"""
            <!DOCTYPE html>
            <html>
            <body>
            <H1>Glowbit Server</H1>
            <h2>Select an action</h2>"""

    for a in actions.actionList():
        html += """
        <a href="/"""+a+"""">"""+a+"""</a><br>
        """

    html += """
        <form action="./text">
        <label>Text:</label><br>
        <input type="text" name="t" value="Hello"><br>
        <label>Color:</label><br>
        <input type="color" name="c" value="#00ff00"><br>
        <input type="submit" value="Submit">
        </form>
        """

    html += """
            <p>Request is """+value+""" </p>
            </body>
            </html>
            """
    return html
actionsList defined in the actions.py class discussed previously.
To serve this page on a connection a serve method is needed.
def serve(connection):
    while True:
        client = connection.accept()[0]
        request = client.recv(1024)
        request = str(request)
        try:
            request = request.split()[1]
        except IndexError:
            pass

        print(request)
        parts = request.lstrip('/\\').split('?')
        args = list()
        if (len(parts)>1):
            args = urlParse(parts[1]).split('&')
        action = parts[0]
        print(action)

        actions.callAction(action, args)

        value=action
        html=webpage(value)
        client.send(html)
        client.close()
This method uses a connection to parse the request and call an action in the actions class created earlier. Then the html for the web page is sent to the client.
The actions.callAction(action, args) is the place this code enables a web page to control the output on the LEDs.
The urlParse method converts any text with spaces, or special characters' into the text to display on the LEDs.
def urlParse(url):
    l = len(url)
    data = bytearray()
    i = 0
    while i < l:
        if url[i] != '%':
            d = ord(url[i])
            i += 1
        else:
            d = int(url[i+1:i+3], 16)
            i += 3
        data.append(d)
    return data.decode('utf8')
To create the connection that is used in the serve method a socket is opened on port 80 on the micro controller device, in this case the Pico W.
def openSocket(ip):
    address = (ip, 80)
    connection = socket.socket()
    connection.bind(address)
    connection.listen(1)
    print(connection)
    return(connection)
This openSocket method uses the provided ip address to the create and return a connection. The same connection used to serve the webPage.
Putting all of this together in a main 'run` method, looks like this.
def run():
    actions.showText('boot.', 0xFF0000)

    wlan = network.WLAN(network.STA_IF)
    wlan.active(True)
    wlan.connect(creds.ssid, creds.pwd)

    # Wait for connect or fail
    wait = 10
    while wait > 0:
        if wlan.status() < 0 or wlan.status() >= 3:
            break
        wait -= 1
        print('waiting for connection...')
        time.sleep(1)

    # Handle connection error
    if wlan.status() != 3:
        actions.showText('fail', 0xFF0000)
        raise RuntimeError('wifi connection failed')
    else:
        print('connected')
        ip=wlan.ifconfig()[0]
        print('IP: ', ip)
        actions.showText(ip[-4:], 0x00FF00)
        time.sleep(1)

    try:
        if ip is not None:
            connection=openSocket(ip)
            serve(connection)
    except KeyboardInterrupt:
        machine.reset()
This run method starts by using the actions.showText method to display boot. on the screen in red. This notifies the person running the app that the device is booting, or starting up.

To connect to the WIFI requires the SSID and the password for that network. Obviously you want to keep this secret and so it should live in a file that is not part of the main code. Ideally this would be set as an environment variable, or a certificate installed on the micro controller device. However for this example, to keep it simple, I used a creds.py file like this
ssid = "MySSID"
pwd = "ssid_passcode"
NOTE this is not secure and should not be considered best practice
The run method waits for the connection to the WIFI network to complete. If it fails then the actions.showText method is used to notify of the connection 'fail'.
If the connection to the WIFI network succeeds then the last 4 digits of the IP address are displayed on the LED array, in green. This should help with finding the page to connect to the device.

Once the connection is made, the socket is opened with openSocket, and then the device can serve the connection.
To start this web app and the actions the code is then simple
actions = actions.actions()
run()
Here is the final result running the colour cycle.

Once this is working you can extend out the actions to display a variety of animations, here the Glowbit server is running Conway's Game of Life

With the Glowbit server controlled via a web URL you can hook it up to other software. Here is displaying that I am in a call, which is determined from my status in Microsoft Teams.

Dr. Neil's Notes
Software > Coding
Using Azure Key Vault in .NET applications
Prerequisites
If you want to use the code from this Note you will need an Azure account, and the .NET SDK.
The code shown here is built and tested with the .NET 7.0 SDK.
Introduction
Building applications often requires calling external services that provide information, or perform functions. In several other examples in the coding sections of these Notes external services have been used, for example the ConsoleWeather and dotnetPiPictureFrame both use the OpenWeather service. These services require SecretKeys that connect you, and the application, consumption of the service. Often this is for billing, or to ensure that the service is not abused.
It is important you keep these Keys secret so that other people do not build software that pretends to be your application, and you end up paying for the service being used by someone else's software. To maintain a higher level of security it might be required that the keys be changed (or rotated) on a regular basis. The application you build should not need to be recompiled, or redeployed when you change the secret keys.
Microsoft Azure provides the Azure KeyVault to manage, maintain, and store your keys. Amazon has SecretsManager, for the same purposes.
These services are a great way to keep secret keys out of your code, and local configuration. When you deploy code to Azure, or AWS, the secrets can be made available to those environments.
In this Note I am going to demonstrate the use of Azure Key Vault in a .NET client application. To secure the access to the Key Vault a local certificate is going to be required, and installed, on the machine where the application is running. Without the certificate installed on the computer, the code will fail to authenticate to the Azure Key Vault, and be unable to get the Secret Keys to access the services.
Creating the certificate
To get started you will need to create a certificate. For this example I am creating a local certificate using PowerShell. This is fine for hobby projects. For a commercial product in production, you will want to use a certificate that has a trusted root, many online services exist for this.
To create a certificate yourself, on a Windows machine, you can use the following PowerShell script.
$certname = Read-Host -Prompt "Enter your certificate name"
$certPwd = Read-Host -Prompt "Enter a password for the privatekey"

$cert = New-SelfSignedCertificate -Subject "CN=$certname" -CertStoreLocation "Cert:\CurrentUser\My" -KeyExportPolicy Exportable -KeySpec Signature -KeyLength 2048 -KeyAlgorithm RSA -HashAlgorithm SHA256

Export-Certificate -Cert $cert -FilePath "..\$certname.cer"

$mypwd = ConvertTo-SecureString -String $certPwd -Force -AsPlainText

Export-PfxCertificate -Cert $cert -FilePath "..\$certname.pfx" -Password $mypwd
Setup the Azure Key Vault
In the Azure Portal create a new Microsoft Key Vault resource. You can do this in the Azure CLI with the following command, change the name to the name you want, and the resource group to the resource group you want, as well as the region, or location.
az keyvault create --name "<your-unique-keyvault-name>" --resource-group "myResourceGroup" --location "EastUS"
You want the Permission Model to be Azure role-based access control
In the portal you can set some secret keys, with a Name and a Value. You can also do this from the Azure CLI with the following script.
$vaultName = Read-Host -Prompt "Enter your key vault name"
$secretName = Read-Host -Prompt "Enter your secret name"
$secretValue = Read-Host -Prompt "Enter your secret value"

$Secret = ConvertTo-SecureString -String $secretValue -AsPlainText -Force
Set-AzKeyVaultSecret -VaultName $vaultName -Name $secretName -SecretValue $Secret
Setup an Azure AD application to access the Vault
To access the secrets from a client application, the client application will need to have the correct role, as defined in the RBAC (role-base access control).
In the Azure Portal, navigate to an Azure Active Directory that you can administrate. If you do not have an Azure Active Directory resource, you can create one, however this is beyond the scope of this Note.
In the App registrations section, create a New registration, it is useful to name this the same as your client application name.
Ensure the application registration is for Mobile and desktop applications, meaning the redirect URL should be something like this https://login.live.com/oauth20_desktop.srf
Once you have registered a new application, head to the Certificates and secrets section in the portal and Upload the certificate created in the previous step.
Then return to the Key Vault adminstration section in the portal and select the Access Control (IAM) section. Add a Role Assignment for Key Vault Secrets User, in order that the application can access the secret values. Then in the Members section, in Assign access to, select User, group, or service principal, then click Select Members, this will show a list of the AD users. To see the application, just created, type the application name in the search box. This will enable the application to access the Key Vault. Review and Assign the new role.
Code to access the Key Vault
In order that a client .NET application can access the KeyVault secrets, it will need to authenticate a the Application with the certificate.
The VaultInfo class here provides the fields required for this to work.
public class VaultInfo
{
    public required string Thumbprint { get; set; }
    public required string VaultUrl { get; set; }
    public required string ClientId { get; set; }
    public required string TenantId { get; set; }
}
- The Thumbprint is the thumbprint for the installed certificate to access the application.
- The VaultUrl is the url of the KeyVault.
- The ClientId and TenantId are the client and tenant Id for the AD application.
This fields in this VaultInfo class can easily be read from a json file, such as this.
{
    "Thumbprint": "12345678901234567890",
    "VaultUrl": "https://mysecrets.vault.azure.net/",
    "ClientId": "eeeeeeee-0000-0000-0000-aaaaaaaaaaaa",
    "TenantId": "eeeeeeee-0000-0000-0000-aaaaaaaaaaaa"
}
This json can be read into a VaultInfo object as shown below
string jsonString = File.ReadAllText(vaultFile);
vault = JsonSerializer.Deserialize<VaultInfo>(jsonString)!;
Read the certificate from the thumbprint as follows.
X509Store store = new (StoreName.My, StoreLocation.CurrentUser);
try
{
    store.Open(OpenFlags.ReadOnly);
    X509Certificate2Collection col = store.Certificates.Find(X509FindType.FindByThumbprint, thumbprint, false);
    if (col == null || col.Count == 0)
    {
        throw new Exception("ERROR: Valid certificate not found");
    }
    return col[0];
}
catch (Exception ex)
{
    Console.WriteLine(ex.Message);
    return null;
}
finally
{
    store.Close();
}
Given the certificate has been found from the thumbprint, the value for a secret key can be read from the KeyVault as follows.
TokenCredential credential = new ClientCertificateCredential(vault.TenantId, vault.ClientId, clientAssertionCertPfx);
var keyVaultSecretClient = new Azure.Security.KeyVault.Secrets.SecretClient(new Uri(vault.VaultUrl), credential);

var val = await keyVaultSecretClient.GetSecretAsync(secretNode);
return val.Value.Value;
Conclusions
Storing secret keys in application code, or config files, is a bad practice. It is not secure, requires the application is redeployed if the key needs to be changed, and makes it hard to manage all the different secrets and passwords your different applications use.
Services like Azure Key Vault, or AWS Secrets Manager, centralize the management of keys. When you are building a client application to run on a device, be it a personal computer, or an IOT type of device like a Raspberry Pi, you can install certificates on those devices, that enable the application to authenticate with Azure Key Vault and get the secret keys needed at run time.
Dr. Neil's Notes
Software > Coding
Using GitHub Packages with NuGet
Introduction
This note introduces using GitHub to manage and maintain packages. As most of the work, and hobby, projects I do are in .NET, the contents of this note are focussed on NuGet packages. Packaging is a common, and standard, way to enable code to be shared between projects that are not in the same distributed output. For example in these notes the code for the Azure Key Vault could be compiled into a DLL that is shared by different products that require secret keys. Packaging also supports versioning of the code, and shared component. This provides the facility for different products to be working with different versions of the shared code.
Building the Package
When building a .NET project that you desire to distribute as a package, you can define the details of the package in the .csproj file. Previously this was often done in a .nuspec file, and you can still find .nuspec files in folders of many projects.
For example the .csproj file for a project named CoolProject could contain a PropertyGroup as follows
<PropertyGroup>
    <IsPackable>true</IsPackable>
    <Authors>DrNeil</Authors>
    <Description>A .NET library for using doing cool things</Description>
    <PackageLicenseExpression>NONE</PackageLicenseExpression>
    <PackageProjectUrl>https://github.com/ORGANIZATION_NAME/CoolProject</PackageProjectUrl>
    <RepositoryUrl>https://github.com/ORGANIZATION_NAME/CoolProject</RepositoryUrl>
    <PackageReadmeFile>README.md</PackageReadmeFile>
</PropertyGroup>
<ItemGroup>
    <None Include="README.md" Pack="true" PackagePath="\" />
</ItemGroup>
For a package you want to publish outside of your organization, the PackageLicenseExpression should be set to reflects the license you wish to use for distribution.
Obviously, replace the ORGANIZATION_NAME with your GitHub organization name, or if you are not an organization it will be the GitHub name where you have your repositories, for example my account is DrNeil so the the RepositoryUrl would be https://github.com/DrNeil/CoolProject
The PackageReadmeFile element is used to set the file used to describe the package, and here is set to a README.md file in the project folder. The ItemGroup at the end indicates the README.md file should not be compiled and is purely for packing in the NuGet package.
When you build this project you can package it. Normally you would only want to package a release build and so from a command line build this would be achieved as follows:
dotnet pack -c Release CoolProject.csproj
Pushing the package
Typically publishing a package should be done from the CI (Continuous Integration) process, for example an Azure DevOps PipeLine or GitHub Action. However for a hobby project, like many of those in these Notes publishing from a local build is fine, and GitHub actions is beyond the scope of this Note.
In order to write a package to GitHub you will need a Classic Personal Access Token (PAT) with the scope write:packages. To create a Classic PAT see the GitHub docs here
Once you have a PAT you can use it from a PowerShell script as follows:
$ghKey = Read-Host -Prompt "Enter your github PAT"
dotnet nuget push "bin/Release/CoolProject.1.0.0.nupkg"  --api-key $ghKey  --source https://nuget.pkg.github.com/<ORGANIZATION_NAME>/index.json
Consuming the package
In order to restore any private packages from GitHub you will need a Classic Personal Access Token (PAT) with the scope read:packages.
To create a Classic PAT see the GitHub docs here
Then in the project folder where you desire to restore the package, add the GitHub packages folder for your organization to the nuget.config file. If you do not have a nuget.config file you may need to create one.
The packageSources define the locations from which to retrieve packages when the .NET compiler tries to restore the packages to your local hard drive in order to build the project.
It is possible to have many packageSources, sometimes, many from different GitHub organizations.
An example nuget.config file.
<configuration>
    <packageSources>
        <clear />
        <!-- `key` can be any identifier for your source. -->
        <add key="nuget.org" value="https://api.nuget.org/v3/index.json" />
        <add key="github" value="https://nuget.pkg.github.com/<ORGANIZATION_NAME>/index.json" />
    </packageSources>

    <!-- Define mappings by adding package patterns beneath the target source. -->
    <!-- Contoso.* packages and NuGet.Common will be restored from contoso.com, everything else from nuget.org. -->
    <packageSourceMapping>
        <!-- key value for <packageSource> should match key values from <packageSources> element -->
        <packageSource key="nuget.org">
            <package pattern="*" />
        </packageSource>
        <packageSource key="github">
            <package pattern="*" />
        </packageSource>
    </packageSourceMapping>
</configuration>
Then you can add the package to your .csproj file using the PackageReference element
 <ItemGroup>
    <PackageReference Include="CoolProject" Version="1.0.0" />
  </ItemGroup>
To restore (retrieve) the packages you can either do a build dotnet build, or explicitly run dotnet restore.
When you restore the packages, if the package has not been made public, you will be asked for the GitHub credentials, You will need to enter your GitHub username and the PAT for the password.
Conclusions
Packaging components to be shared amongst products is a great way of sharing code between different deliverables. As packaging also supports versioning, it enables you to have different versions of the shared code used by different products, enabling you to roll out updates across products over time, and not forcing every product to always be on the latest version of the packaged code.