Dr. Neil's Notes
Software > Coding
.NET Development on a Raspberry Pi
Introduction
With the release of .NET 6, I thought it would be fun to try getting a Raspberry Pi working as a development machine. It was pretty straight forward and I will share the steps here to get going. I have decided to use my existing development machine to access the Raspberry Pi, saving the need for another screen, keyboard, or mouse.
A video that accompanies this Note can be found here
Get a new Raspberry Pi image setup
The quickest way to get started with a Raspberry Pi is to download the Raspberry Pi Imager from the Raspberry Pi software page https://www.raspberrypi.com/software/.
Follow the instructions to download the app for Windows, Mac or Ubuntu and create an operating system image on an SD card for your Raspberry Pi.
If you are plugging a mouse, keyboard, and monitor into your Raspberry Pi you can skip forward to the section titled Install .NET on Raspberry Pi.
Headless Setup
You can set up your Raspberry Pi to work without a keyboard, mouse or screen attached to the Raspberry Pi. Instead you can use your laptop or desktop computer to access your Raspberry Pi, this is called 'headless'.
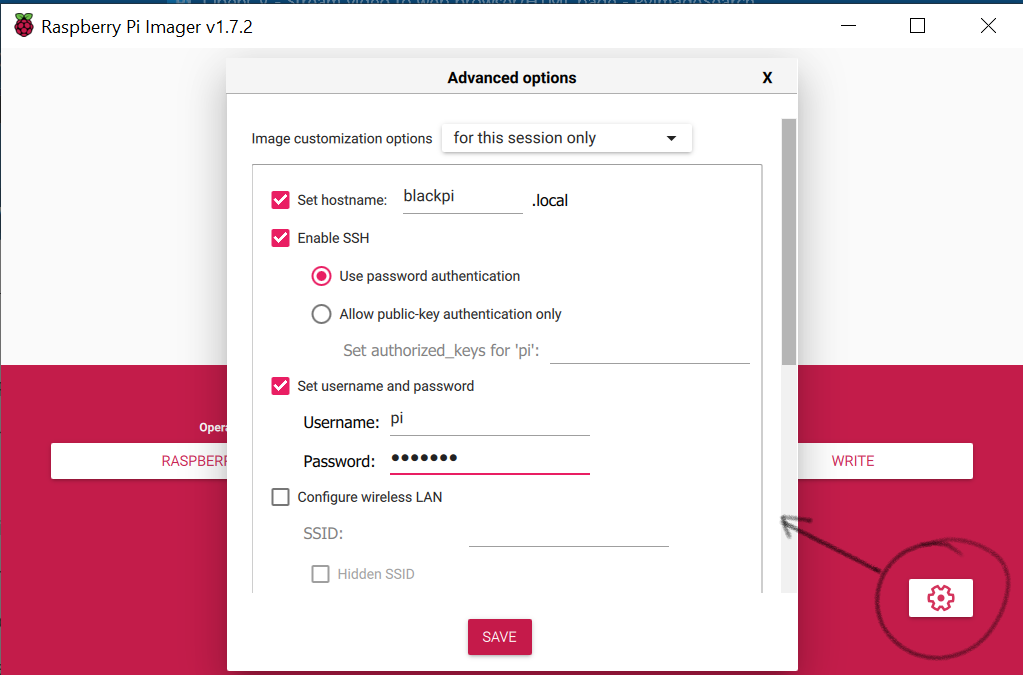
The latest Raspberry Pi Imager software makes this easier, and more secure with the Advanced options. Before starting to write the boot image to the MicroSD card, select the Advanced options, allow SSH, and set the username and password as shown.
The old way of setting up a headless Raspberry Pi
If you have an older Raspberry Pi image and want to enable headless mode then before you plug your micro SD card (the one you imaged with the Raspberry Pi OS in the previous step) you need to add one file to the root folder of the micro SD card.
Once the Micro SD card is imaged in the above step:
1. open the root folder on the SD card.
2. add a file named ssh to the folder.
This file should not have any extension, and it does not need to contain anything.
This lets you access the Raspberry Pi with Secure Shell (SSH).
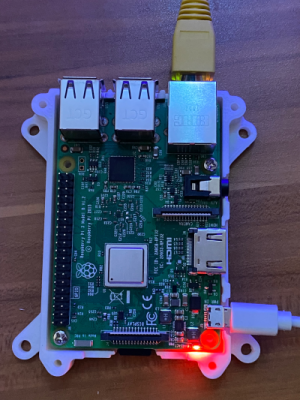
Plug in the Raspberry Pi
Insert the Micro SD card into the Raspberry Pi, and then plug in an ethernet cable (that is connected to your network) and attach the power cable. The Raspberry Pi should show flashing LEDs.
Get the IP address of your Raspberry Pi
In order to use SSH from your computer to access the Raspberry Pi you need the IP address of your Raspberry Pi.
To obtain the IP address:
1. plug in your Raspberry Pi as in the previous step,
2. open a terminal on your computer
3. use ping to find the IP address of your Raspberry Pi.
ping raspberrypi.local
NOTE: if you get a response from ping that the device could not be found, it could be that the Raspberry Pi is still setting things up. The first time you put a newly imaged SD card into the Raspberry Pi it can take a few minutes to complete setup and be ready to work with.
SSH to the Raspberry Pi
Now you can open a Secure Shell connection to the Raspberry Pi from your computer in a terminal.
Replace <ip address of your pi> with the ip address from the step above. You do not want the angle brackets.
ssh pi@<ip address of your pi>
It is also perfectly fine to use the name of the device for ssh.
ssh pi@raspberrypi.local
You will be prompted for the password for the pi user.
NOTE: if you used the Advanced options in the Raspberry Pi Imager, then the username and password will be set to the options specified in that step. You will not need to change the password in the next step.
The default user when you set up the first time is pi and the default password is raspberry
Change your password
If you are not prompted to change the password on first login then follow these steps.
In your terminal when you have connected to SSH, type
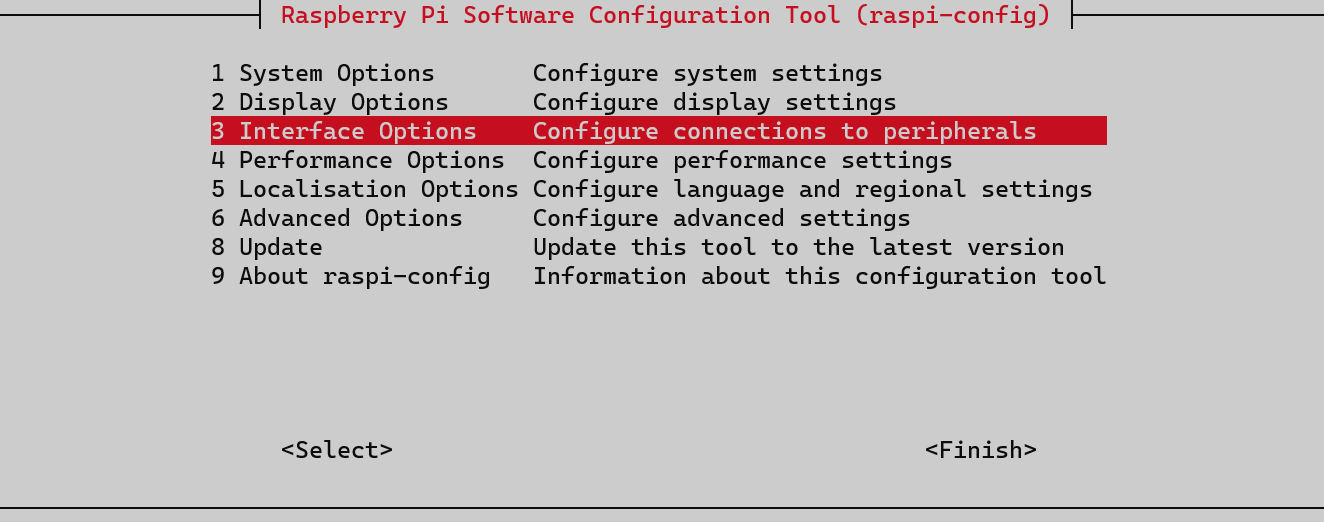
sudo raspi-config
This will launch the config app in your terminal. Use the arrow keys to navigate the menu.
1. Navigate to System Options and press Enter
2. Navigate to Password and press Enter
You will be guided through changing your password.
Connecting with VNC
You can do most of your work from the terminal, however it is not as productive as having the full GUI Shell for doing development work. To access the graphical shell you can use VNC. To install VNC on your Raspberry Pi return to the SSH prompt in your terminal as described in the step above.
Return to the Raspberry Pi configuration. From the Terminal enter
sudo raspi-config
The select Interface Options
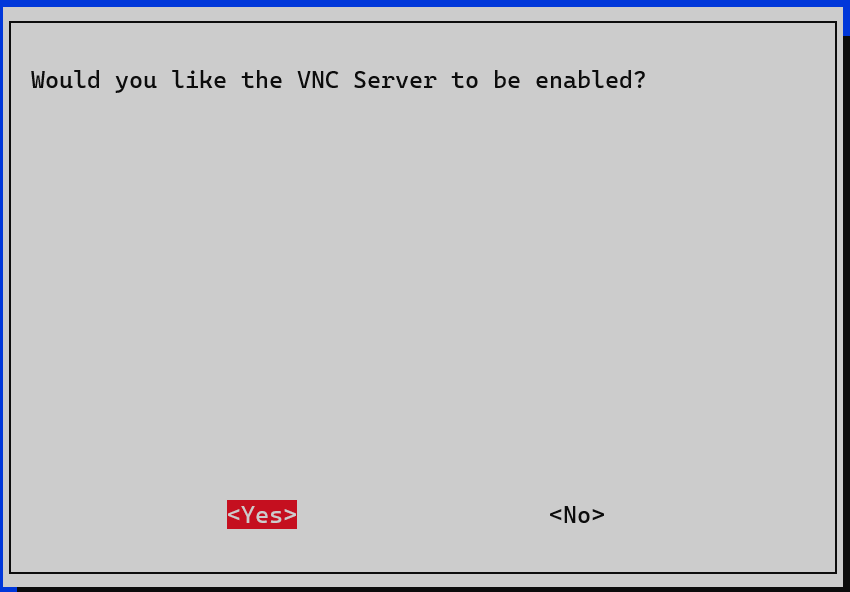
Then select VNC
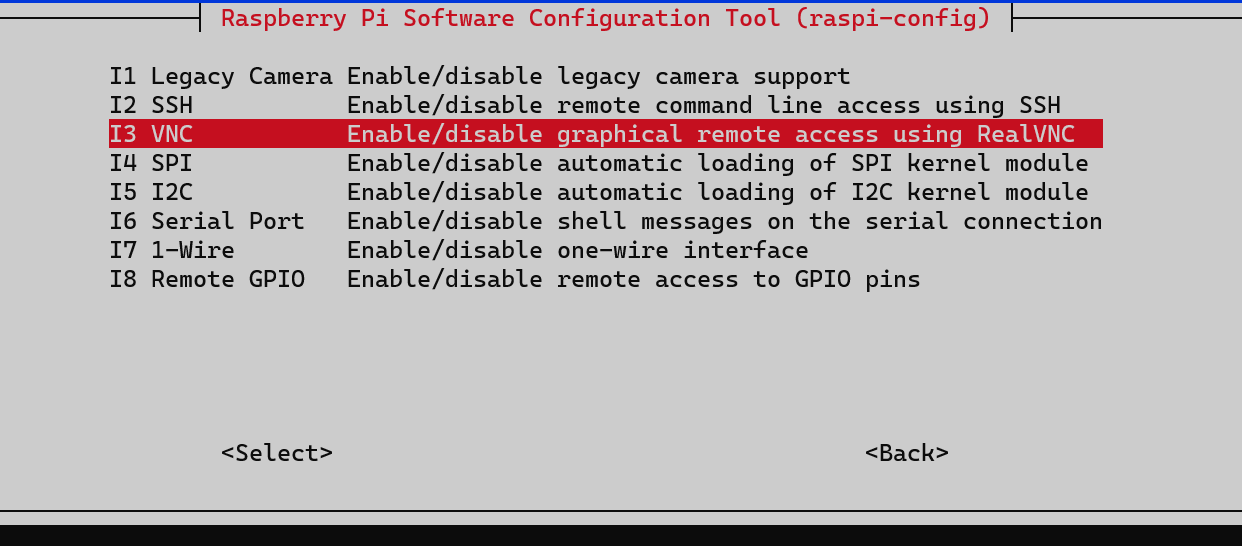
Now enable the VNC server on the Raspberry Pi
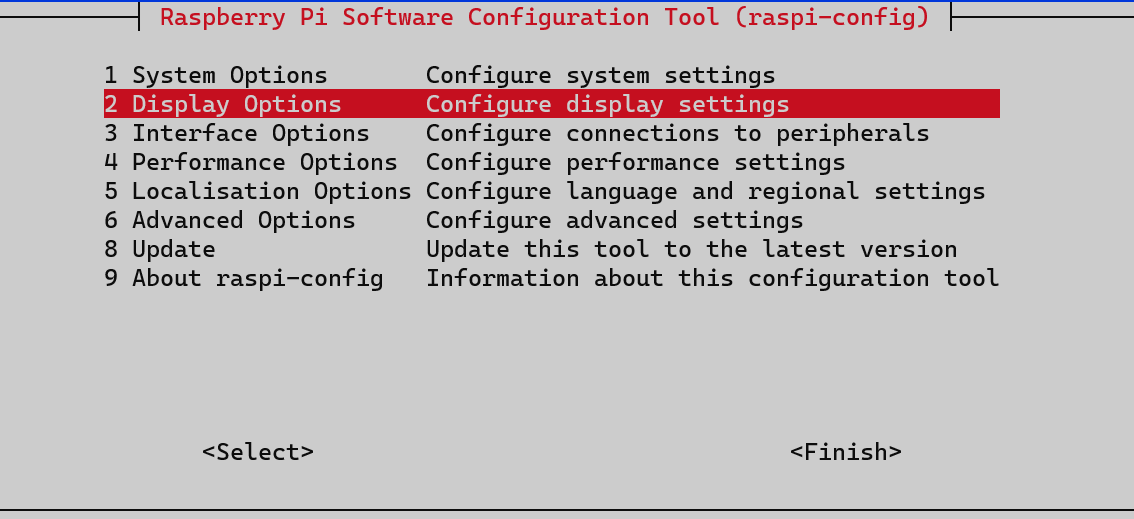
Then select the Display Options
Select VNC Resolution
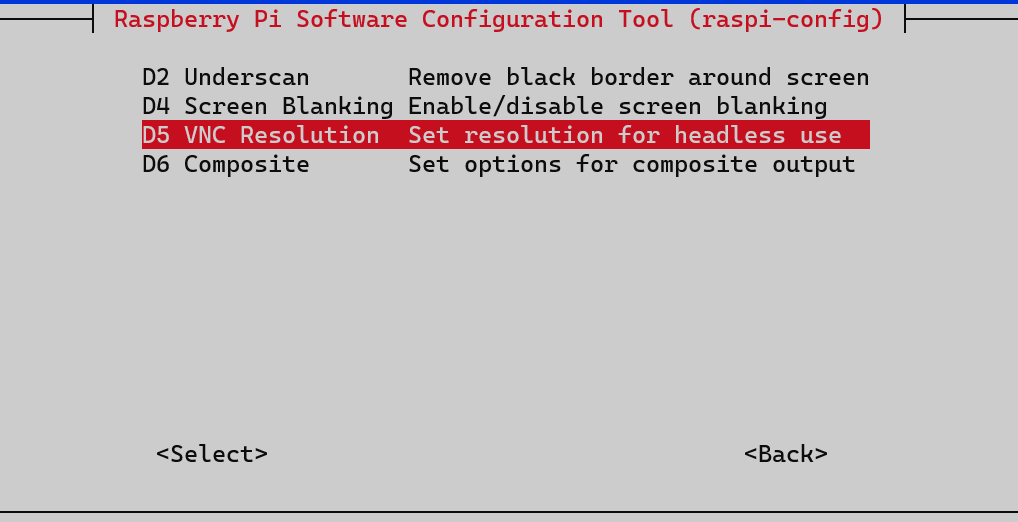
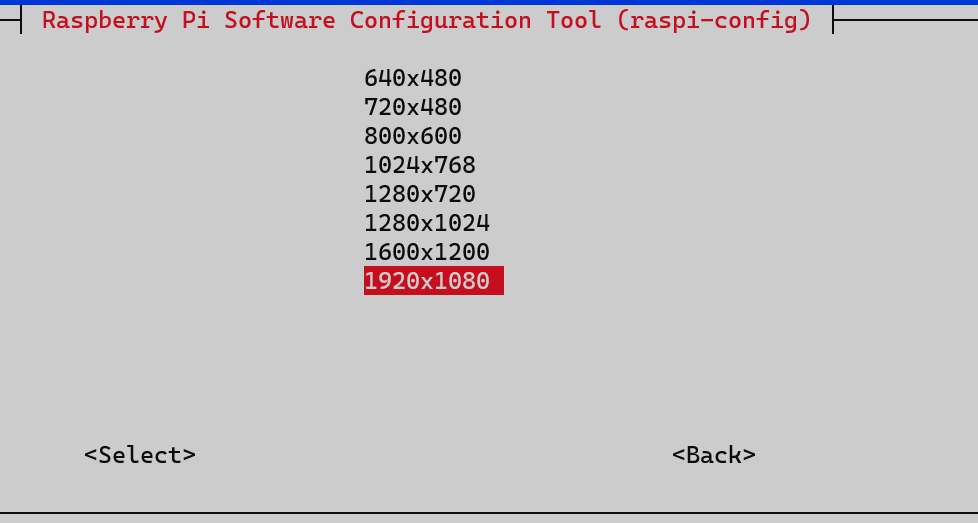
Then select a resolution that best suits your display
You will be asked to reboot the Raspberry Pi.
Download the VNC Viewer to your computer, there are versions for Windows, Mac, Linux, iOS, Android, and other operating systems including Raspberry Pi.
https://www.realvnc.com/connect/download/viewer/
When you have installed the VNC Viewer you can launch it and connect to your Raspberry Pi using the IP address of the Raspberry Pi
If this is a fresh install of the operating system then the Raspberry Pi desktop will show some notifications to guide you through setting your location, language, time zone, password, Wi-Fi, desktop, and update the software.
Install .NET on Raspberry Pi
Microsoft has some good instructions on deploying .NET to your Raspberry Pi. The following steps are taken from the Microsoft Docs.
In your terminal use curl to install the latest version of .NET (at the time of writing .NET 6).
curl -sSL https://dot.net/v1/dotnet-install.sh | bash /dev/stdin --channel Current
To make it easier for the Raspberry Pi to find the .NET libraries enter the following lines into your SSH terminal
echo 'export DOTNET_ROOT=$HOME/.dotnet' >> ~/.bashrc
echo 'export PATH=$PATH:$HOME/.dotnet' >> ~/.bashrc
source ~/.bashrc
Install Visual Studio Code
Visual Studio Code is my editor of choice for working with code, to install Visual Studio Code on a Raspberry Pi, use the following command in your terminal.
sudo apt install code
Go to your VNC Viewer and you should now have Visual Studio Code in your Programming menu
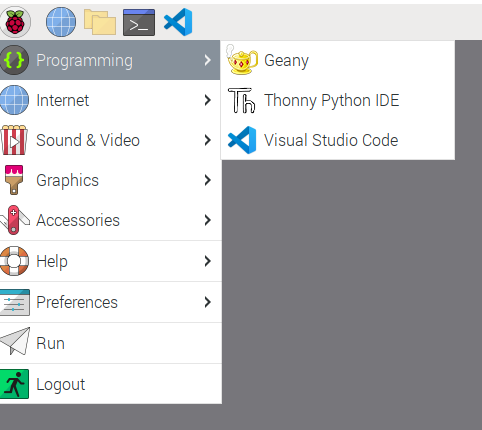
(You can see here I have also added VS Code to the applications in the menu bar)
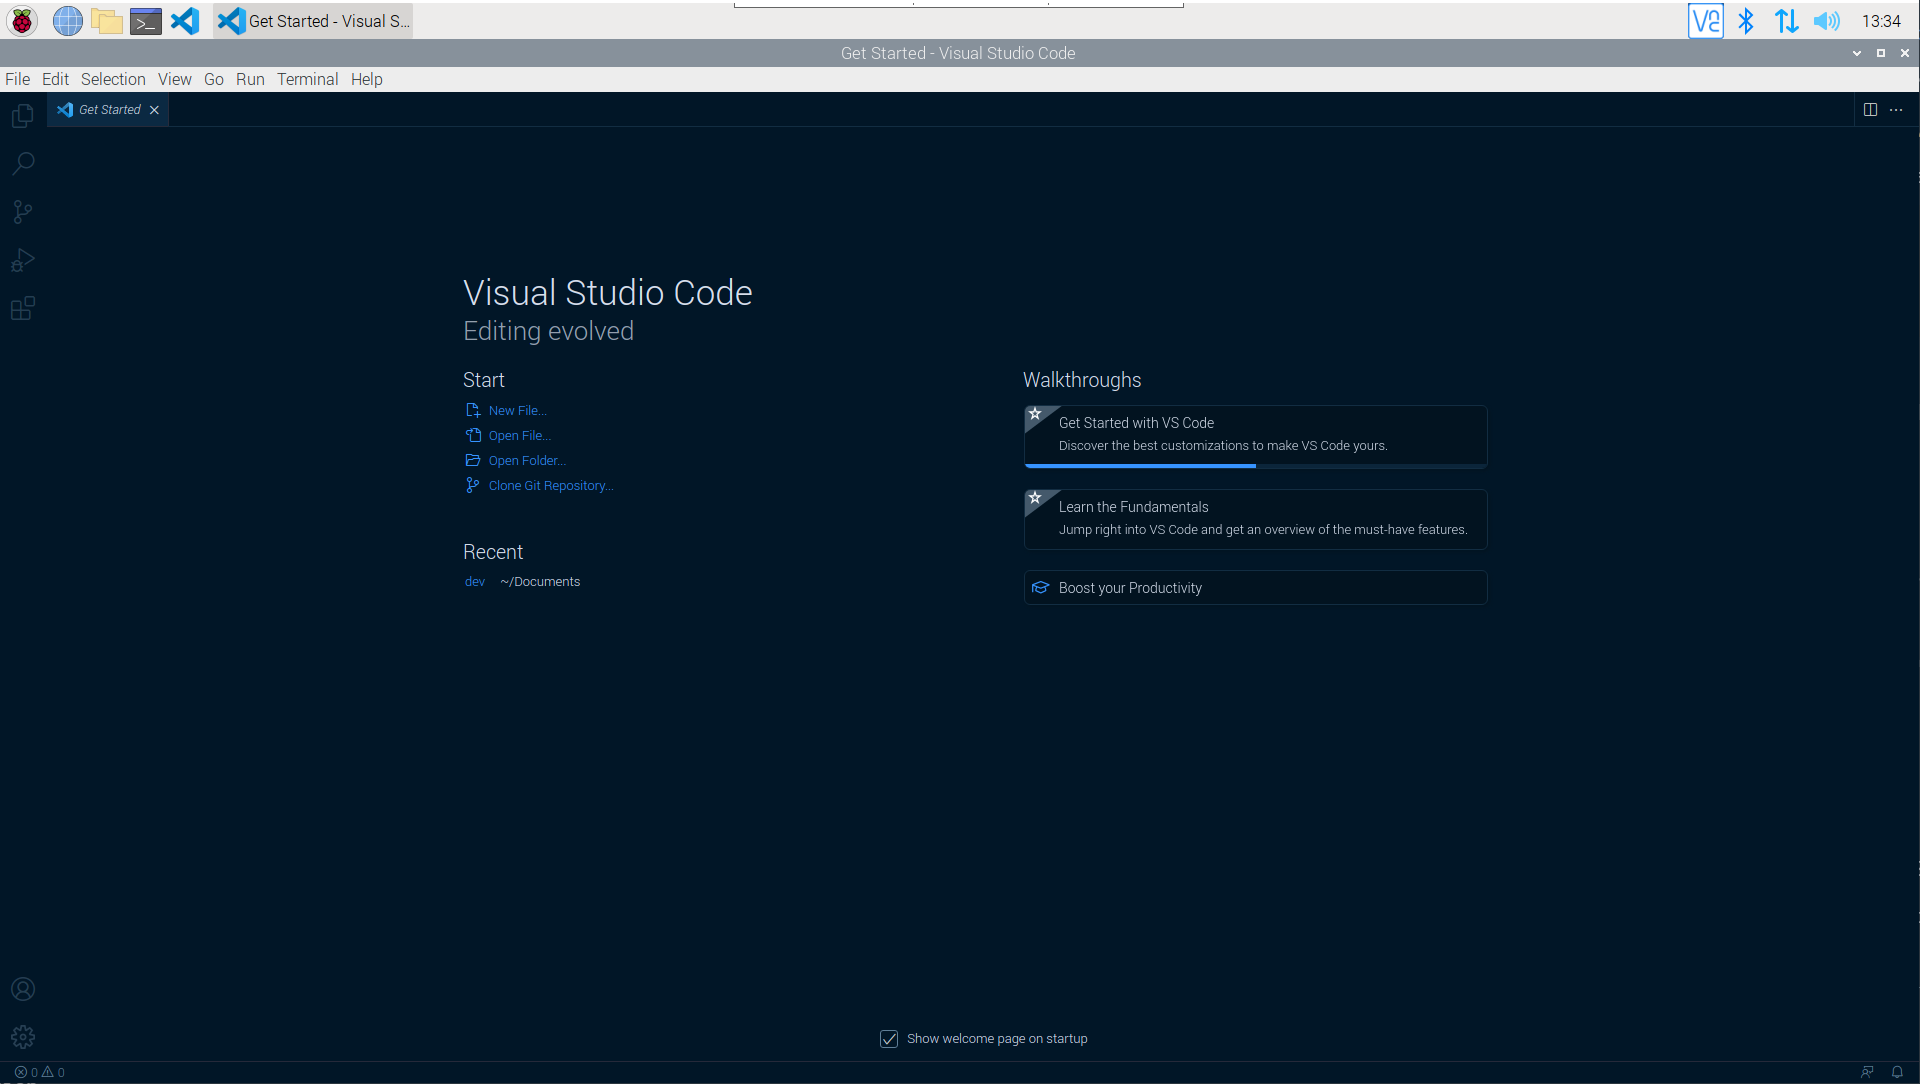
Visual Studio Code can be launched and you are now ready to start developing some great .NET applications on your Raspberry Pi.
(Optional) Rename the Raspberry Pi
If there is more than one Raspberry Pi on the network then this step is important, if you only have one Raspberry Pi on the local network then you can skip this step.
To rename the Raspberry Pi, in the Raspberry Pi desktop select Preferences - Raspberry Pi Configuration
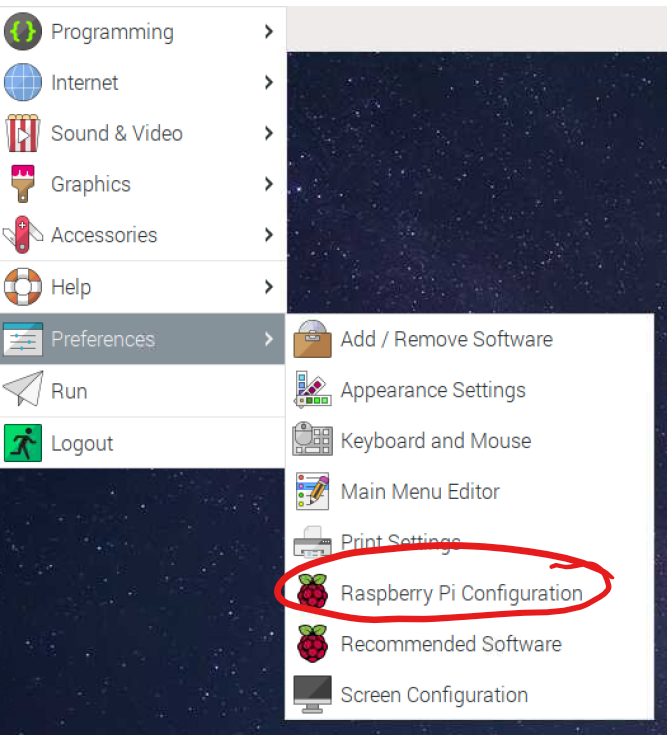
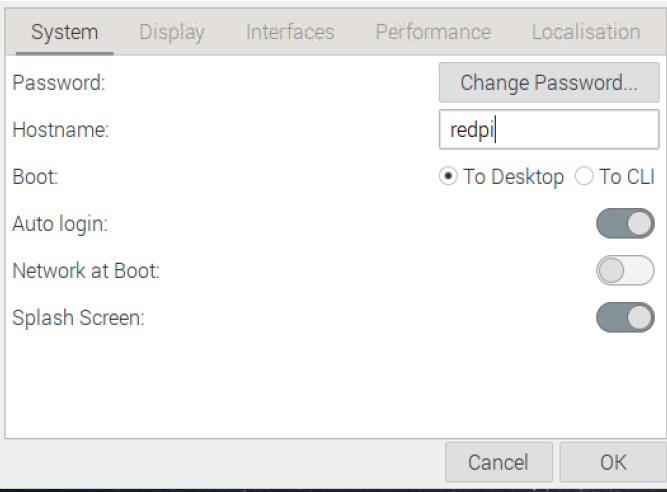
A dialog will appear, and the hostname can be changed from RaspberryPi to anything you like (it is best avoid spaces and non alphanumeric characters).
Here I have named my Raspberry Pi redpi
Reboot the Raspberry Pi
At this point after having set up the Raspberry Pi and installed all the tools you need to develop .NET application, it is best to reboot the Raspberry Pi.
From the SSH terminal enter
sudo reboot
The Raspberry Pi will now reboot.
IMPORTANT if you renamed the Raspberry Pi in the previous step, then this is the name you should use to ping, and ssh to the device (instead of respberrypi).
Conclusion
This Note has explained how to get a Raspberry Pi ready to do .NET development. Included in this Note are the steps needed to use the Raspberry Pi without having a keyboard, mouse, or screen attached to the Raspberry Pi. If you have a computer already set up, then the work on the Raspberry Pi can all be done remotely from your computer, over the network.
**(Optional and not recommended) Create new VNC desktops **
Make sure you have the latest VNC software with the following command in your SSH terminal.
sudo apt install realvnc-vnc-server
Once the VNC Server is installed and enabled, you can run the VNCServer from the SSH terminal with this command, this also sets the screen resolution for a new virtual desktop, in this case I selected 1920x1080.
vncserver -geometry 1920x1080
The Terminal should output the address of the new VNC virtual desktop, for example. This address will be needed to connect to the desktop from your computer in the VNC client.
New desktop is raspberrypi:1 (198.161.11.151:1)